====== Creating a graphic HMI for Mervis SCADA ======
{{page>creating-hmi-intro-hidden}}
Prerequisites:
* Existing Mervis IDE project created according to the [[mervis-scada-project-hidden|Creating a Mervis SCADA project]] tutorial
* All prerequisites from the mentioned tutorial
Graphic HMI variant for Mervis SCADA is available only via a web interface, as the Mervis mobile app currently does not support it. It is thus necessary to connect all data points used in this tutorial to the data point table as well.
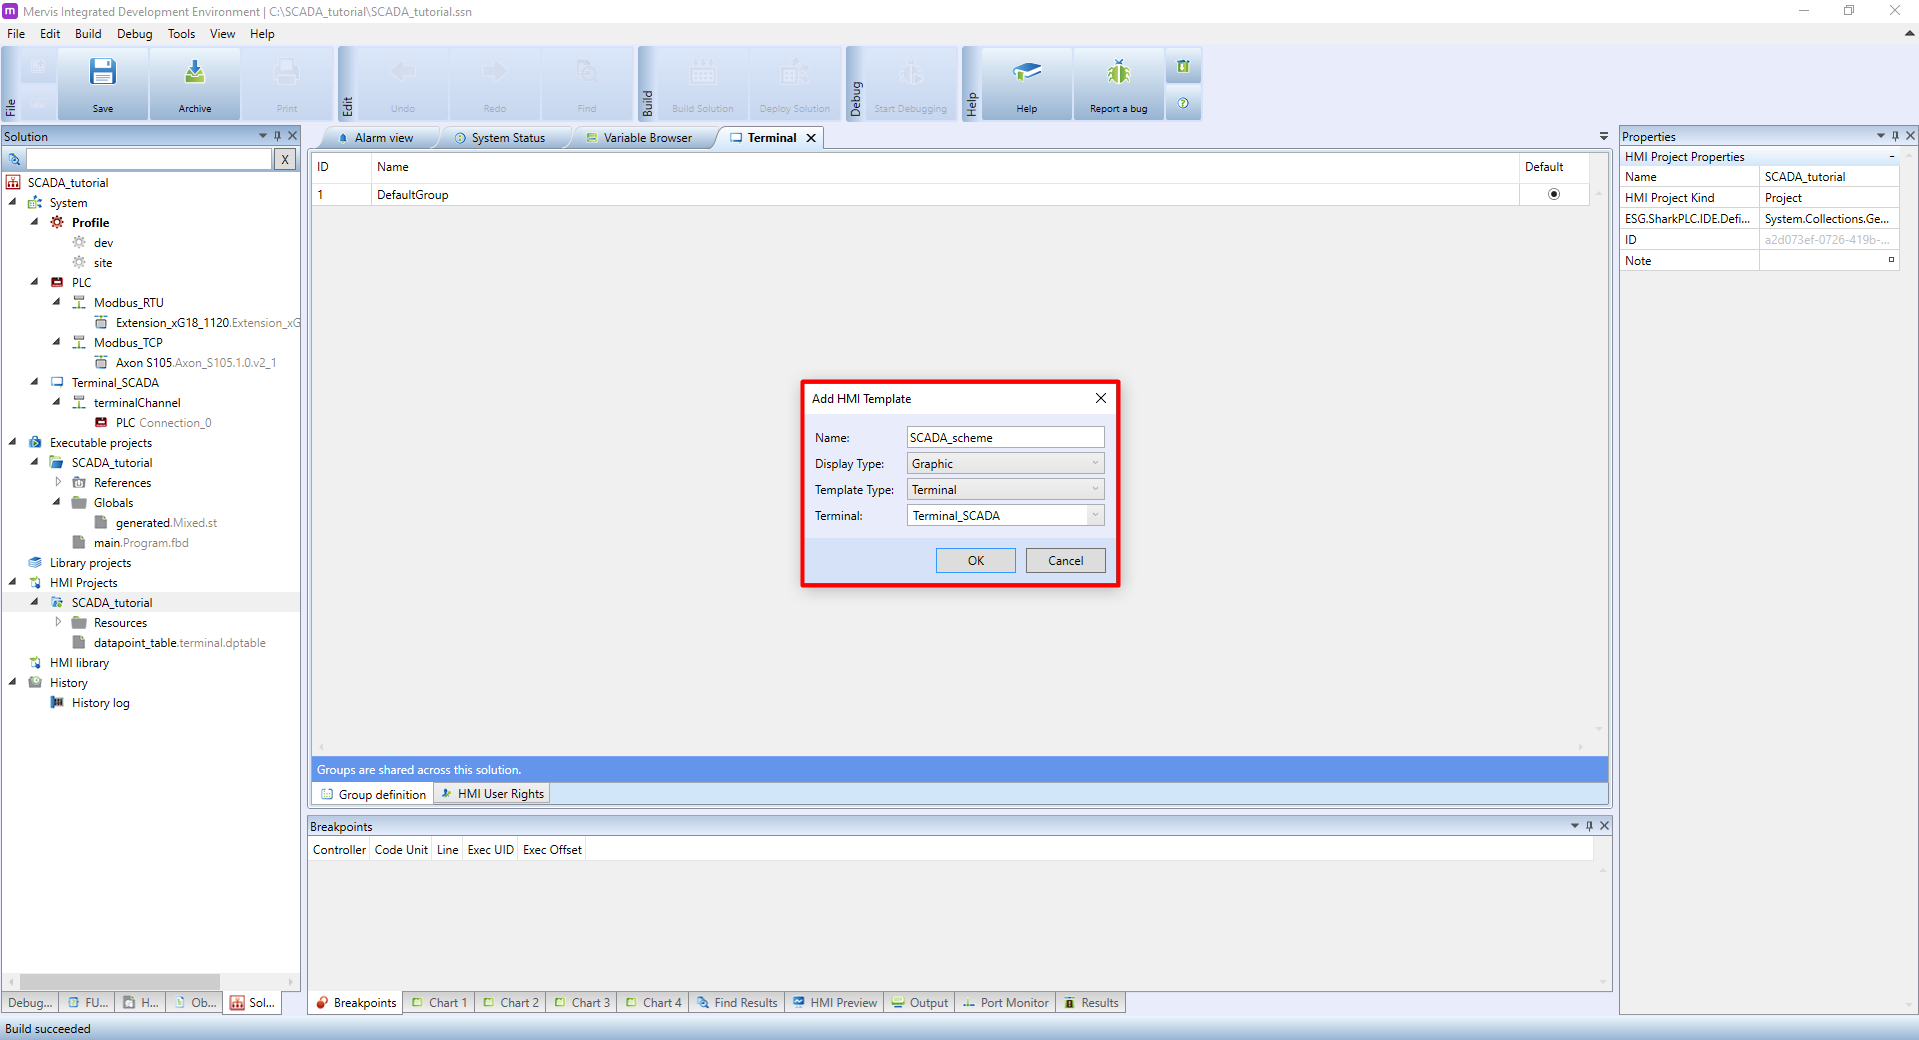
===== Creating a template =====
{{page>creating-hmi-template-hidden}}
* Name should be considered carefully, we also recommend to use a prefix separated by underscore, ie. SCADA_schema. \\
* Display Type determines the template type -> select **Graphic** \\
* Template Type - choose a Terminal \\
* Terminal - choose terminal the template is created for
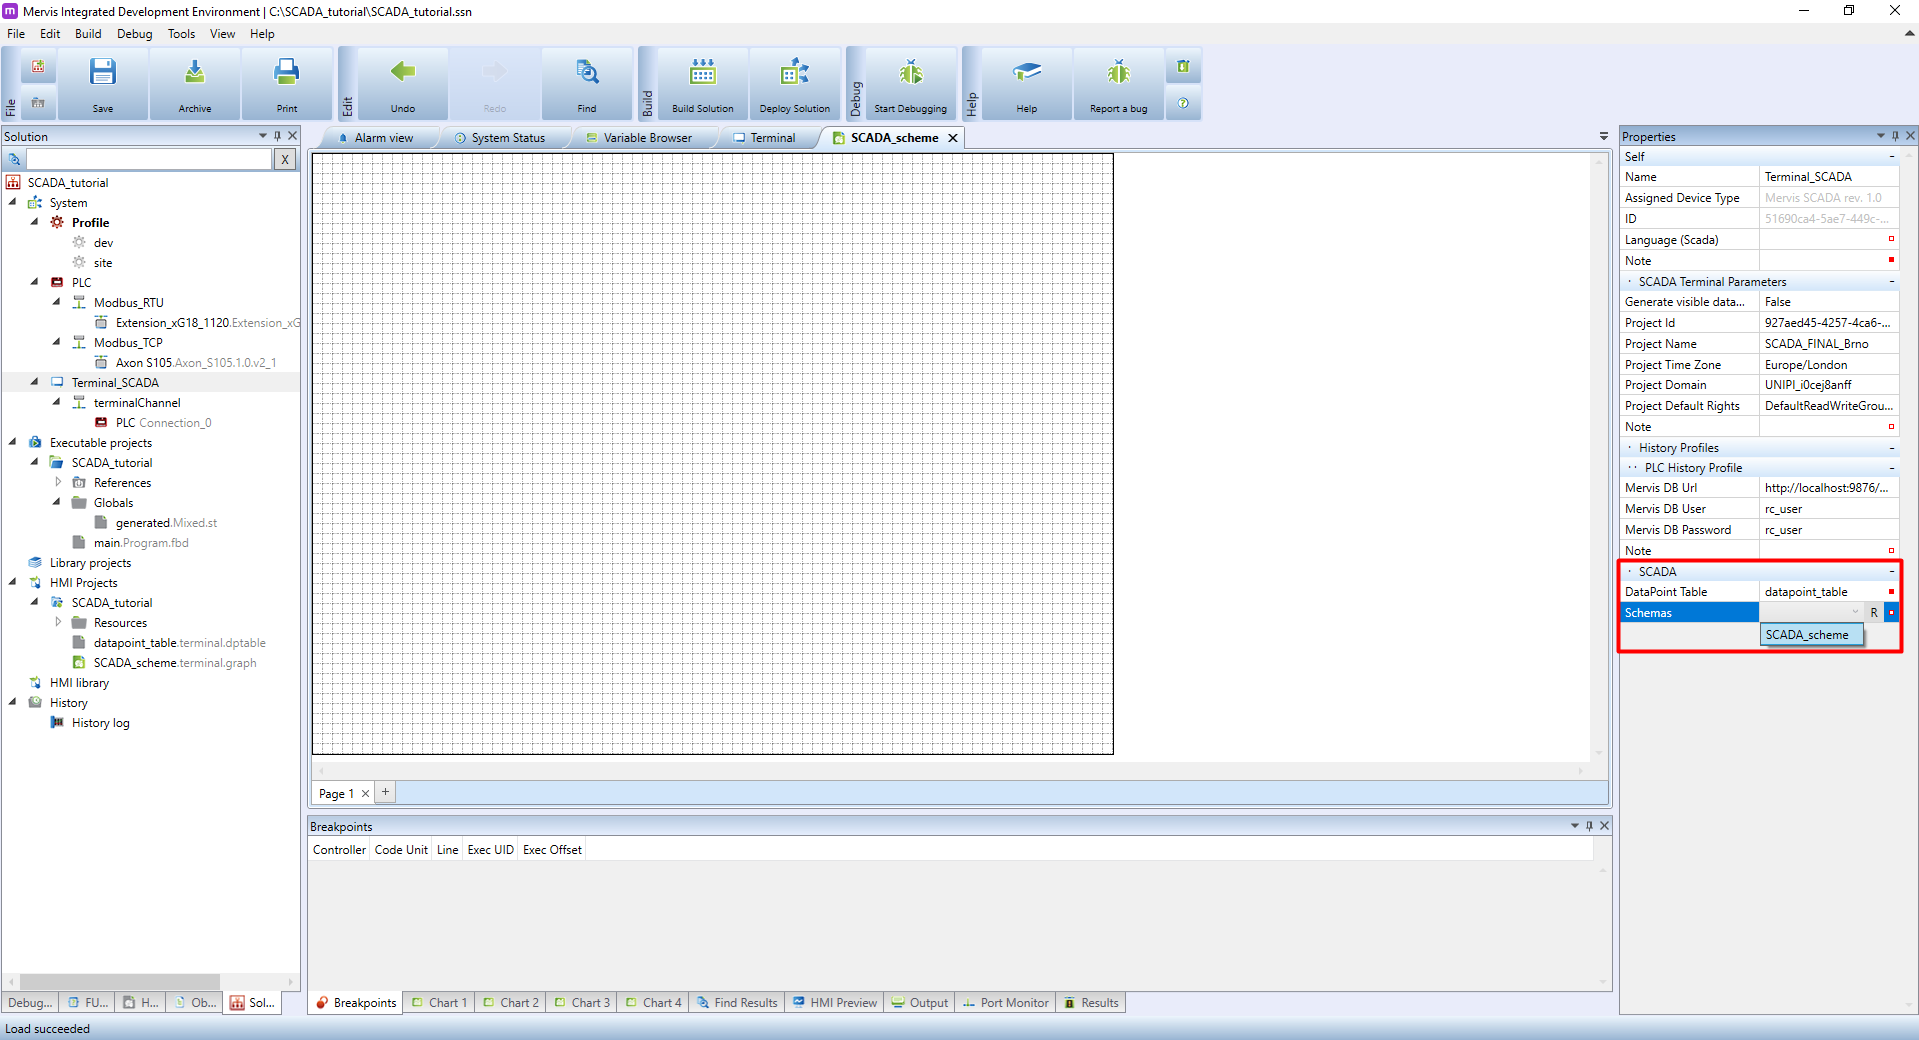
You now need to assign the template to the terminal. Click on the terminal and look for **Schemas** in its properties in the right column. Here you need to insert the template you created in the previous steps.
===== Creating a HMI =====
All data points (variables) used in the graphic HMI also need to be connected to a data point table and, by extension, to the Mervis DB as well.
{{page>creating-hmi-interface-hidden}}
===== Uploading Mervis SCADA project definition =====
{{page>mervis-scada-upload-hidden}}
**In case the SCADA graphic scheme will not display:**
* Make sure the template is assigned in the SCADA terminal properties.
* Did you compile/deploy the solution prior to uploading the definition in your customer account?
* Log off the SCADA interface and log in back again.
You can now return back to the main [[mervis-scada-project-hidden#id_creating-scada-graphic|Mervis SCADA tutorial]].
====== ======
{{page>scada-remove-duplicates-hidden}}