This is an old revision of the document!
 - překlad
Připojení rozšiřujícího modulu Unipi Extension
Rozšiřující moduly Unipi Extension představují praktický a jednoduchý způsob, jak zvýšit počet vstupů a výstupů v jedné lokaci, či zpřístupnit vstupy a výstupy v lokaci vzdálenější.
Rozšíření komunikují s PLC skrze sériový port RS485.Rozšiřující moduly fungují jako Modbus slave zařízení s rozšířenou podporou v softwaru Mervis.
Hardwarové zapojení
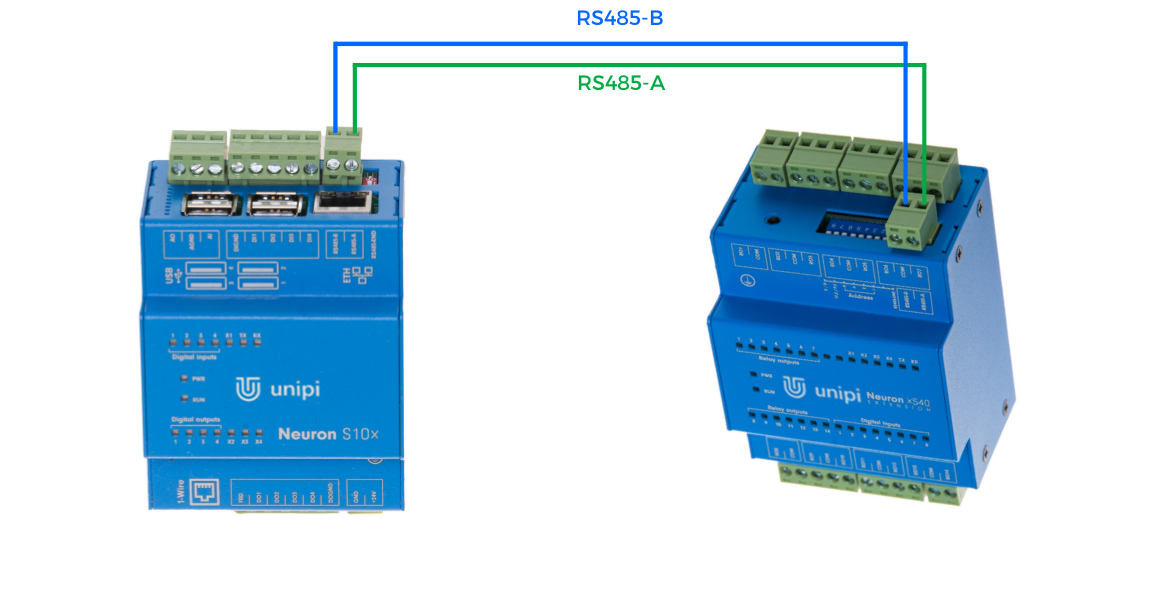
K připojení rozšiřujícího modulu ke kontroléru potřebujete pouze dva kabely. S nimi jednoduše propojte porty RS485-A a RS485-B na rozšíření s porty RS485-A a RS485-B na kontroléru.
Aby spolu obě zařízení komunikovala, je třeba u obou nastavit shodné parametry portu - rychlost, datové bity, stop bity a paritu. Každý rozšiřující modul navíc musí mít unikátní Modbus adresu. Všechny tyto atributy lze nastavit dvěma způsoby - pomocí hardwarových DIP přepínačů, či softwarově v Mervis IDE.
DIP přepínače
DIP přepínače jsou malé páčky s dvěma polohami - nahoře a dole. Pokud je páčka v dolní poloze, daná funkce je aktivována.

Všechny modely umožňují pomocí DIP přepínačů nastavit rychlost komunikace, paritu a adresu.
První DIP přepínač je nazván RS485-ENG a slouží pro připojení či odpojení interního 120Ω rezistoru mezi porty RS485-A a RS485-B pro řádné zakončení sběrnice RS485. Tuto funkci je třeba využít, pokud je modul poslední v pořadí na sběrnici, obvykle se tento pokyn vztahuje na rozsáhlé sběrnice s délkou v řádu stovek metrů.
Druhý DIP přepínač nemá žádnou funkci a je vynechán.
Přepínač 3 až 6 jsou určeny pro adresaci zařízení a lze s nimi v binárním formátu nastavit adresu v rozsahu 0 - 15.
| Adresa | DIP č. 3 | DIP č. 4 | DIP č. 5 | DIP č. 6 |
|---|---|---|---|---|
| 0 | OFF | OFF | OFF | OFF |
| 1 | ON | OFF | OFF | OFF |
| 2 | OFF | ON | OFF | OFF |
| 3 | ON | ON | OFF | OFF |
| 4 | OFF | OFF | ON | OFF |
| 5 | ON | OFF | ON | OFF |
| 6 | OFF | ON | ON | OFF |
| 7 | ON | ON | ON | OFF |
| 8 | OFF | OFF | OFF | ON |
| 9 | ON | OFF | OFF | ON |
| 10 | OFF | ON | OFF | ON |
| 11 | ON | ON | OFF | ON |
| 12 | OFF | OFF | ON | ON |
| 13 | ON | OFF | ON | ON |
| 14 | OFF | ON | ON | ON |
| 15 | ON | ON | ON | ON |
Sedmý přepínač slouží pro přepínání rychlosti sběrnice. Dostupné jsou rychlosti 19200 bps (poloha OFF) a 9600 bps (poloha ON).
Osmý přepínač umožňuje volit mezi sudou paritou (poloha OFF) či žádnou paritou (poloha ON).
Softwarové nastavení
Parametry připojení lze nastavovat rovněž i v Mervisu. HW nastavení má přednost, pro použití SW nastavená je proto nutné nastavit adresu na 0. Zbytek procesu je popsán níže.
Using UniPi extension in the Mervis
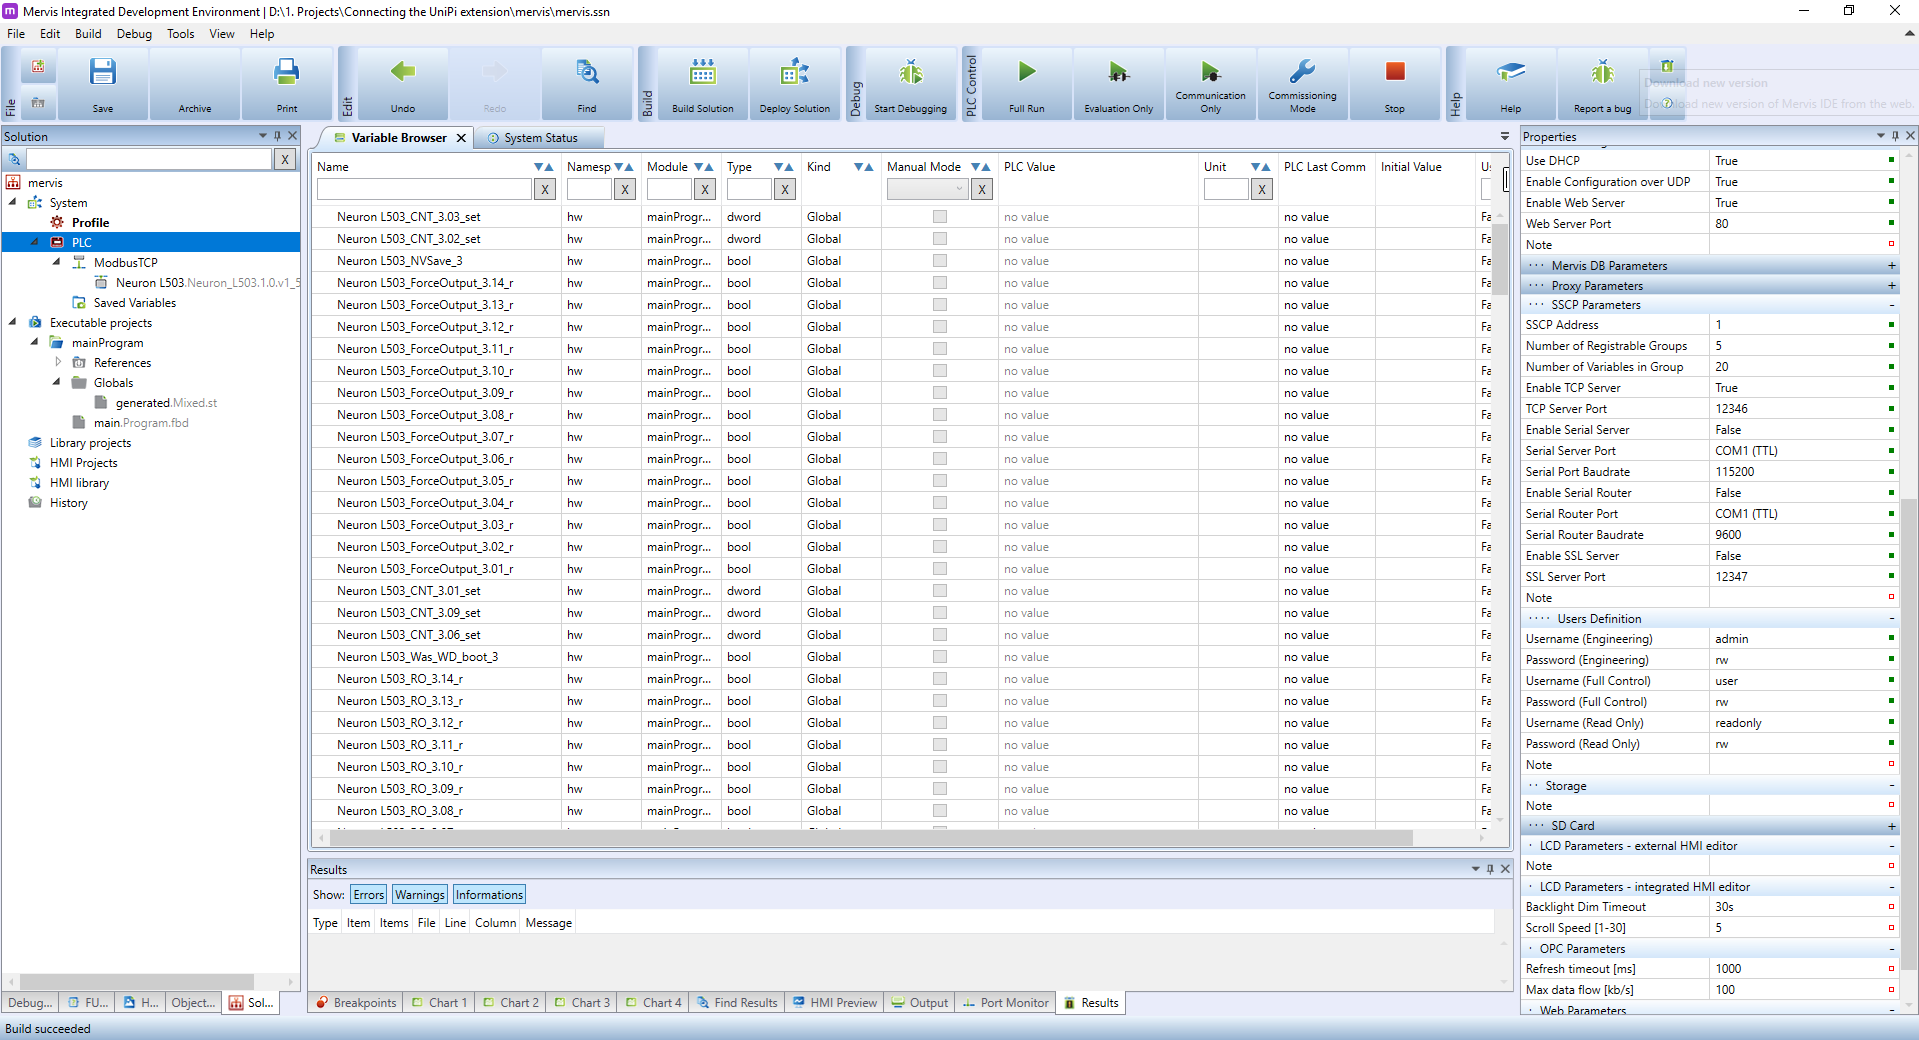
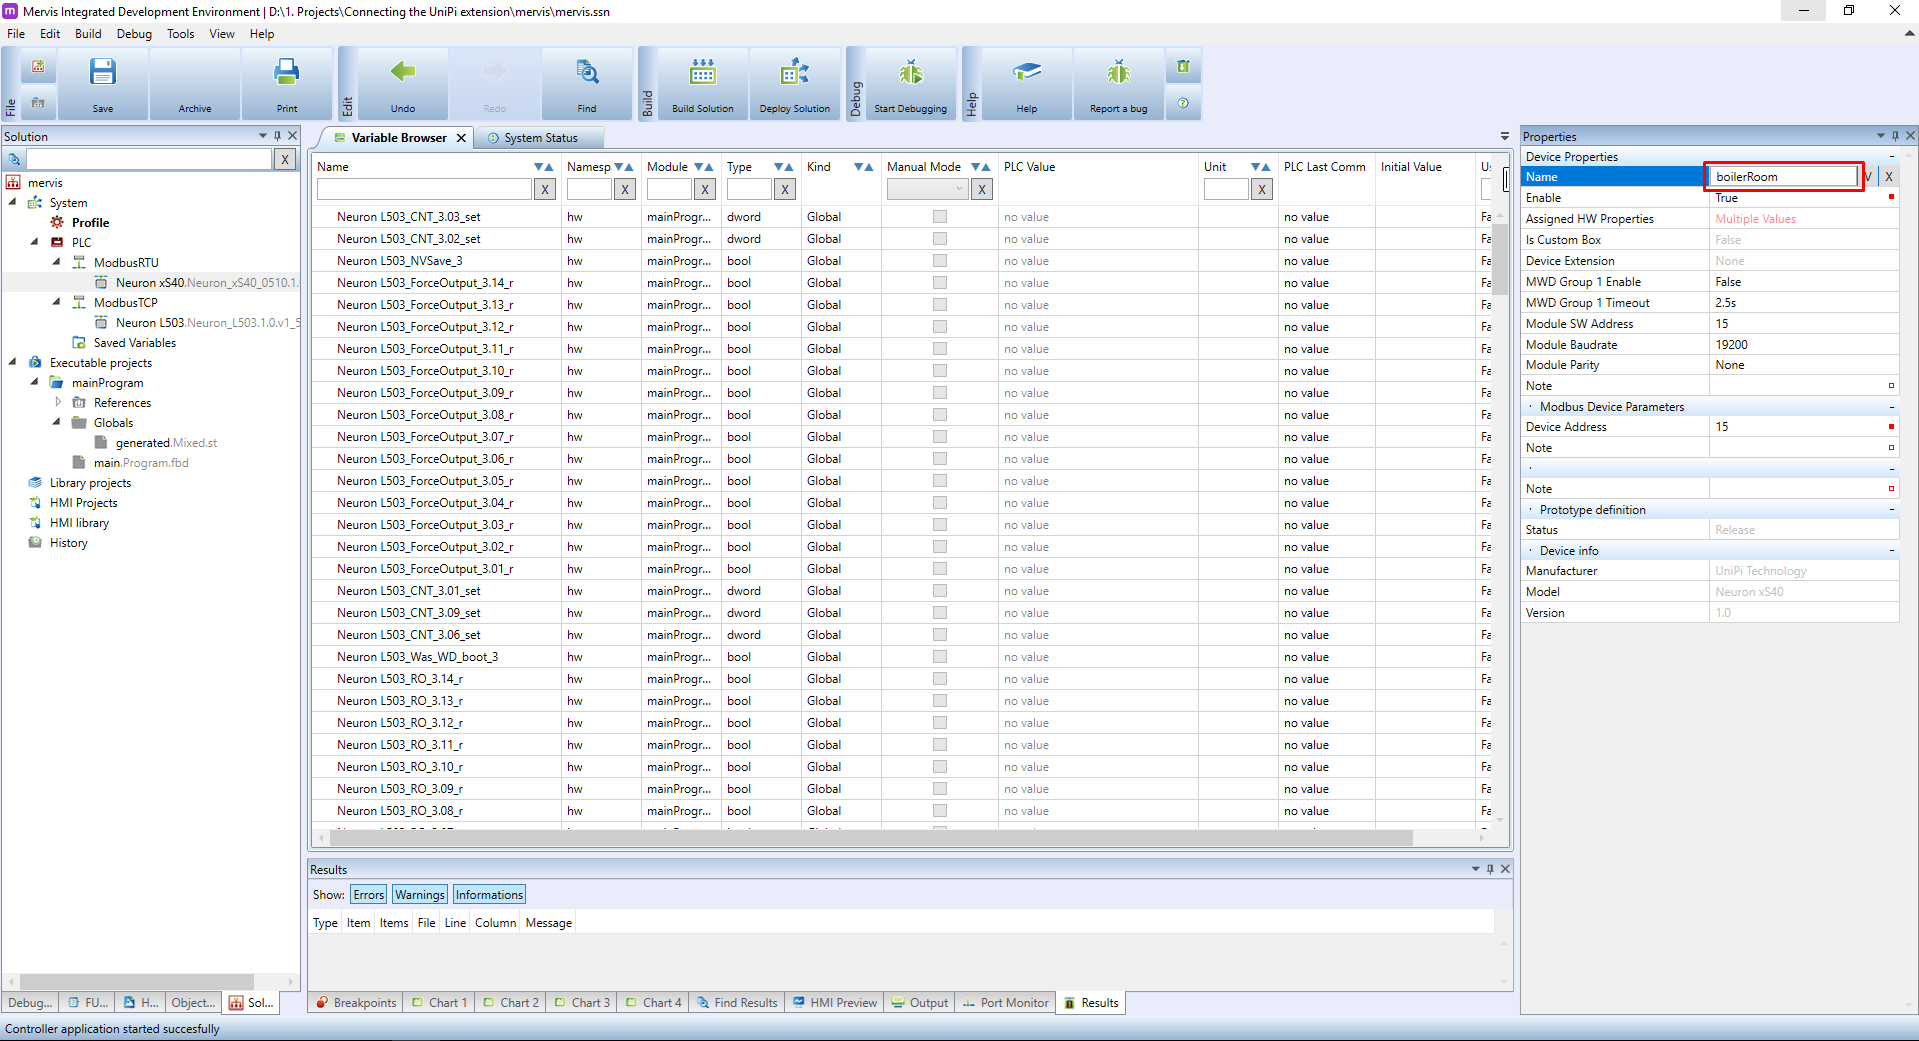
Let's assume you have a basic project in Full mode, you are attached to the controller, you have Executable project with one FBD program and this program is configured as a sole Task of the PLC. And you Set Autogen on the UniPi device. Your workspace should look like this:
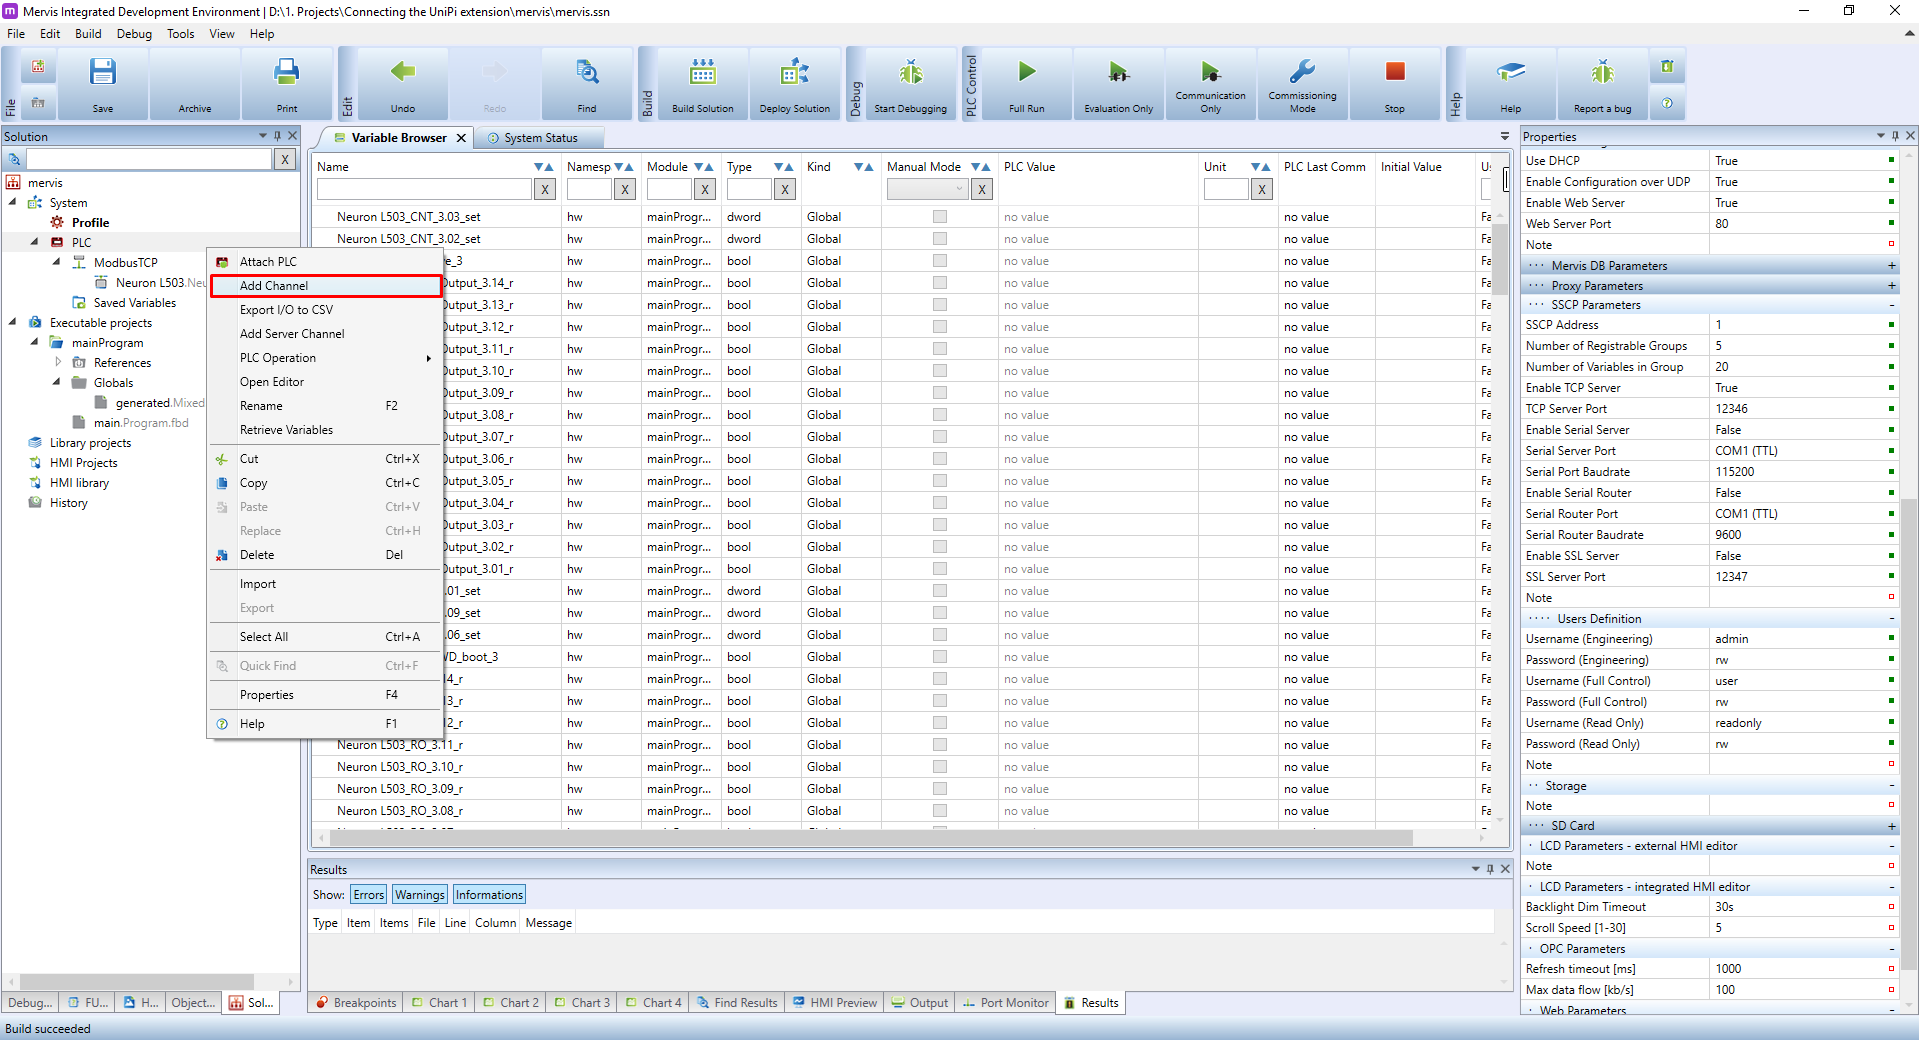
As we stated previously, the communication with UniPi extension is via ModbusRTU. So create a channel by right clicking on the PLC in the Left panel and selecting the Add Channel option.
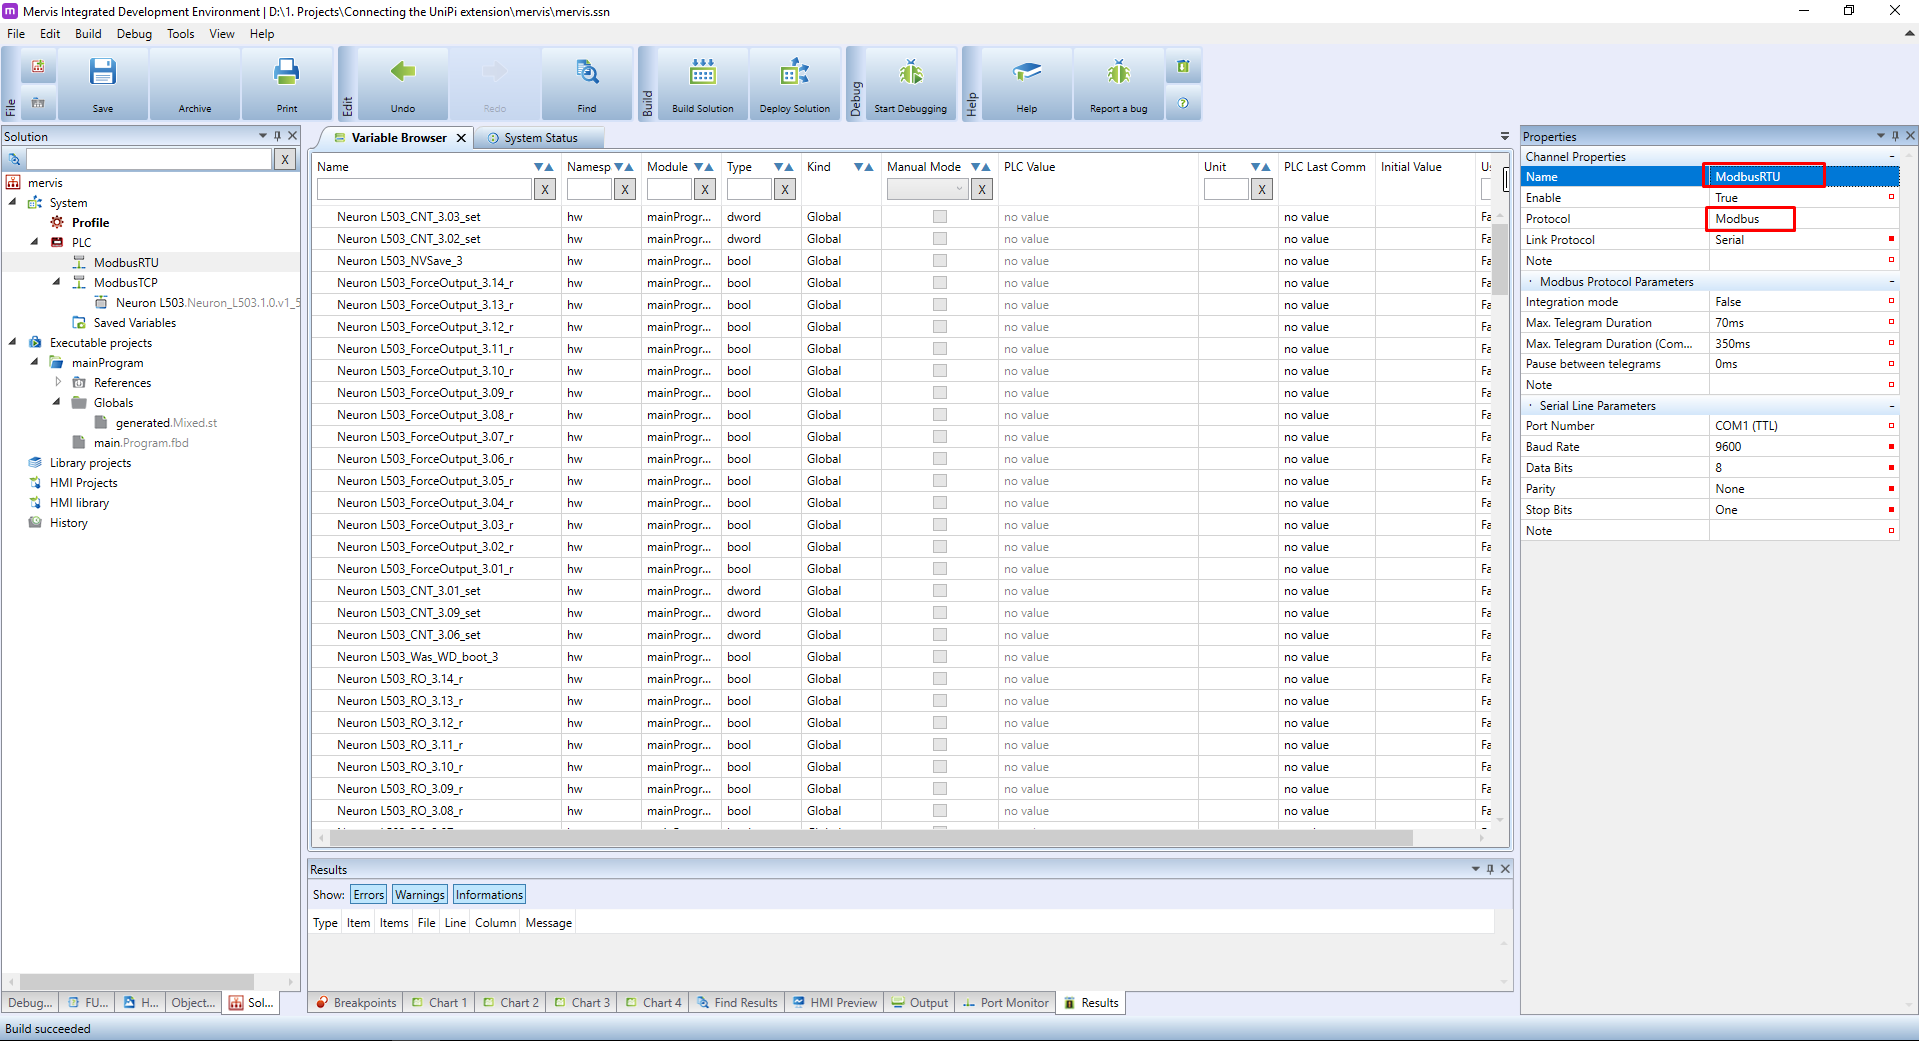
A new channel will appear under the PLC. Select it and in the Properties panel change the Name to something more descriptive, like ModbusRTU. Also change the Protocol to Modbus.
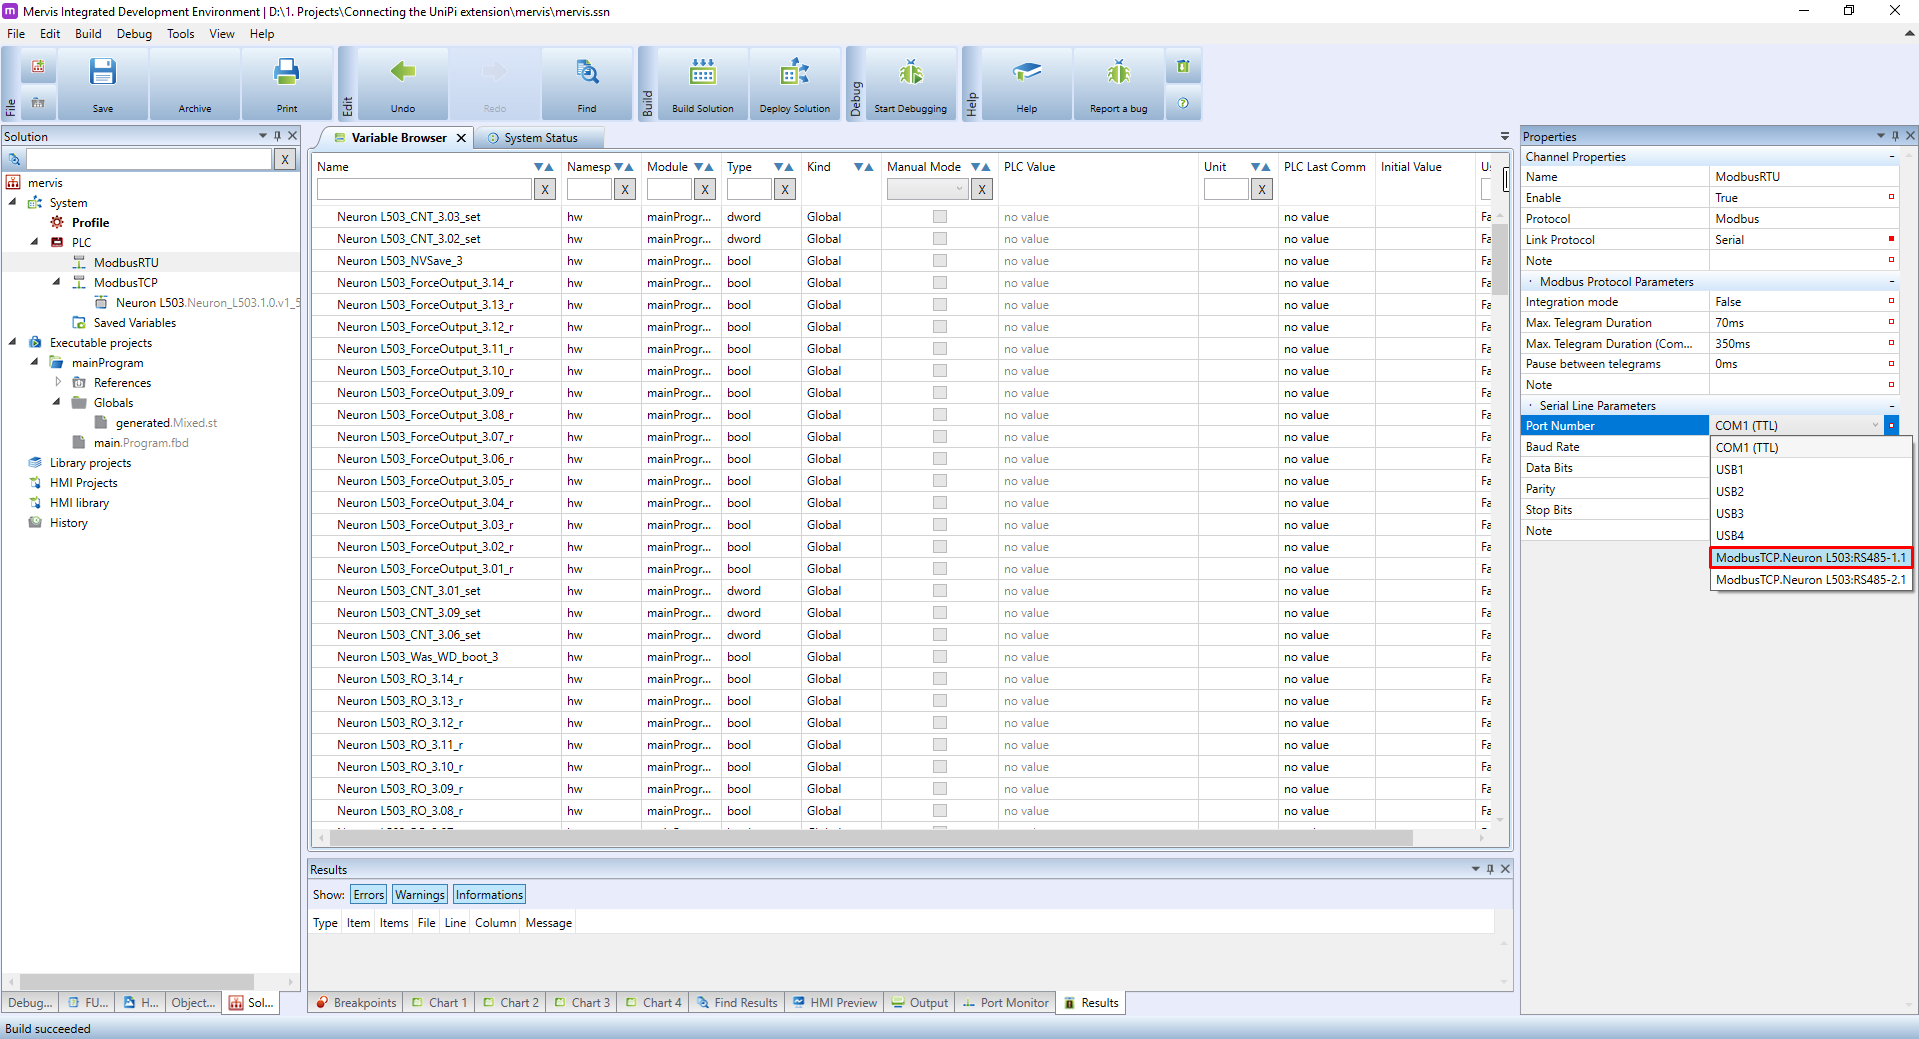
Leave the Link Protocol to Serial, but change the Port Number to serial port on your PLC. Our testing UniPi Neuron L503 is equipped with two RS485 ports, and we will use the one on the 1st group.
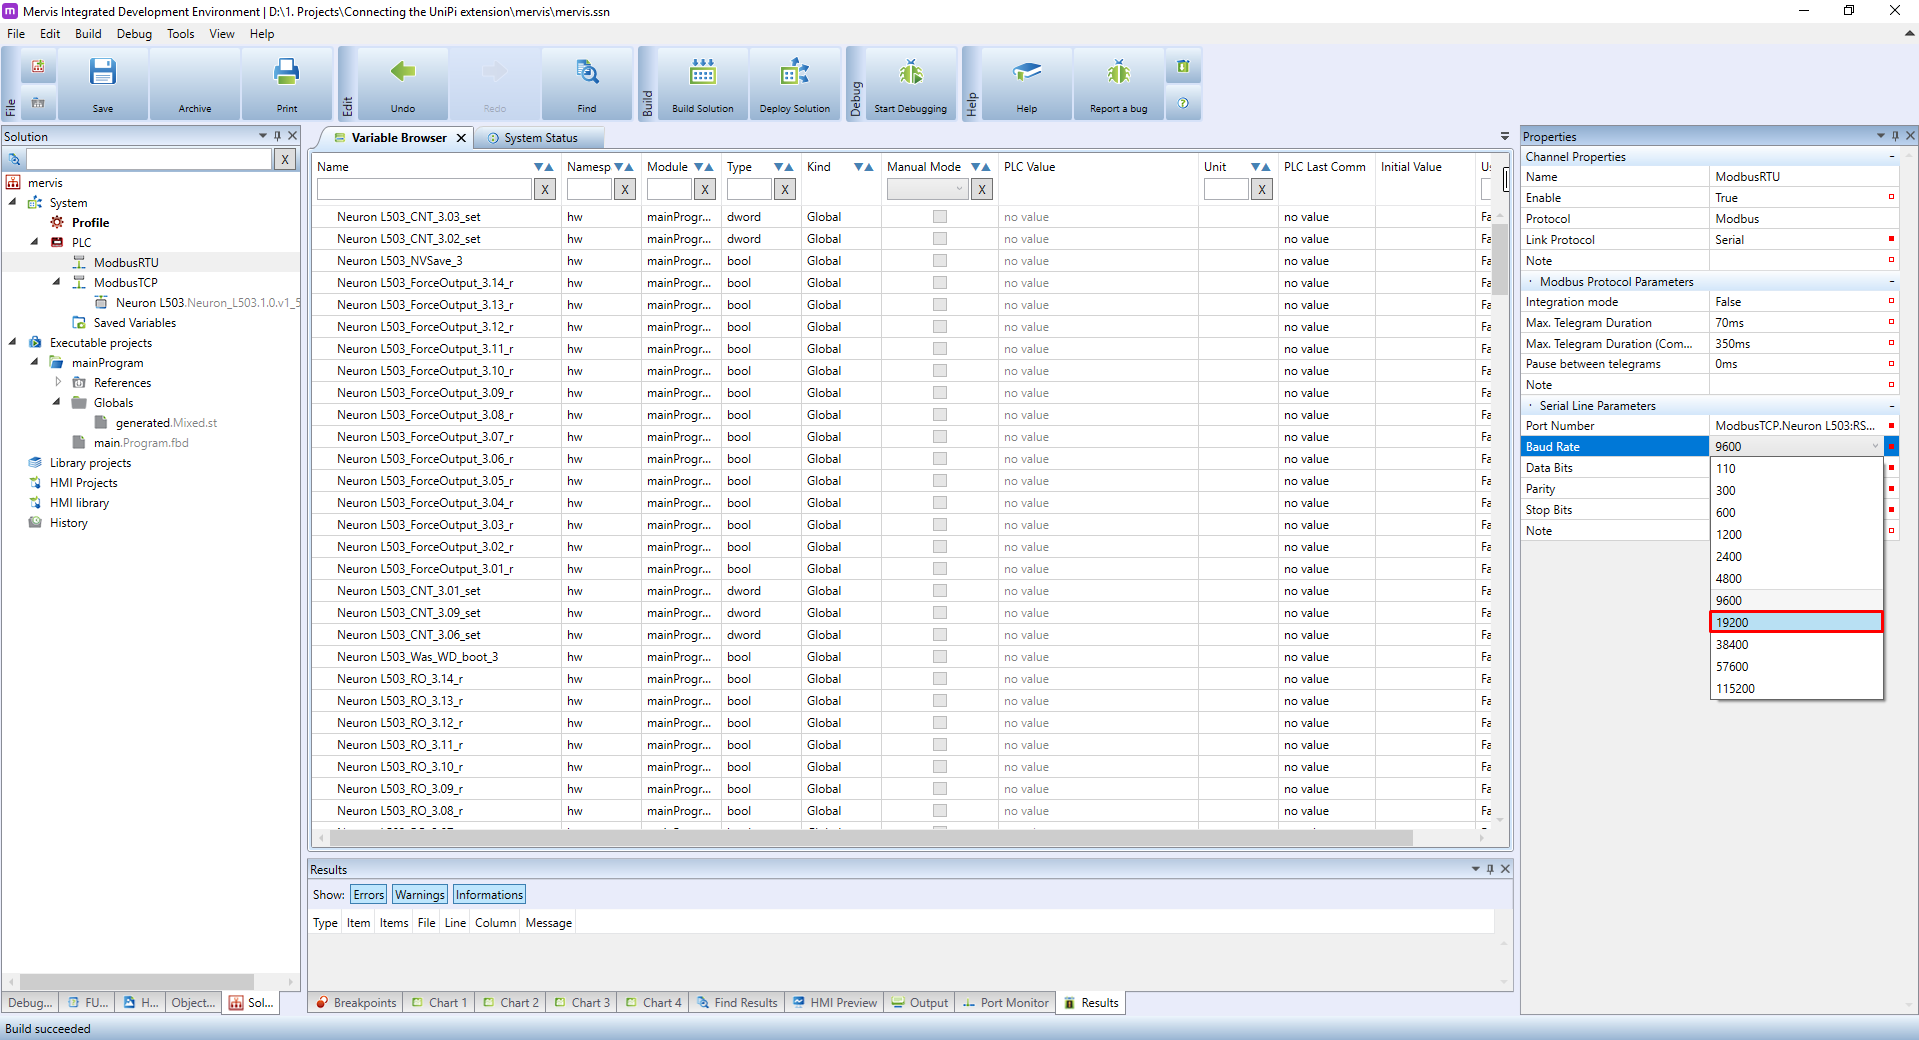
We will also change the Baud Rate (a.k.a speed) to 19200, as it is a default value for UniPi's extensions.
Now we can add the device and we can do it in two ways. You are used to right click on the channel name and then clicking on the Add Library Device and then selecting the proper device from the list. This will work, but with UniPi extensions, you can let the Mervis detect all the units on the bus automatically and add all of them at once.
When new channel is added, the autodetection will not work until you deploy the solution, because the PLC doesn't know this channel yet.
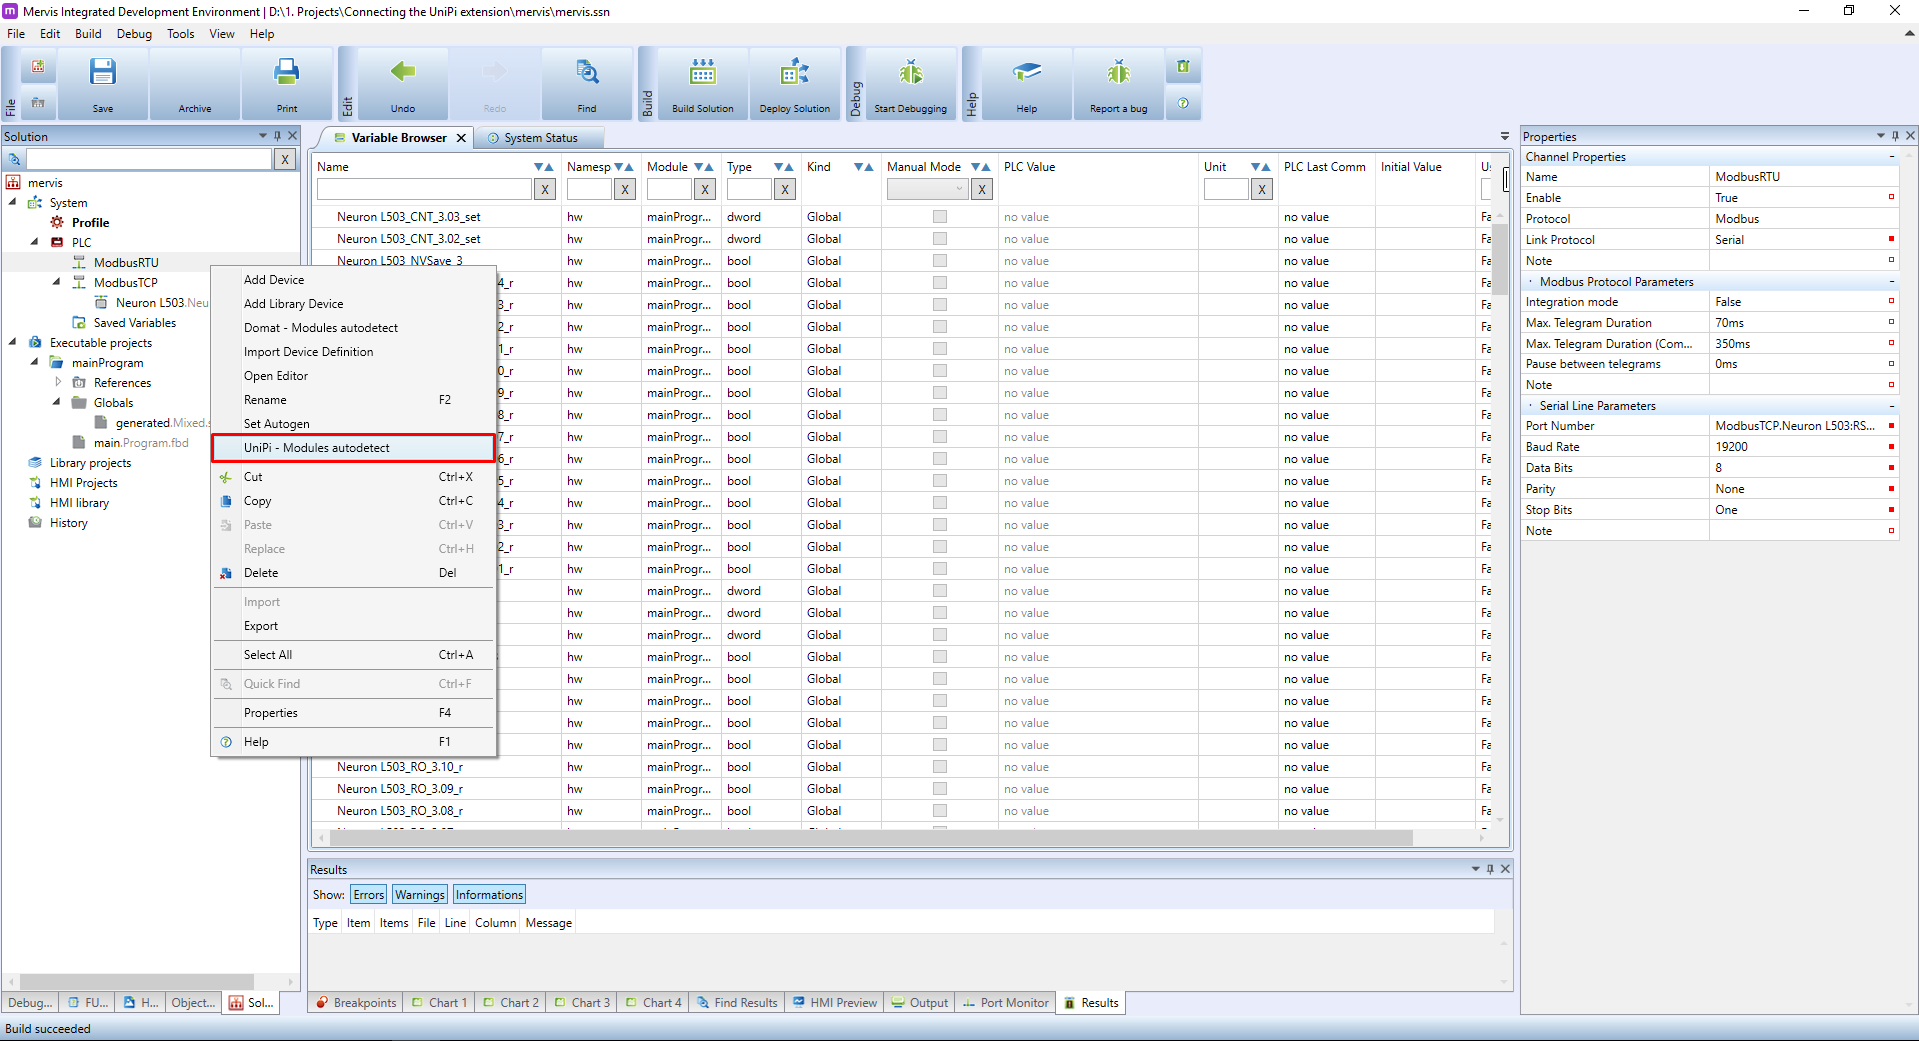
To autodetect the devices, right click on the channel name in Left panel and in the context menu click on the UniPi - Modules autodetect.
You will be probably presented with dialog warning you, that the autodetection needs to be executed while the PLC is in the Commissioning mode. The Mervis will offer you to switch to this mode and after the detection it will switch back to the previous mode.

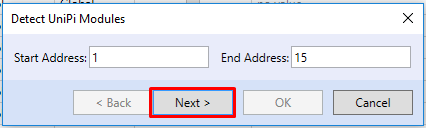
Next dialog will ask you for the range of Modbus ID's the autodetect will look for. You can leave the default 1 - 15.
The detection has finished and you can see a list of UniPi extensions on your RS485 bus. You can tick the Import checkbox and import their definitions.

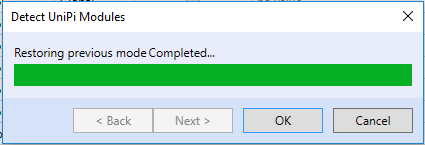
And confirm the restore to previous mode.
A new device(s) will appear under the channel. You should rename them to something more descriptive, e.g. by their purpose or location.
Also run Set Autogen on the device in order to generate all the variables which the extension has.
Turn on the Debugging and select the Variable browser tab in the Main window. Under the name, search for the name you gave the extension (in our case the boilerRoom). In the browser, you should now see only the variables for the extension and their current values.
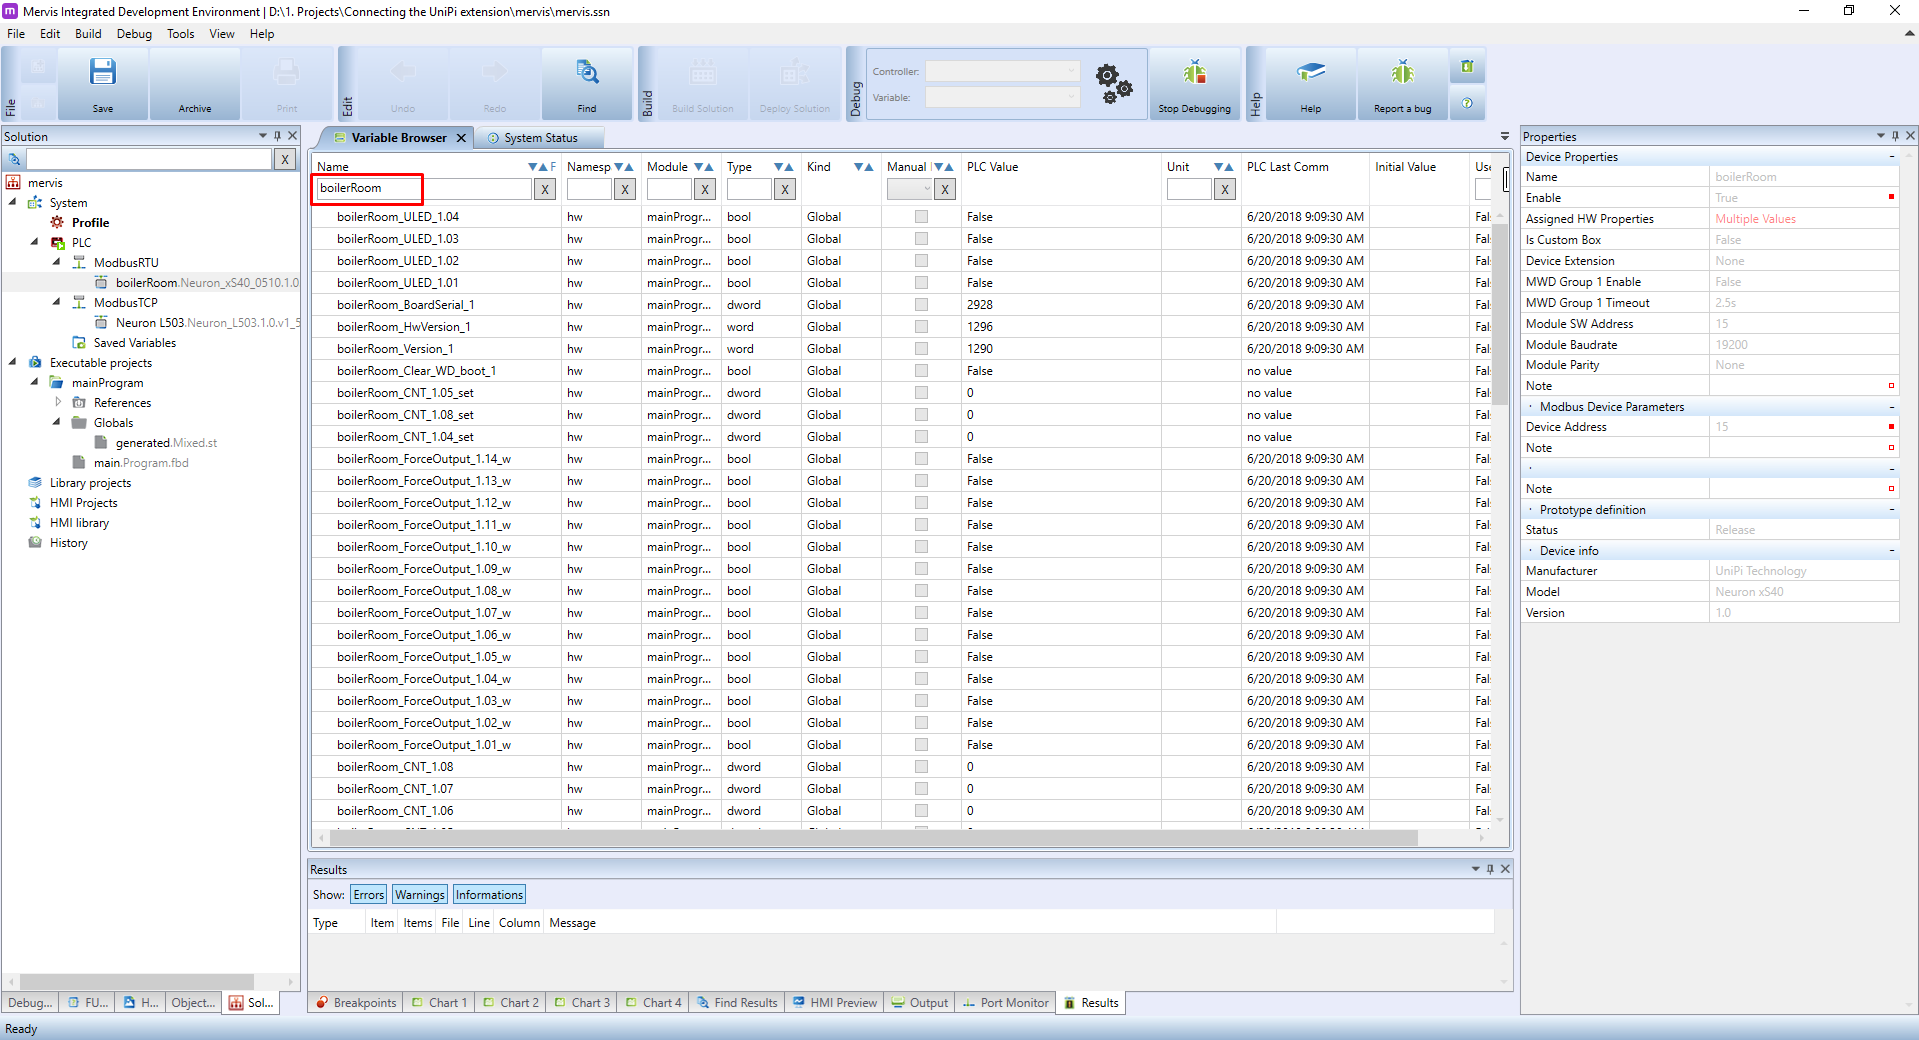
You can try changing the values of boilerRoom_ULED_1.01 and you should see the LED X1 on the extension turn ON and OFF.
Překonfigurování rozšiřujícího modulu
We already learned, that you can set a subset of the communication parameters by HW DIP switches. Now we will learn, how to set those in Mervis.
To set the parameters, you need to have a working connection with the extension. We already have this in our current project, so let's continue.
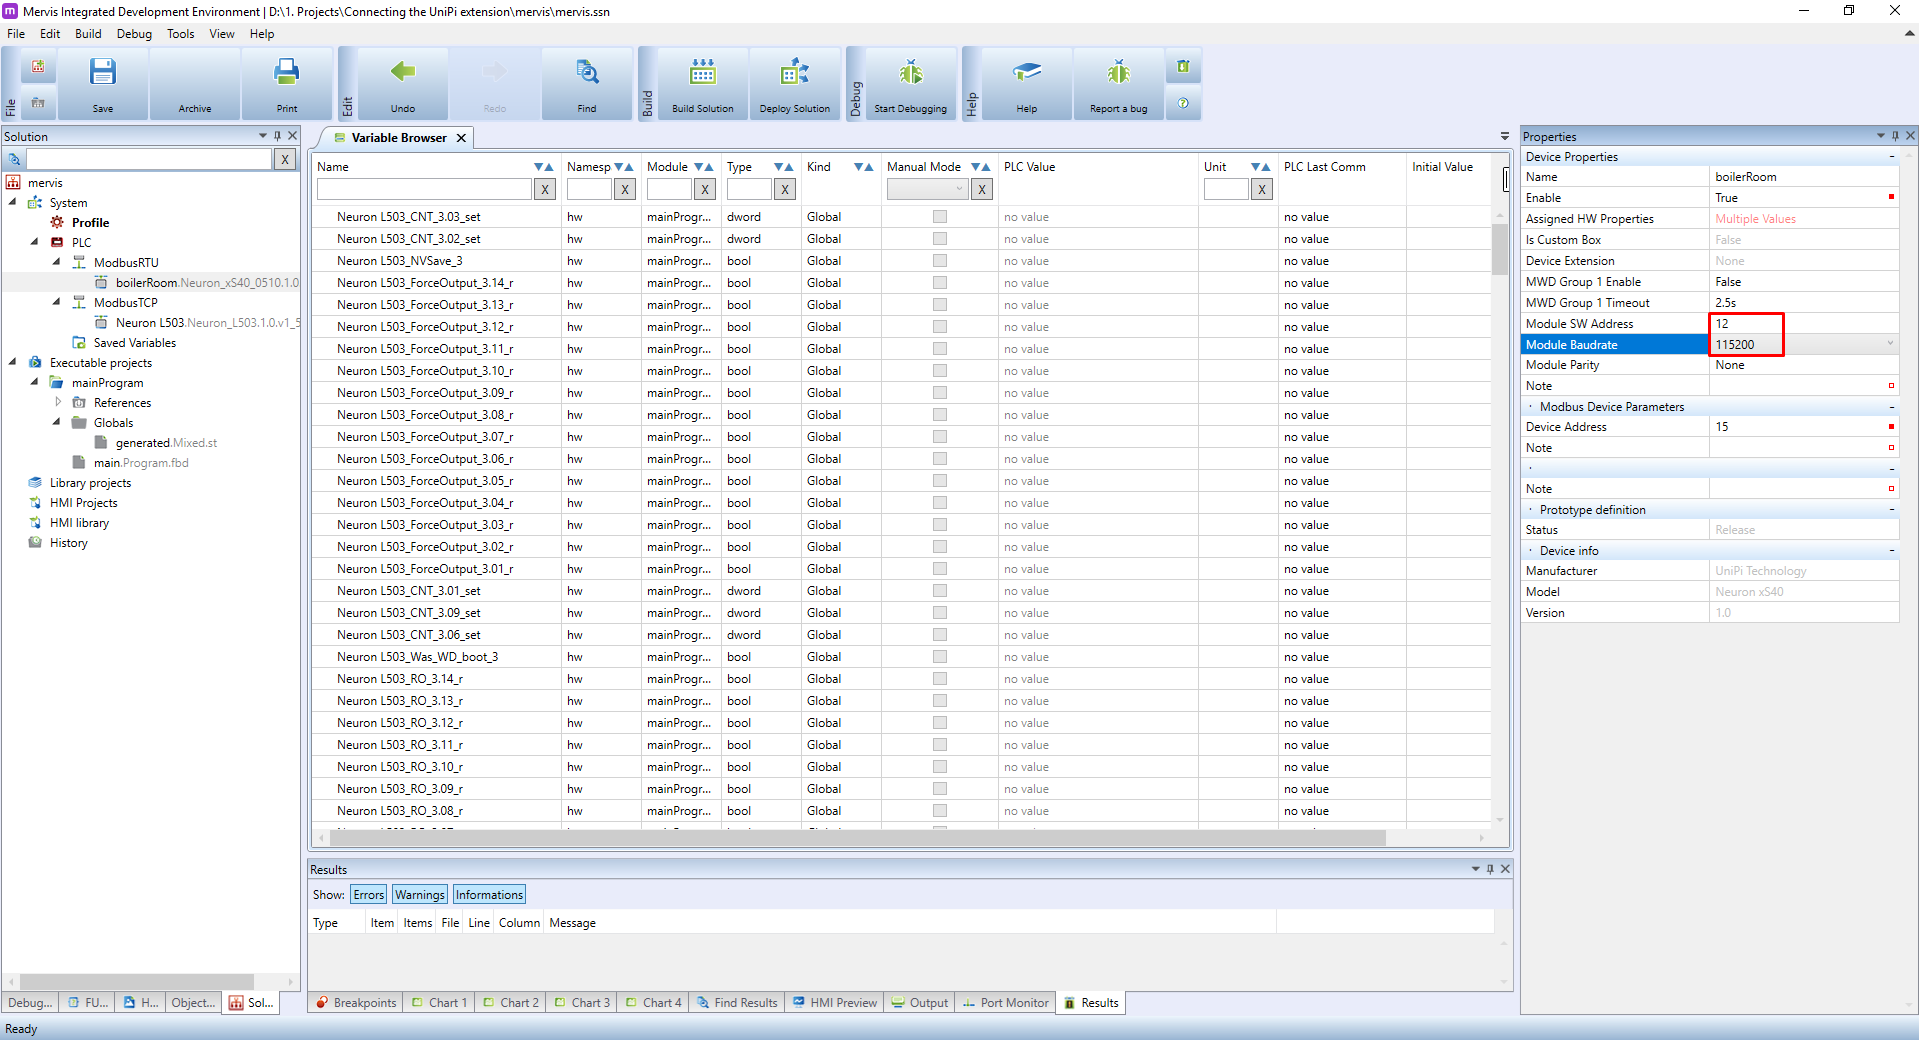
The parameters are configured on the device itself. Select the extension in the Left panel and check the properties on the Left panel.
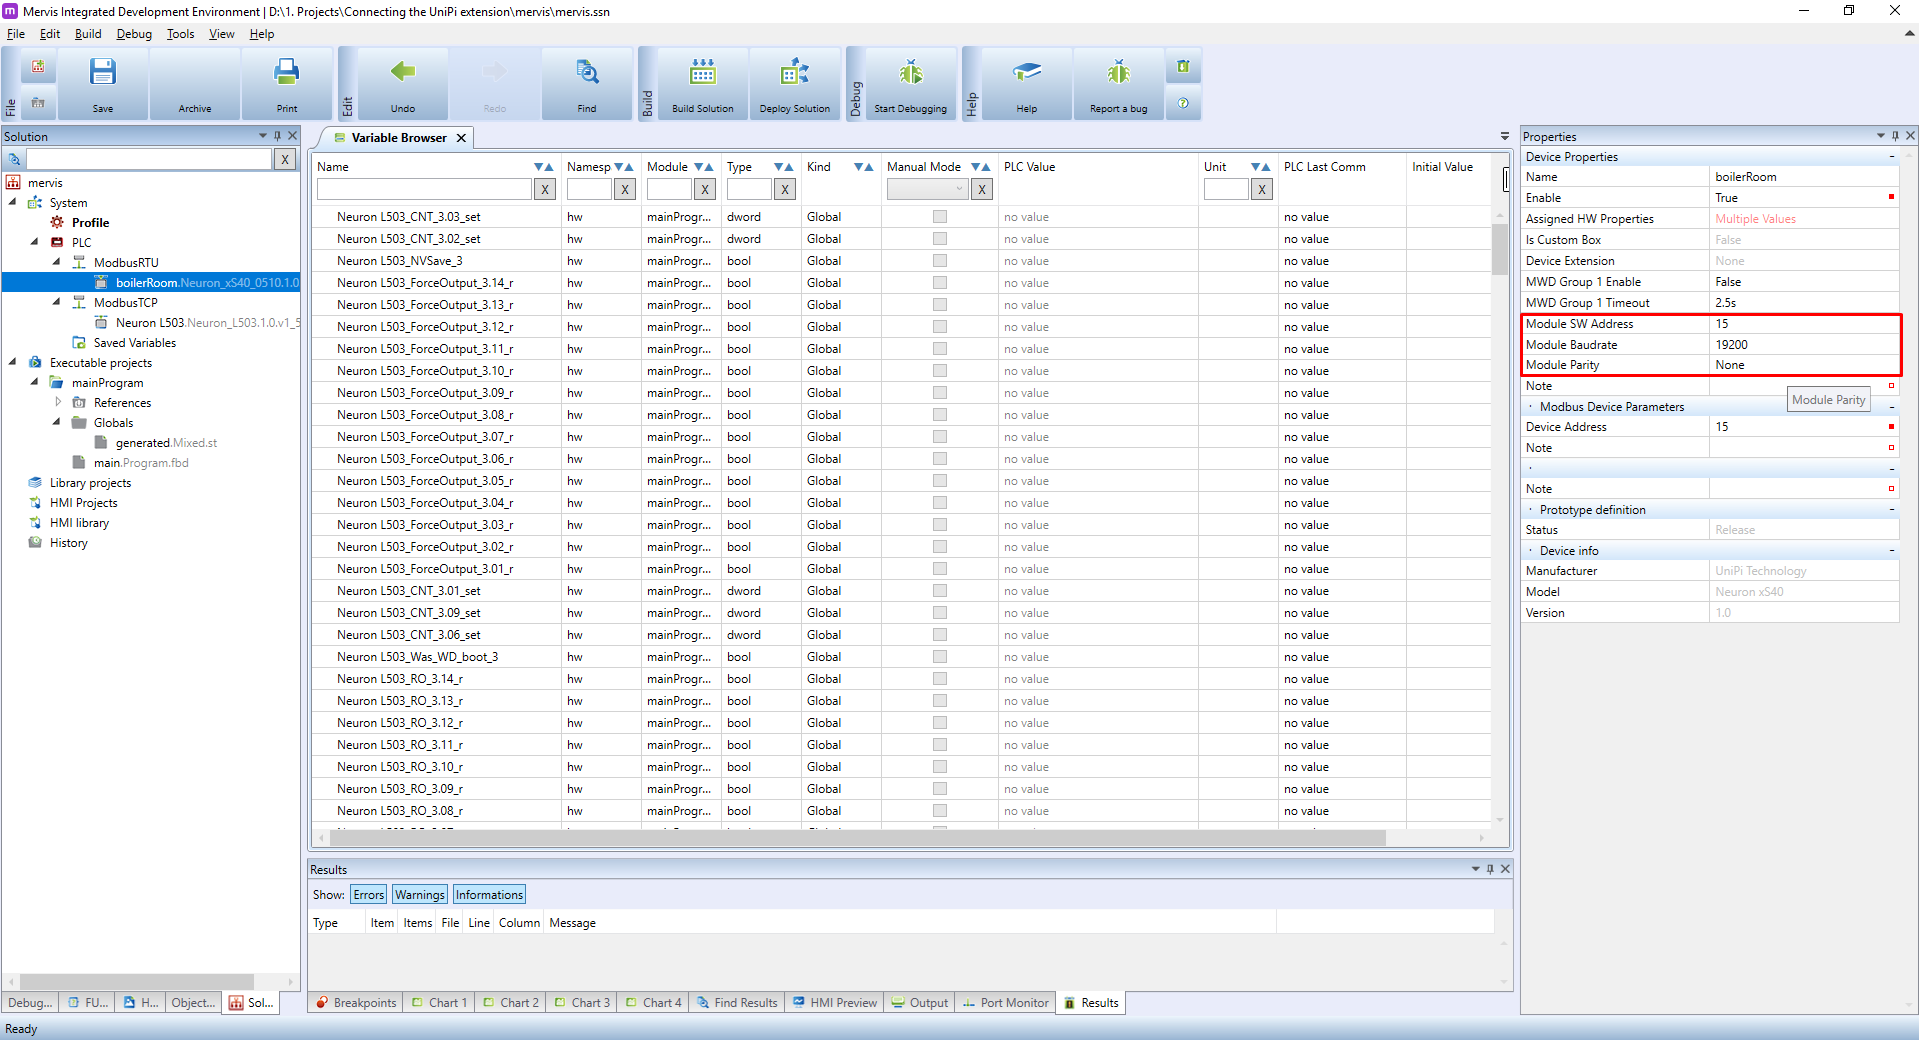
In Mervis, we can set address, baud rate and parity. The data bits will always be 8 and stop bits will be 1. So let's change the parameters to address = 12 and baudrate = 115200.
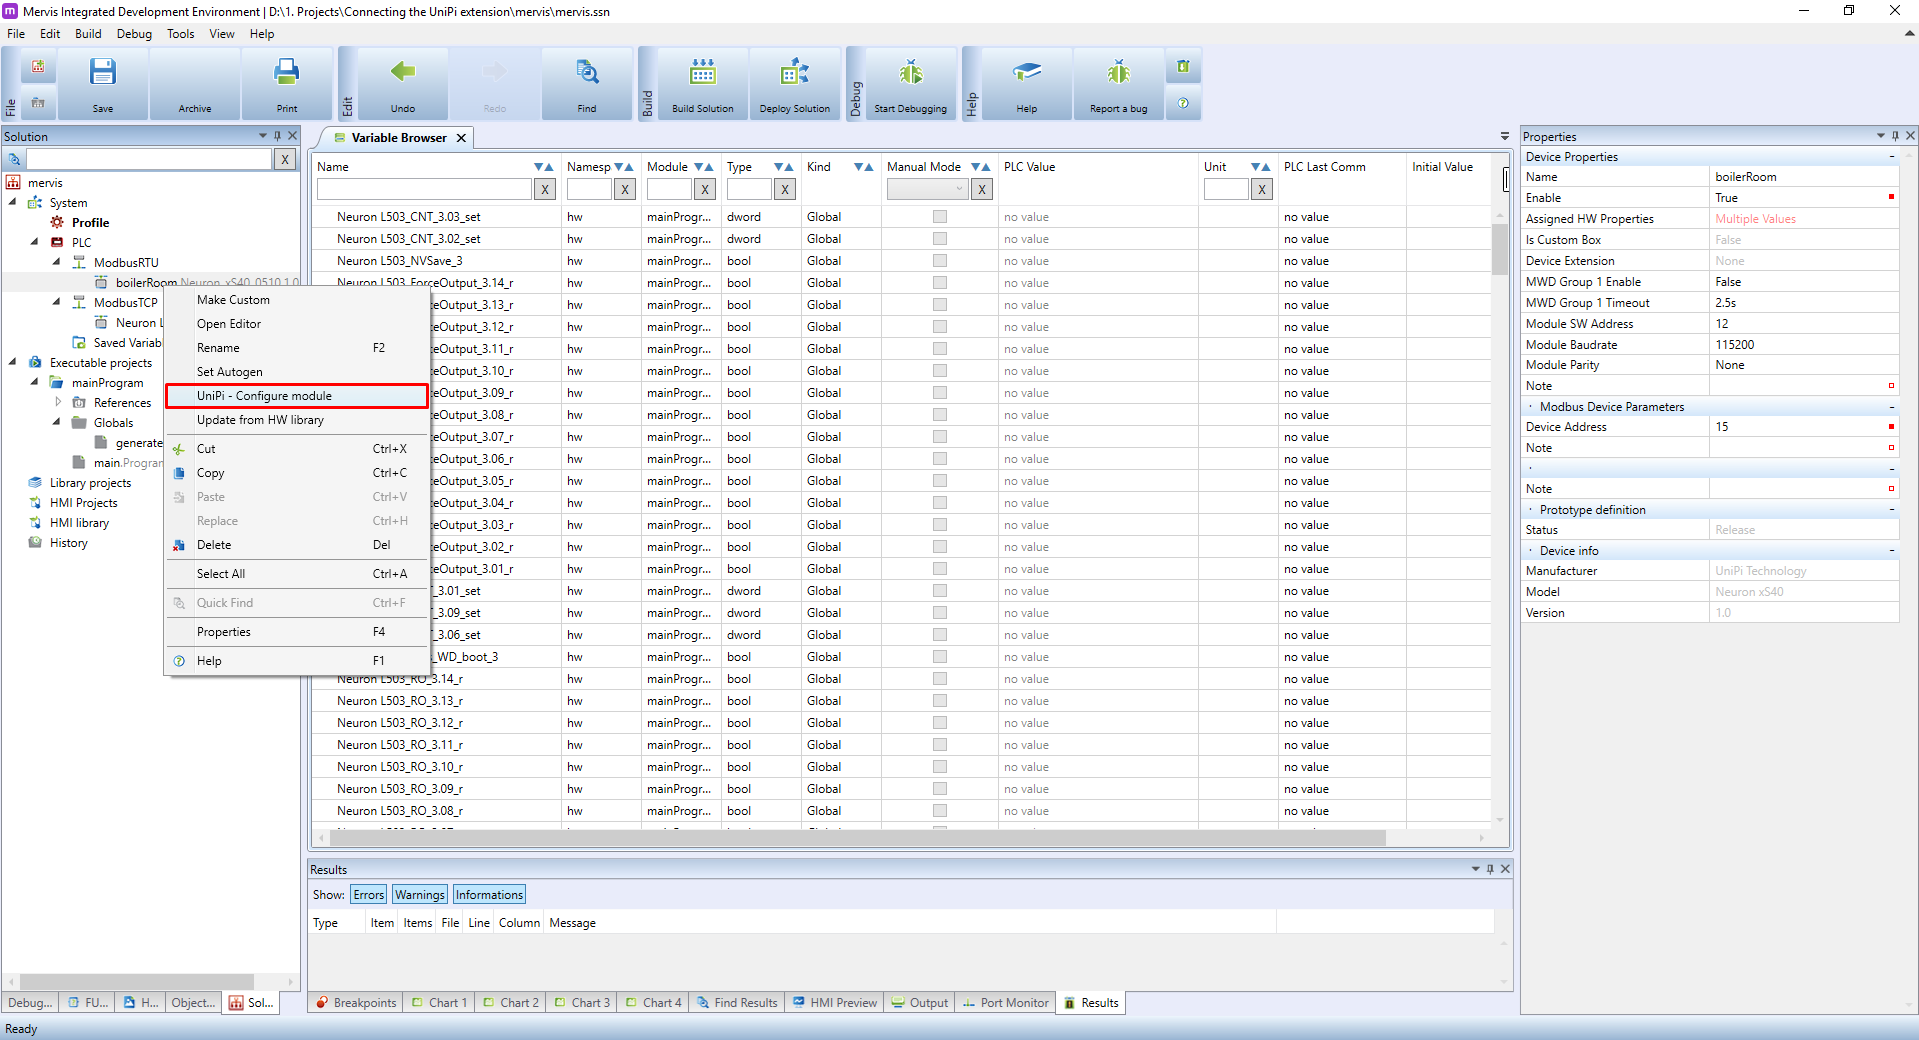
In order to save these settings, you need to configure the module. Right click on the extension in the Left panel and in the context menu, click on UniPi - Configure module.
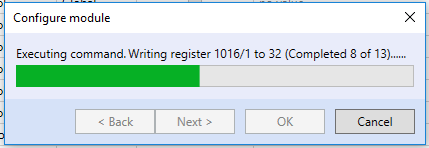
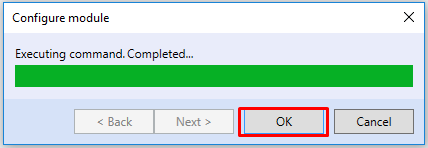
You will probably be asked to switch to Commissioning mode as with the autodetection. After confirmation, you will see a progress bar of the configuration. After the configuration finishes, confirm the dialog by clicking on OK
We downloaded the configuration into the extension, but to apply the settings, you need to restart the extension as well.
Now that we changed the configuration of extension, we need to do changes in the project as well. Remember, that our ModbusRTU channel is configured to 19200bps. We need to change it to 115200bps to match the speed of the extension. You should know the drill: select the channel in Left panel, change the Baud Rate property in the Properties panel to 115200 and don't forget to Deploy the solution afterwards.
If you run the UniPi - Modules autodetect again, you should find the extension on new address 12. You could import the new device, but then you would have two devices under the ModbusRTU channel. Easier way is to change the communication address in the current device's properties. Select the extension in the Left panel and in the Properties panel check the Modbus Device Parameters.
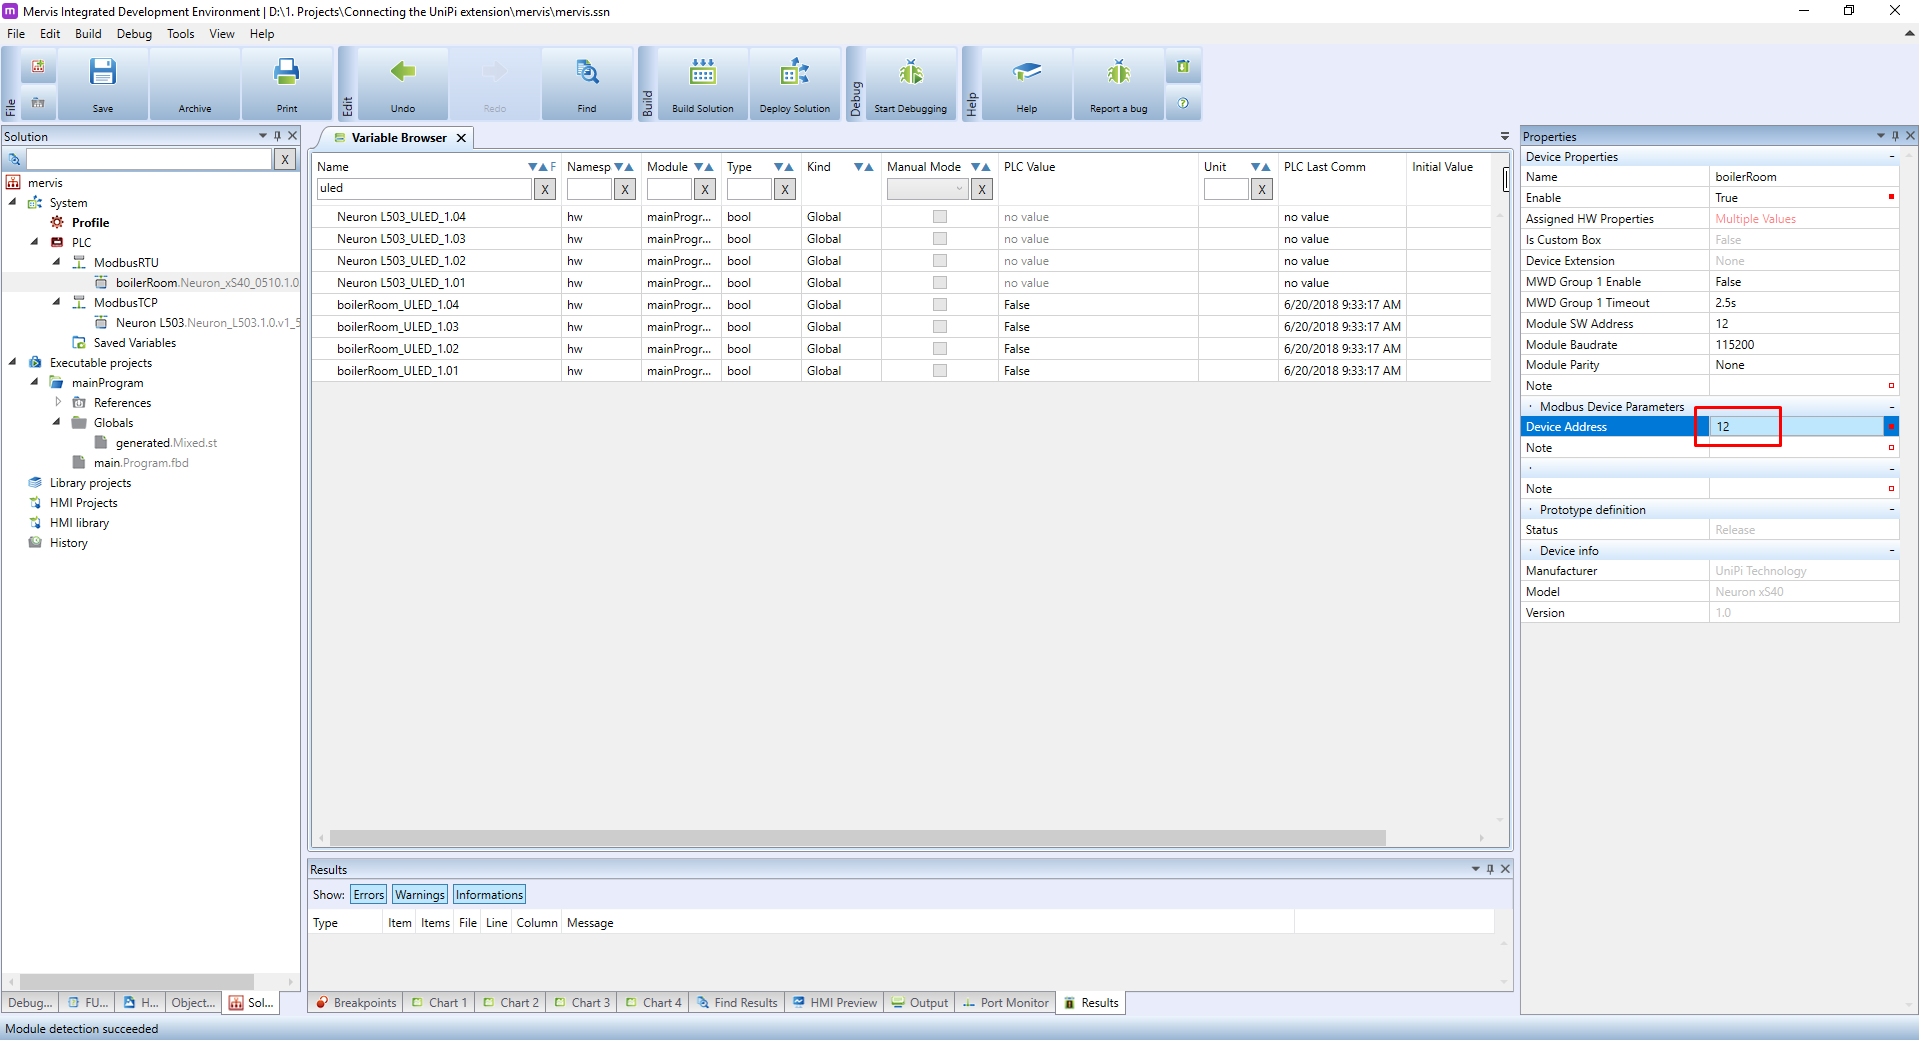
Change the Device Address to match the Module SW Address, Deploy the solution and start the Debugging. In the Variable browser you should see all the properties and their current value.