Connecting to Unipi via Mervis Proxy
In this tutorial, we will learn how to set the Unipi controller to use the Mervis Proxy and how to connect to the Unipi via this proxy.
Patron
Neuron
Gate
Unipi 1.1
Axon
Prerequisites:
- Unipi controller running Mervis OS
- Temperature regulator project from the Attaching 1-Wire devices tutorial.
- 24 V⎓ power supply
- 1-Wire temperature sensor
- Mervis Proxy credentials (tutorial how to obtain it)
In this tutorial, we will use Unipi Neuron L503.
1. Setting the Proxy
If you followed the Prerequisites, your workspace should look like this:
Select the PLC in the Left panel and look for the Proxy Parameters section in the Properties panel.
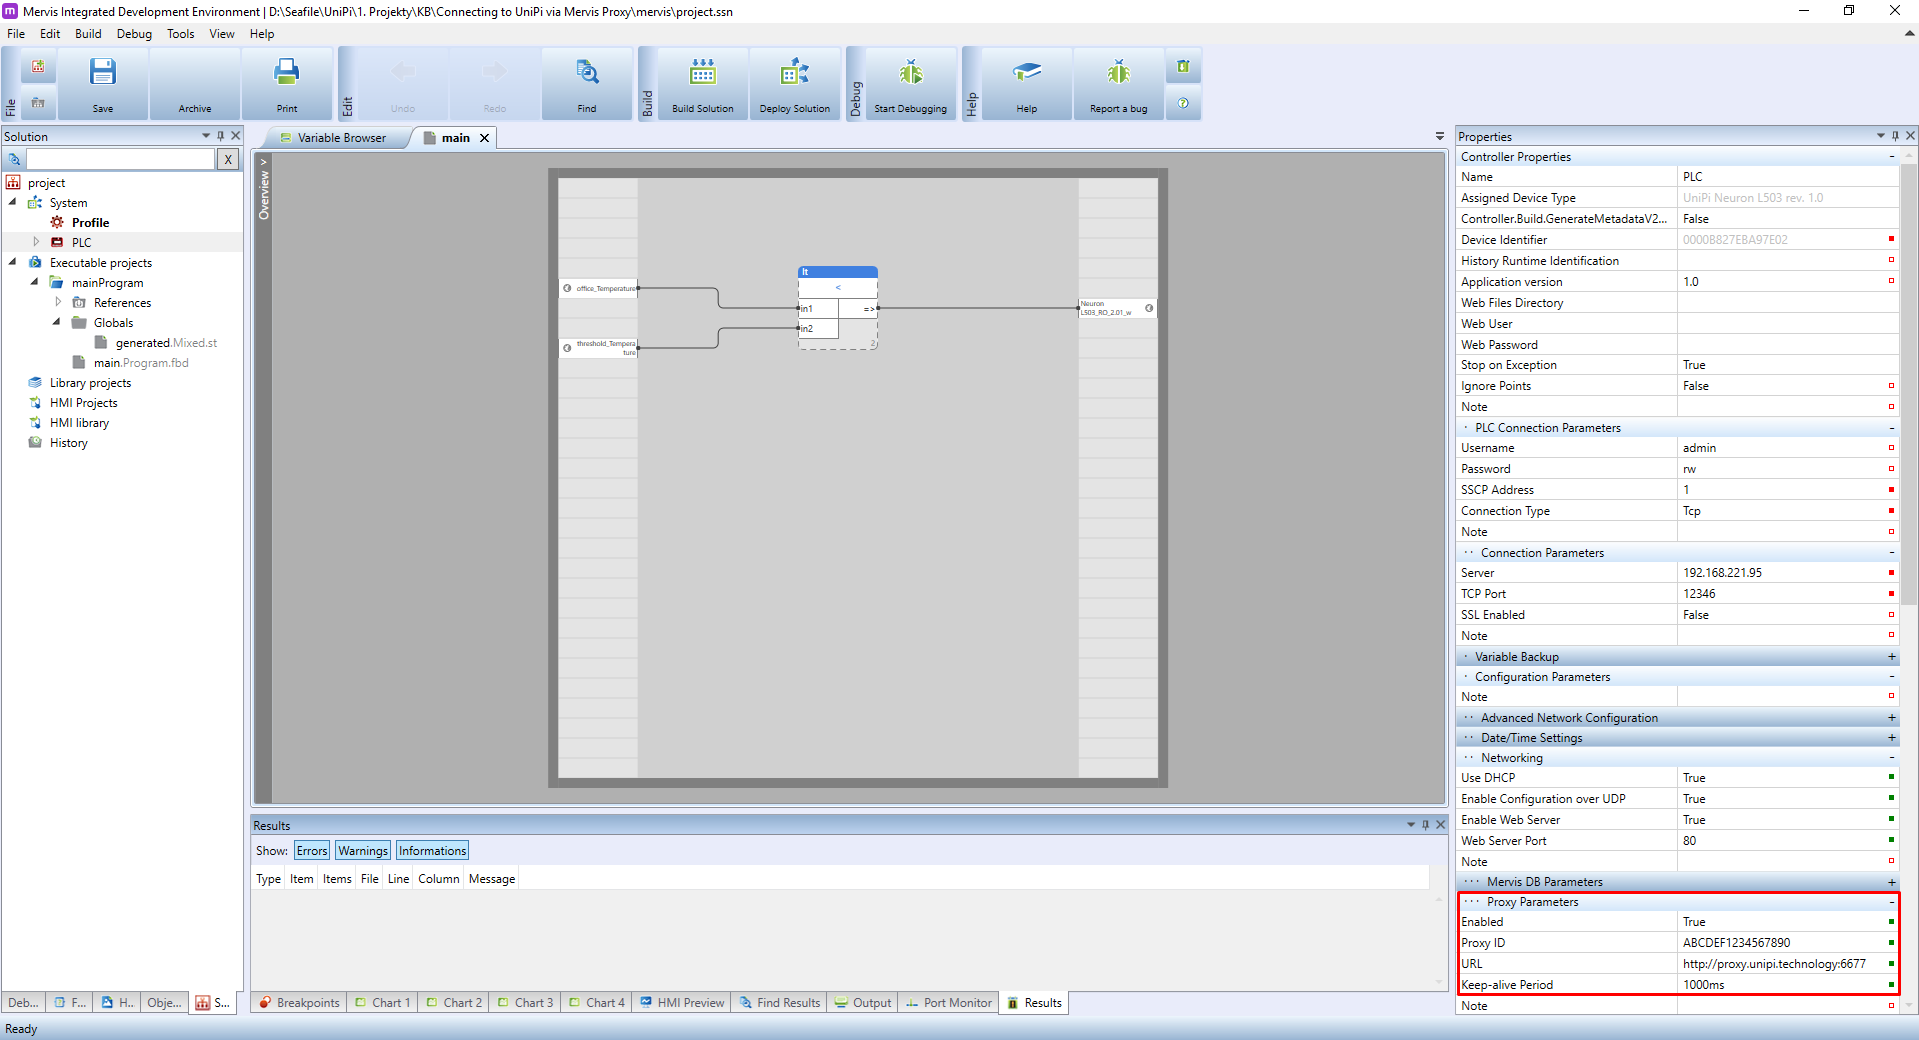
Change the values in the section accordingly:
- Enabled: set this value to
TRUEto enable the proxy communication - Proxy ID: fill the proxy ID which you obtained in your account on unipi.technology
- URL: for Mervis OS v2.3.0 and newer, set the URL to
https://proxy.unipi.technology:6678. For the rest, usehttp://proxy.unipi.technology:6677 - Certification validation: set to
FALSEby default. More info in the Certification validation article - Keep-alive Period: leave this option unchanged
Since we changed the configuration of PLC, we need to upload it in order to take affect. Right click on the PLC in the Left Panel and in the context menu select the PLC Operation → PLC Setup → Upload configuration.
If you are not sure, check out the Uploading a RunTime configuration tutorial.
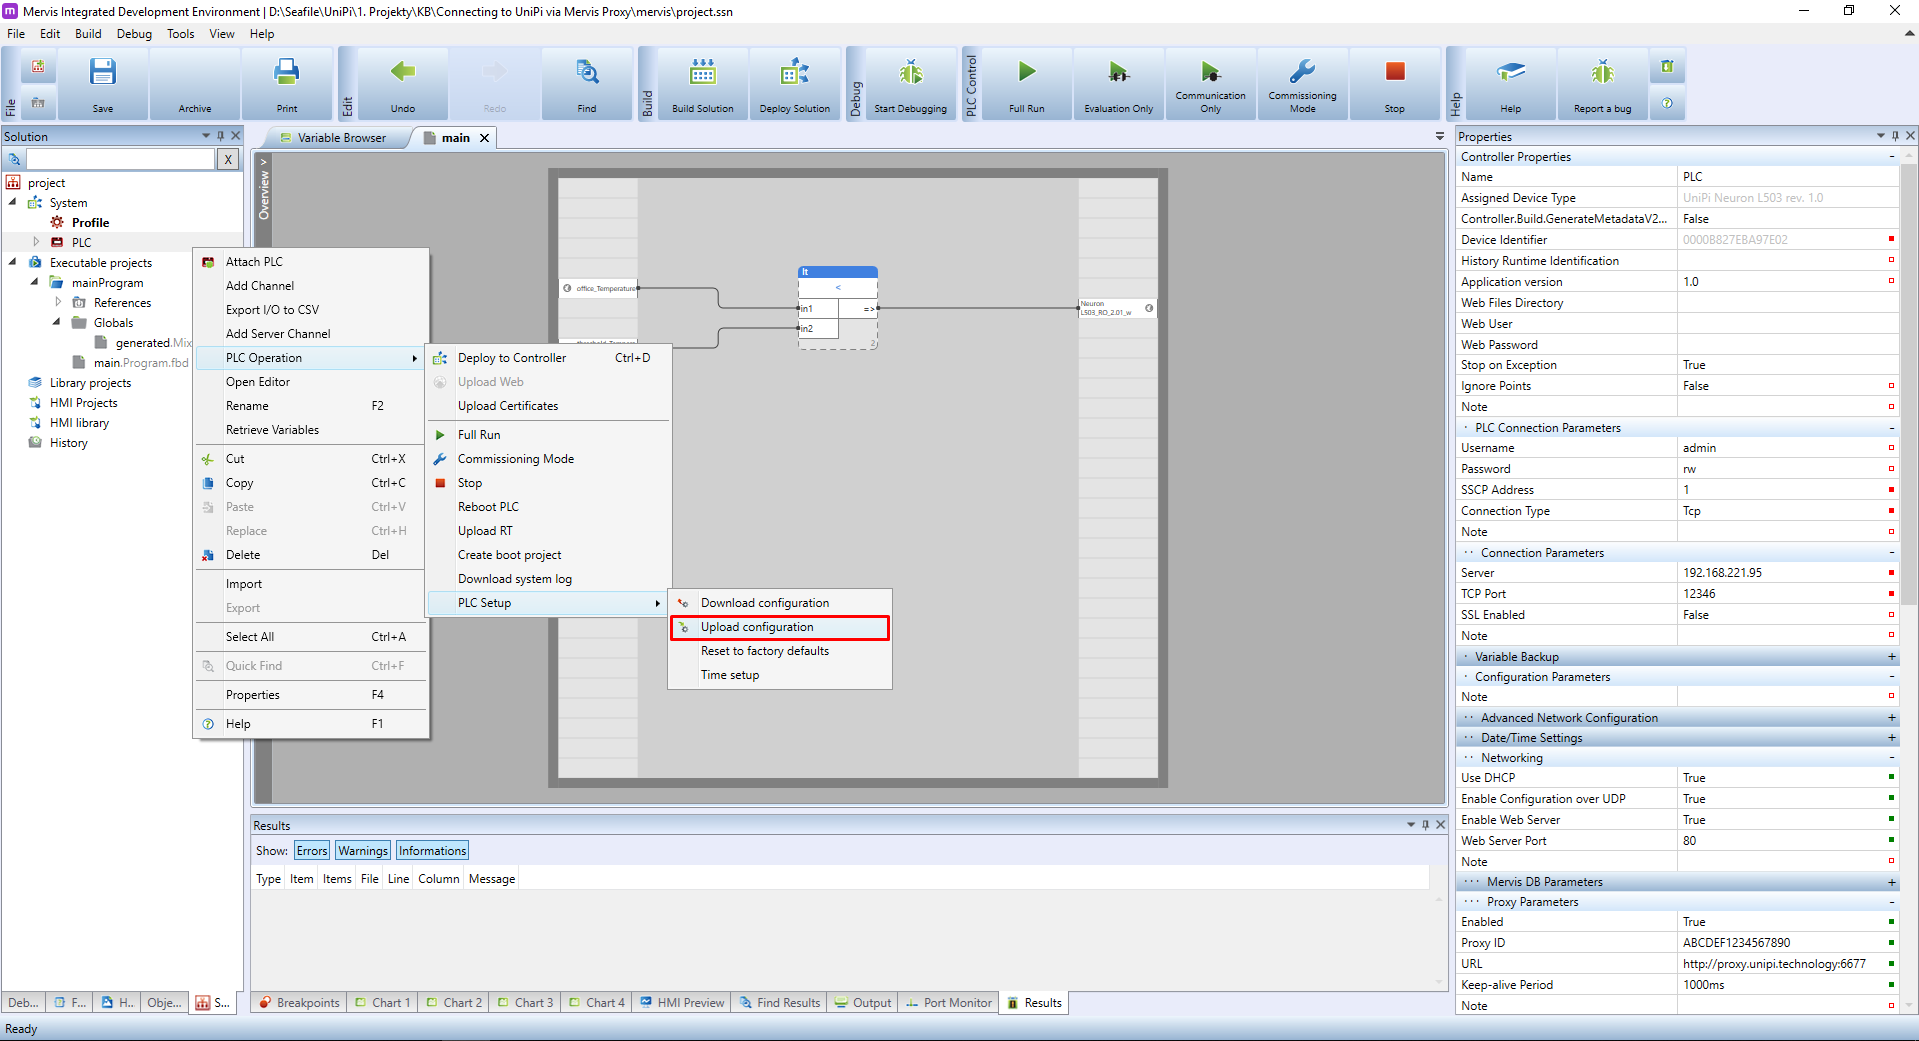
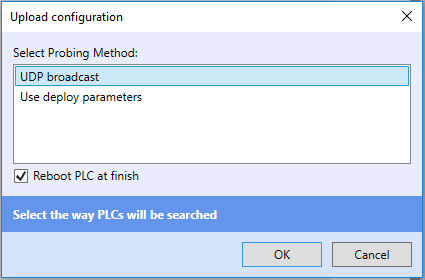
An upload configuration dialog will appear. If you are on the same LAN as your controller, you can select UDP Broadcast, otherwise select the Use Deploy Parameters and confirm by clicking on OK.
Now we can switch into the debugging mode and check, if the connection to Mervis Proxy is working. Start Debugging and switch to the System status tab in the Main window. Look for the Proxy in the Services section. You should see the status changing between Idle and Connecting, depending on the Keep-alive Period value.

2. Connecting to the PLC via Proxy
To use the power of proxy connections, it is time to learn about Profiles. Profile are used in situations, where you need to switch between different settings of the Solution. In this tutorial, we need to switch between two connection parameters settings - the settings for connecting to the PLC on the local network, and the settings for remote access via a proxy server.
Each newly created solution automatically includes a main (default) profile called “Profile”, which you can see in the Left panel under the System item. The main profile name cannot be changed.
To create new profile, right-click on the default Profile and select Add Child Profile
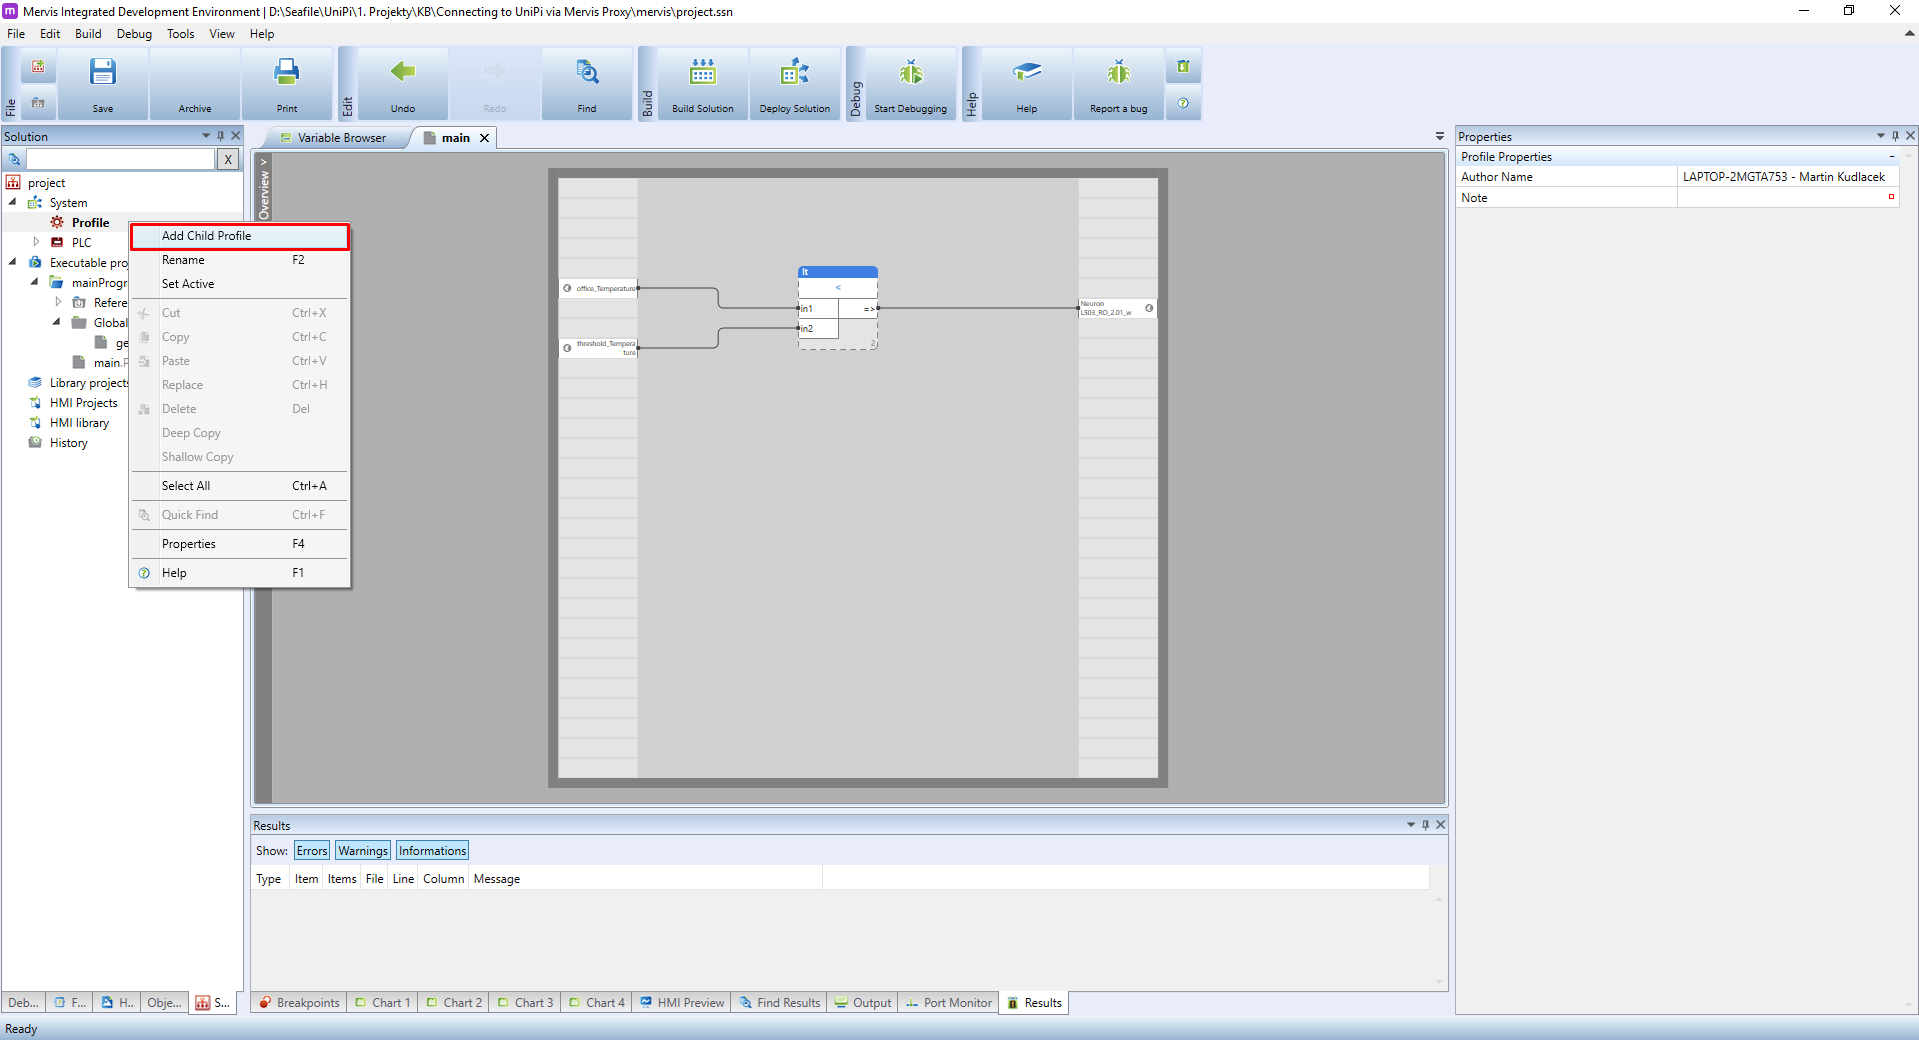
A new sub-profile will appear below the main profile. Each sub-profile is offset to the right of the parent profile, indicating a hierarchy.
Click to select the newly created profile and change its name to proxy in the Properties panel.
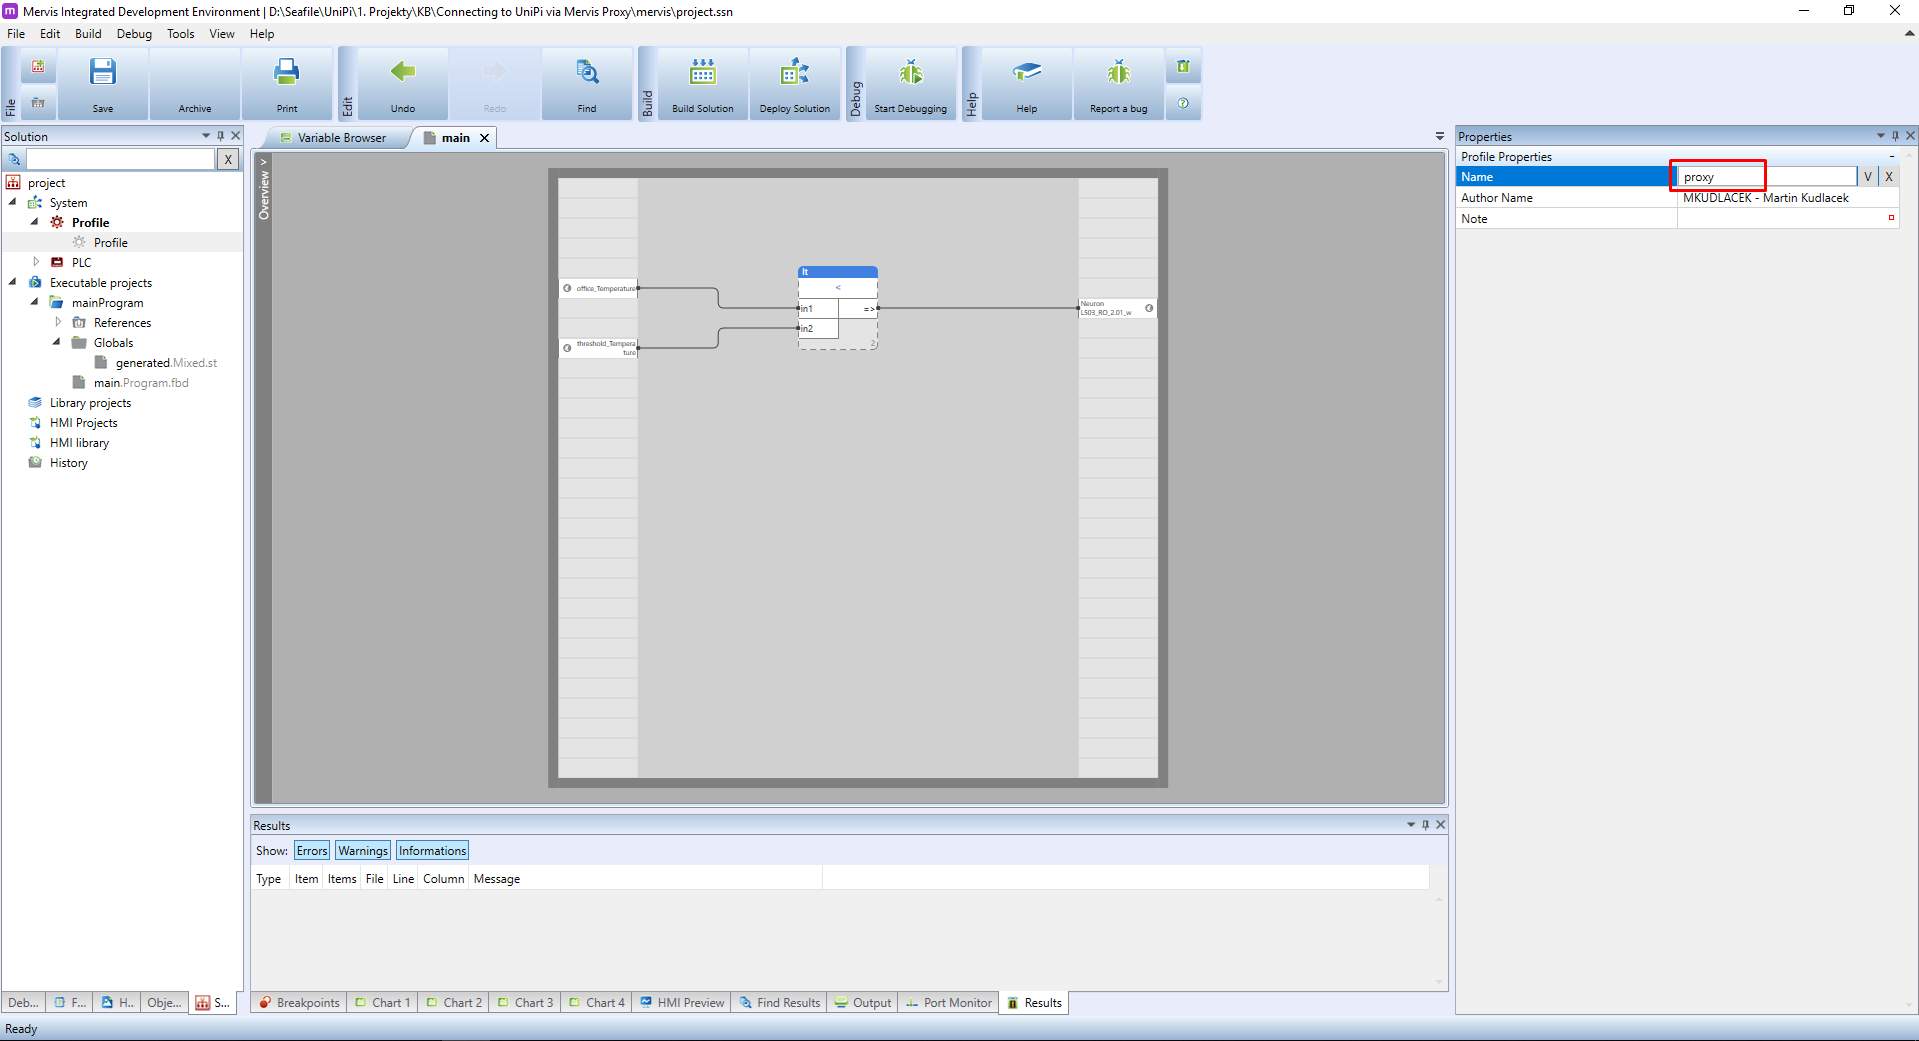
You should have this workspace afterward:
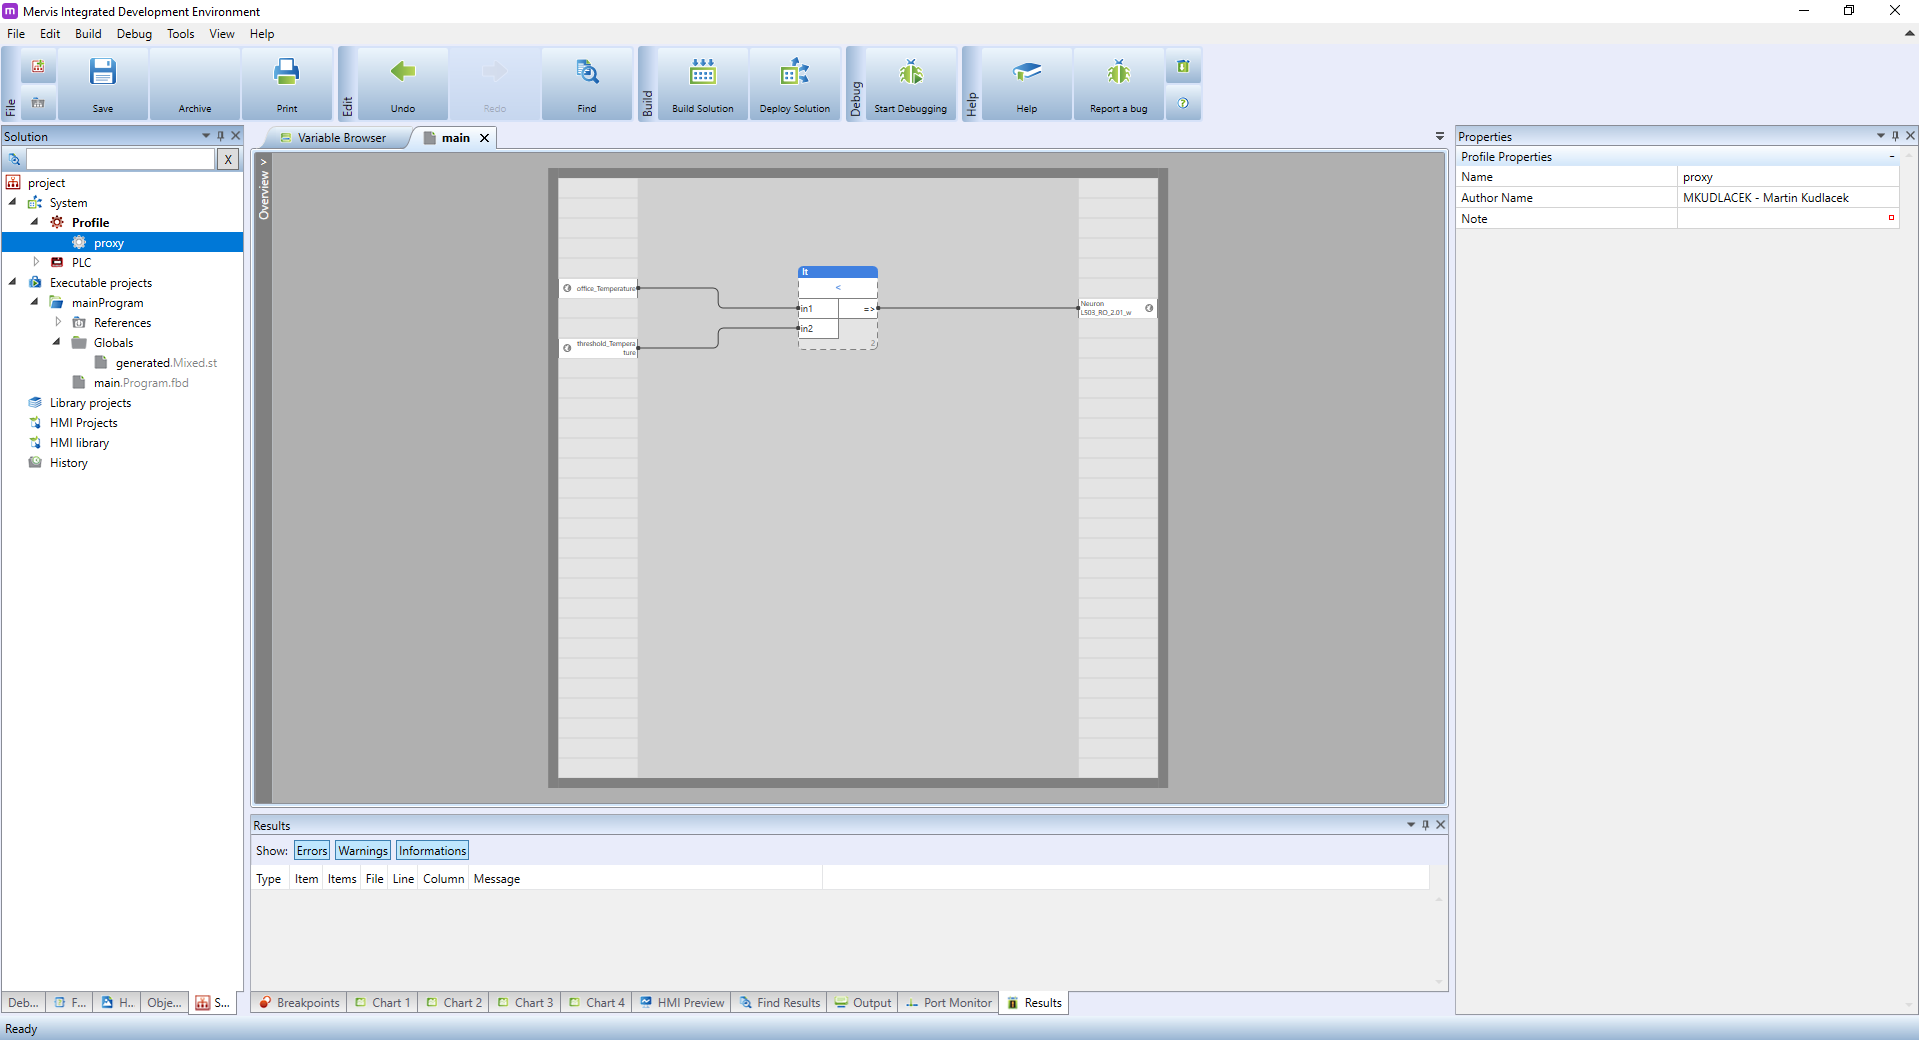
As you can see, the default Profile has colorized icon and the text is bold. This indicates the active profile. Any changes in the solution parameters will be stored into the active profile.
To select another profile, double-click on its name to set it as active and all changes to the solution parameters will now be saved to this profile.
Do this for the proxy profile. However, the main profile remains active because the proxy profile is based on the main profile. Therefore, both will be active.
As we have not yet made any changes to the proxy sub-profile, it is now taking over all data from the parent profile. If we now change any parameter of the solution, it will be set only in the proxy sub-profile and the parent (main) profile will not be affected
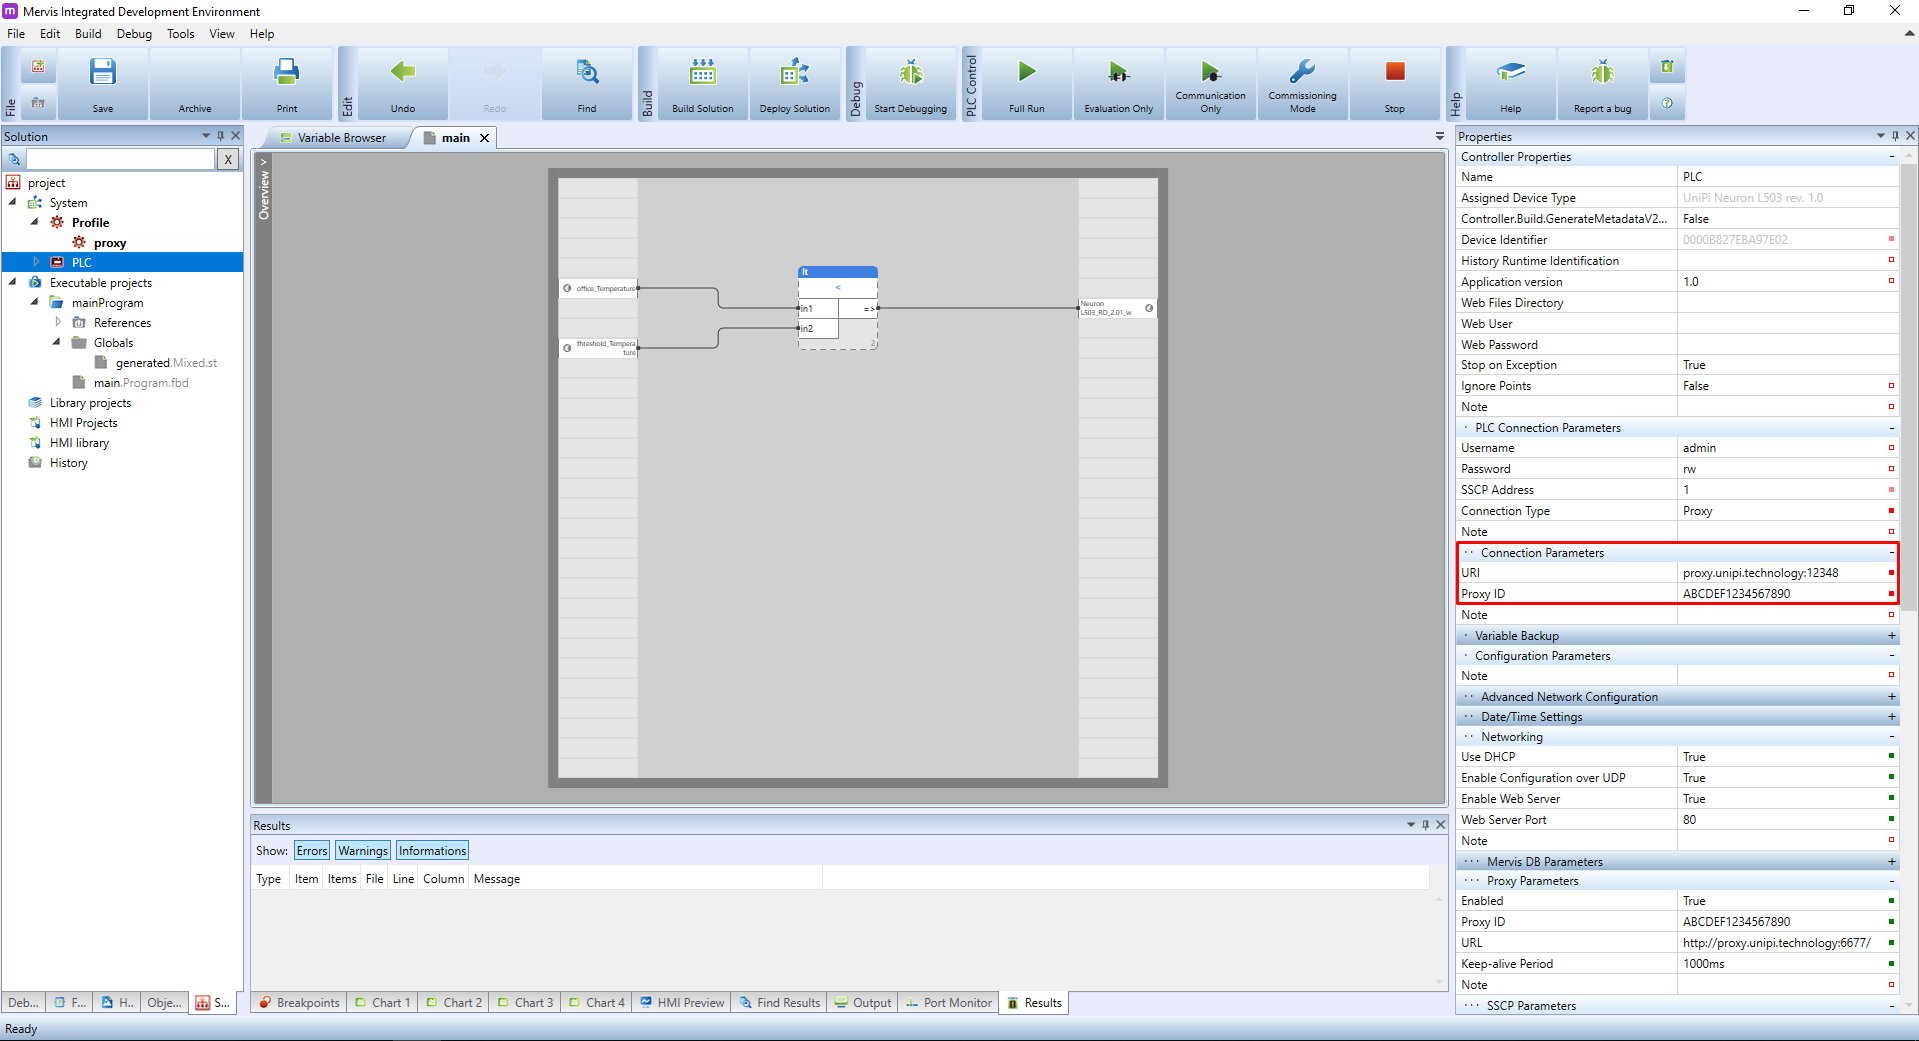
Now we can change the connection parameters to use the proxy. Select the PLC in the Left panel and move over to the Properties panel. In the section PLC Connection Parameters change the Connection Type to Proxy.
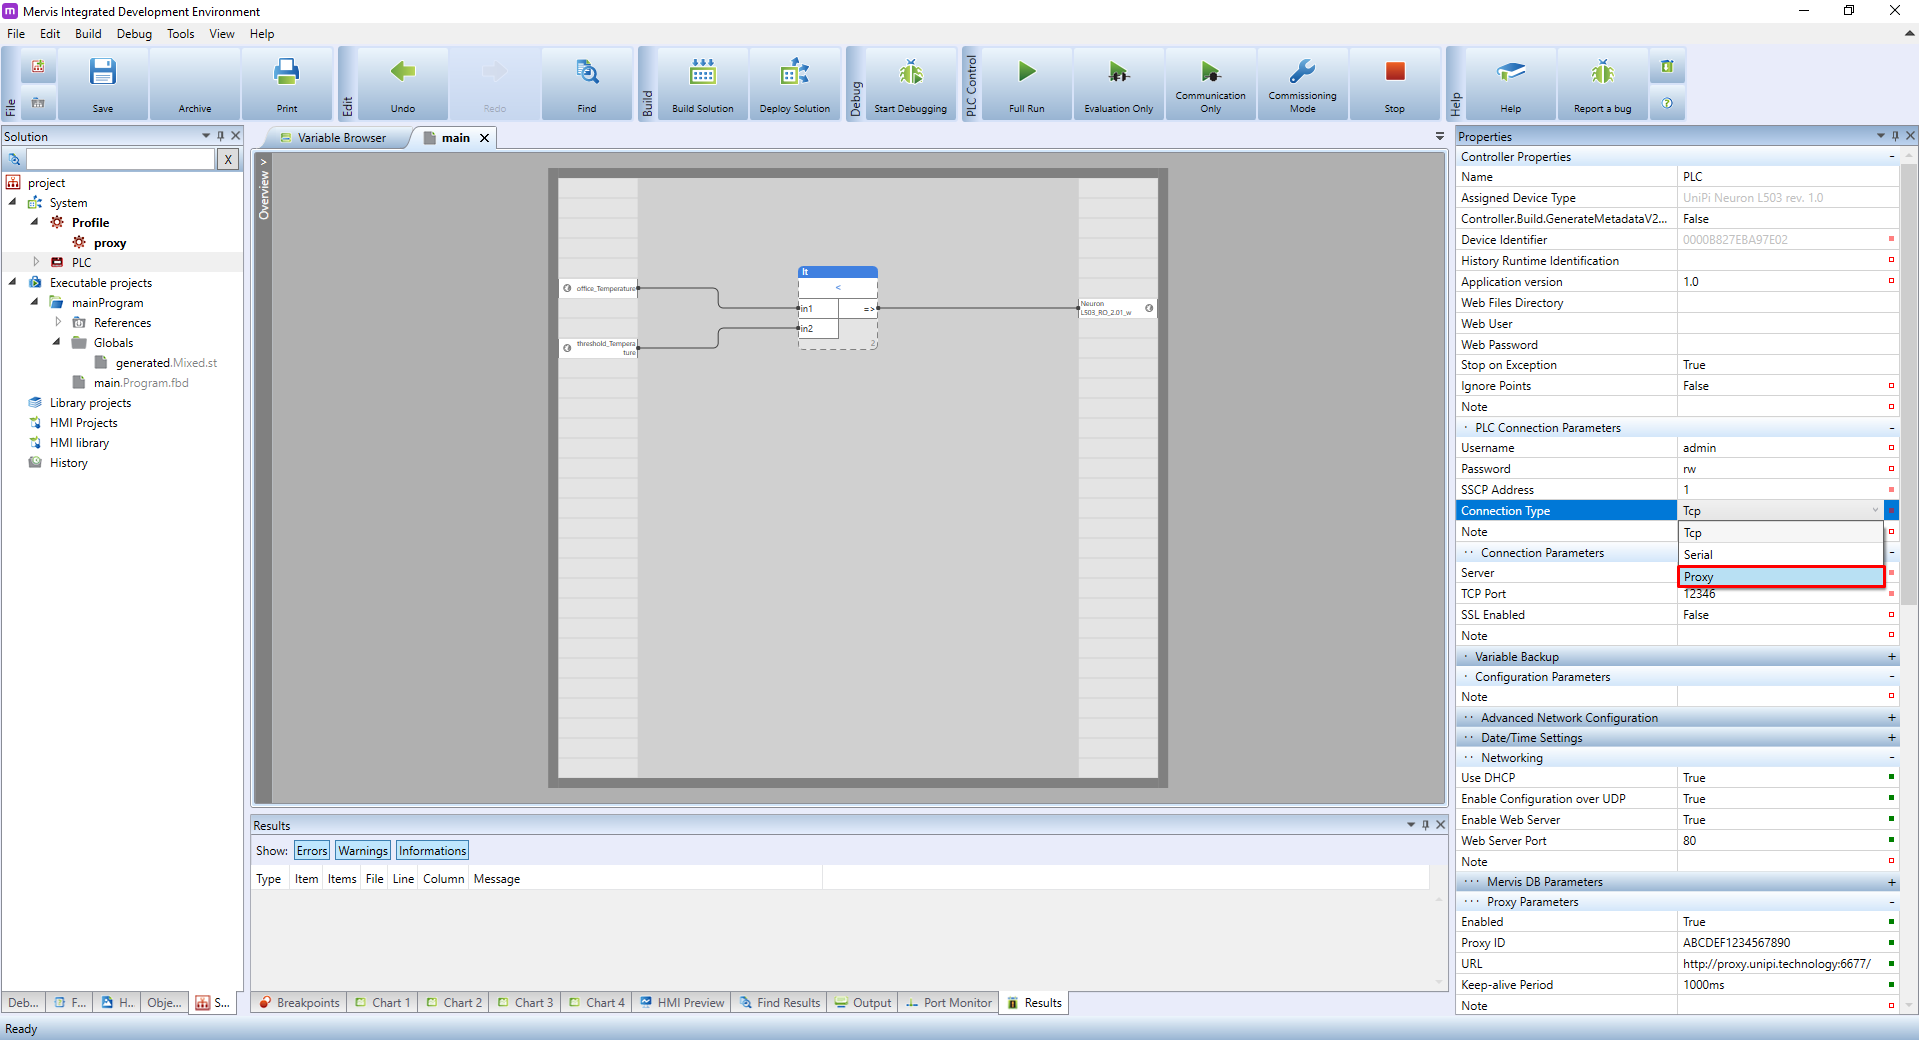
In the section Connection parameters change the values accordingly:
- URI: for PLCs using Mervis OS and Mervis IDE 2.3.0 or newer, set the URI to
tcps://proxy.unipi.technology:12349. For the rest, usetcp://proxy.unipi.technology:12348 - Proxy ID: fill in the proxy ID which you obtained in your account on unipi.technology
Now all that remains is to start the debugging session and the Mervis IDE will connect to the PLC through a proxy server. To switch back to the LAN connection, all you have to do is turn off debugging, set the main Profile as active, and start debugging session again.
Caution: If you changed the wrong value in the sub-profile, or you wanted to make the change in the parent profile, it is possible to reset the value in the sub-profile using the  button next to the value. Clicking this button deletes the value and retrieves it from the parent profile.