Remove duplicate data points
If the number of data points increases after you add a graphic scheme to SCADA, even if you use the same data points, it is due to their different settings in the data point table and in the scheme. In this chapter, you'll learn how to get as few duplicate data points as possible.
The digital or analog inputs and outputs described below are not the inputs and outputs of the unit, but the designation of the input and output values for Mervis SCADA. The digital input in SCADA only indicates the status, while the output can be set.
When setting, pay attention to invisible characters, which can also cause a difference between the diagram and the table.
Available from Mervis IDE version 2.4.2!
Digital inputs/outputs
For digital values, the solution is very simple, you only need to set the same states mapping for identical data points in the table and in the graphic scheme.
First, open the data point table in the Mervis IDE and click on the row with the required digital data point. Its properties are displayed in the right panel, select State mappings here and click on the three-dot symbol  .
.
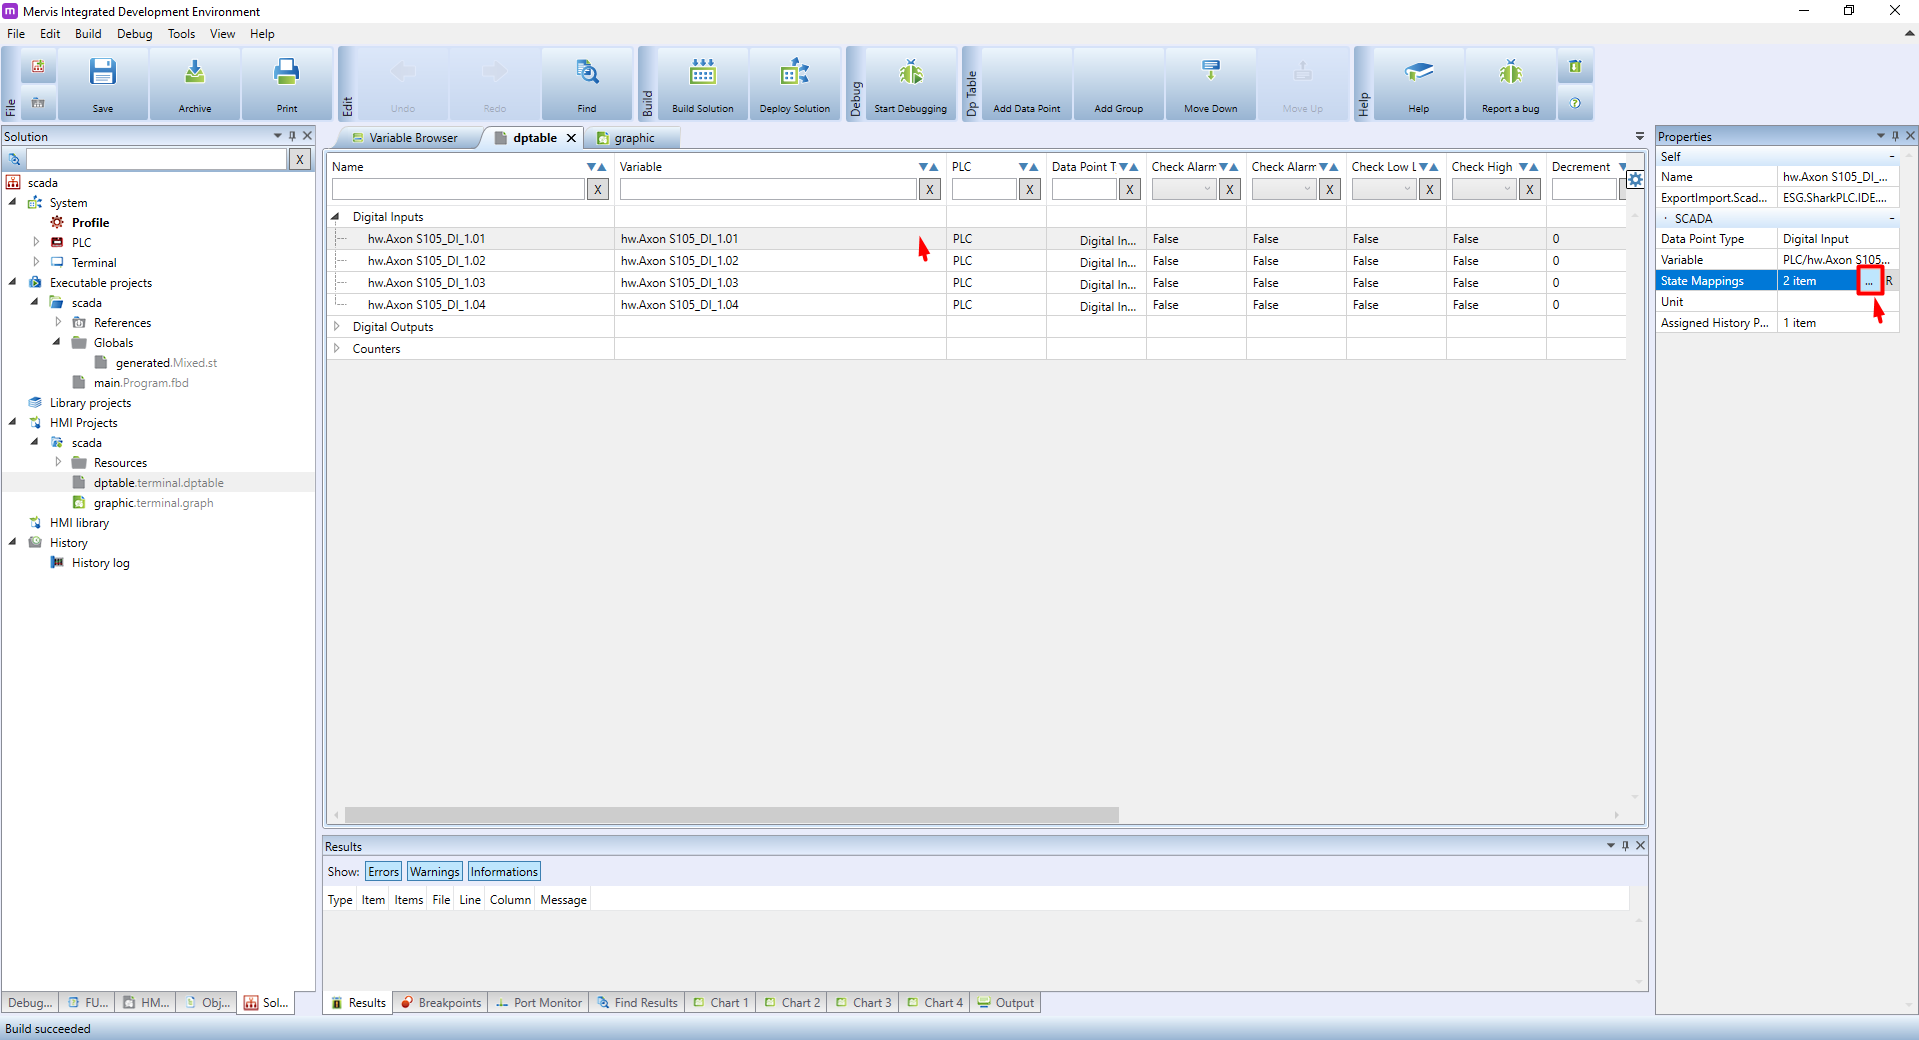
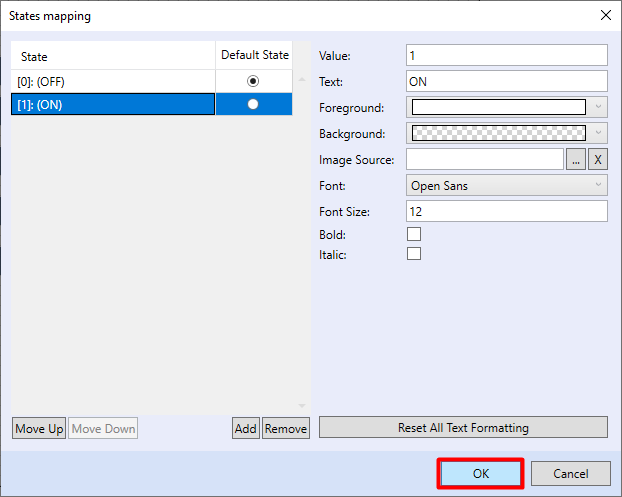
Set the required states and their name according to the data type. In this case, we set two states ON and OFF, as it is a two-state variable of type BOOL. After setting, confirm by clicking OK.

Now open the graphic scheme for Mervis SCADA and find the element bound to the same variable that you set in the previous step. Click on this element to display its properties in the right panel, select States mapping, and click on the symbol with three dots .
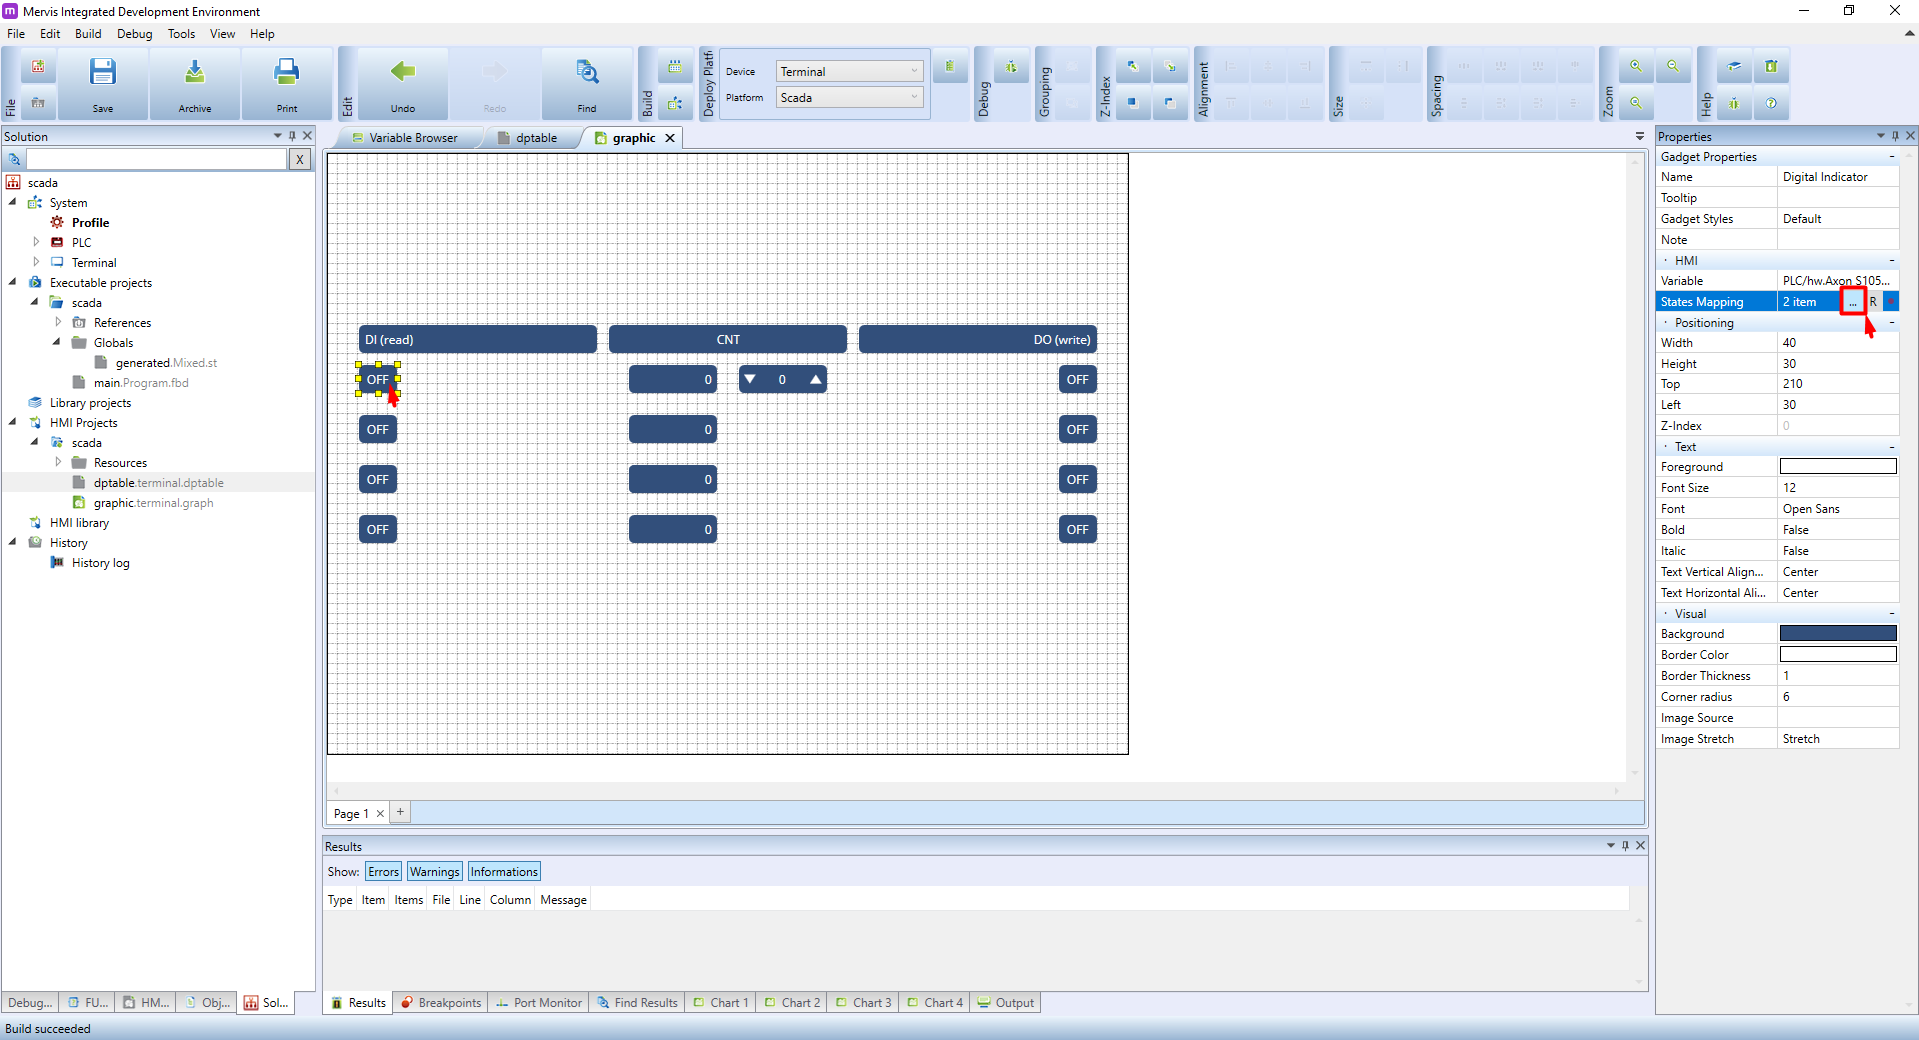
Set the states mapping to match the previous setting for the data point in the table, i.e. ON and OFF.
With this setting, when the states are identical, text states are displayed for the graphic element in the diagram. If you want the text not to be visible (e.g. because you want to replace the states ON and OFF with an image - light, pump, etc.), this can be achieved by setting the foreground colour to “transparent ”.

Images can be set arbitrarily since they do not create duplicates.
Analog inputs
For analog inputs, the setting is more complicated and it is necessary to set more parameters. Again, however, they must be the same for the same data points in the table and in the graphic scheme.
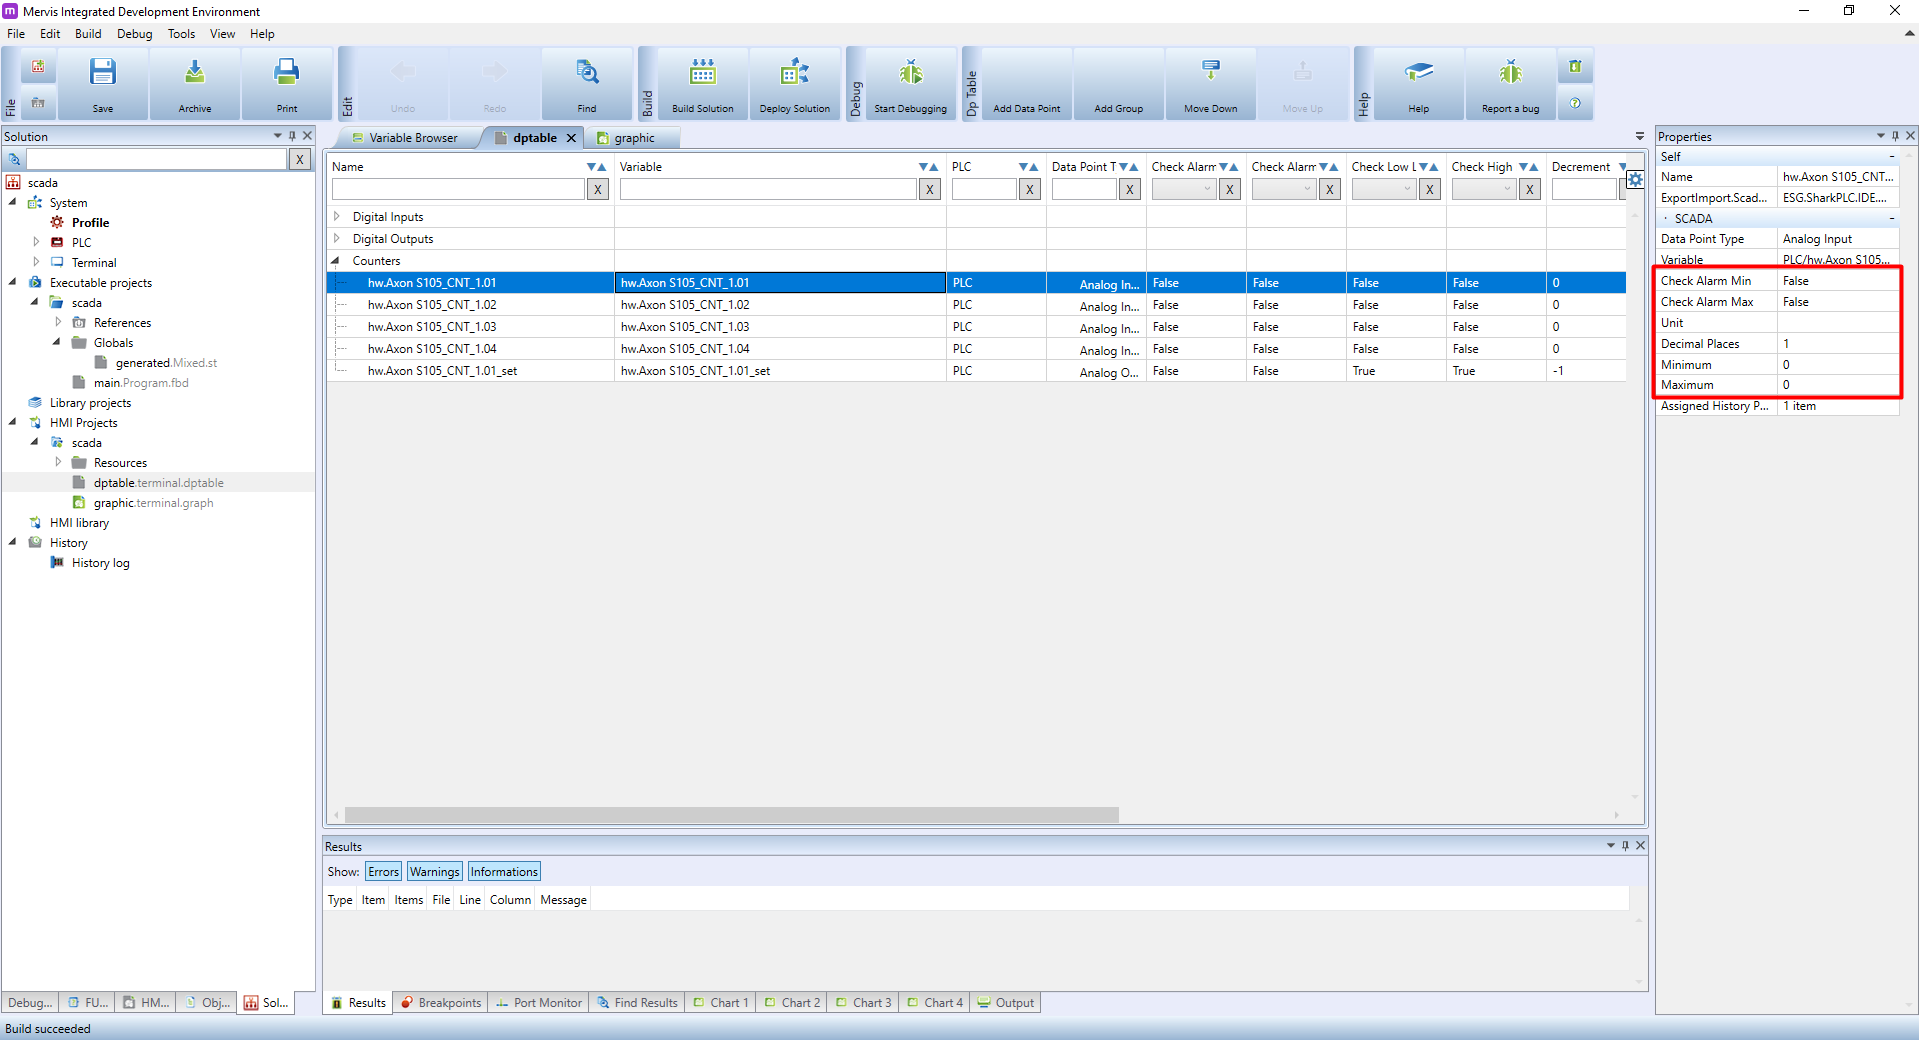
First, open the data point table in the Mervis IDE and click on the row with the required analog input. The right panel shows its properties, here are the important parameters:
- Check Alarm Min - “False” must be turned off
- Check Alarm Max - “False” must be turned off
- Unit - must be identical (watch out for invisible characters)
- Decimal places - must be the same (integer)
- Minimum - must be 0
- Maximum - must be 0
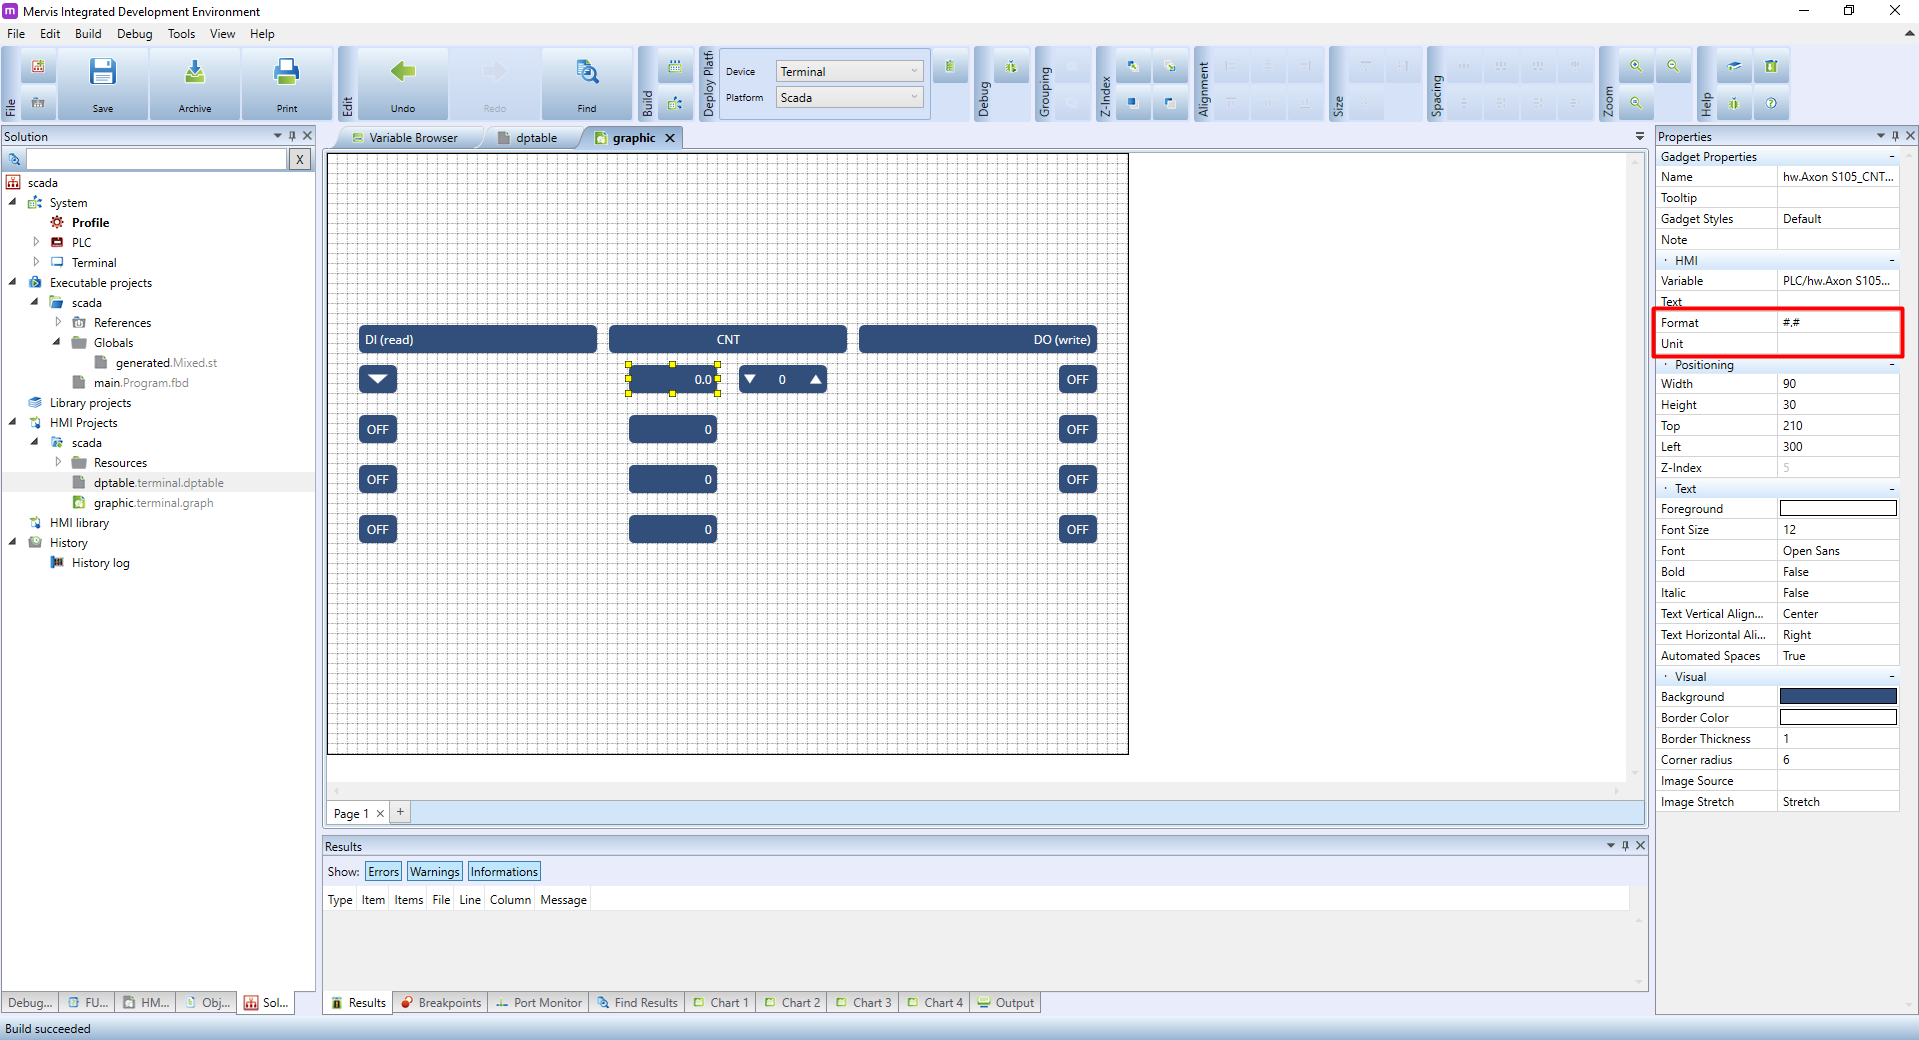
Now open the graphic scheme for Mervis SCADA and look for the “Value indicator” element bound to the same variable you set in the previous step. Click on this element to display its properties in the right panel, here are the important parameters:
- Format - number of crosses # after the dot indicates the number of decimal places
- Unit - must be the same as the unit in the previous step
Analog outputs
You will find even more parameters that need to be set for analog outputs. Here, too, they must be identical for identical data points in the table and in the graphic scheme.
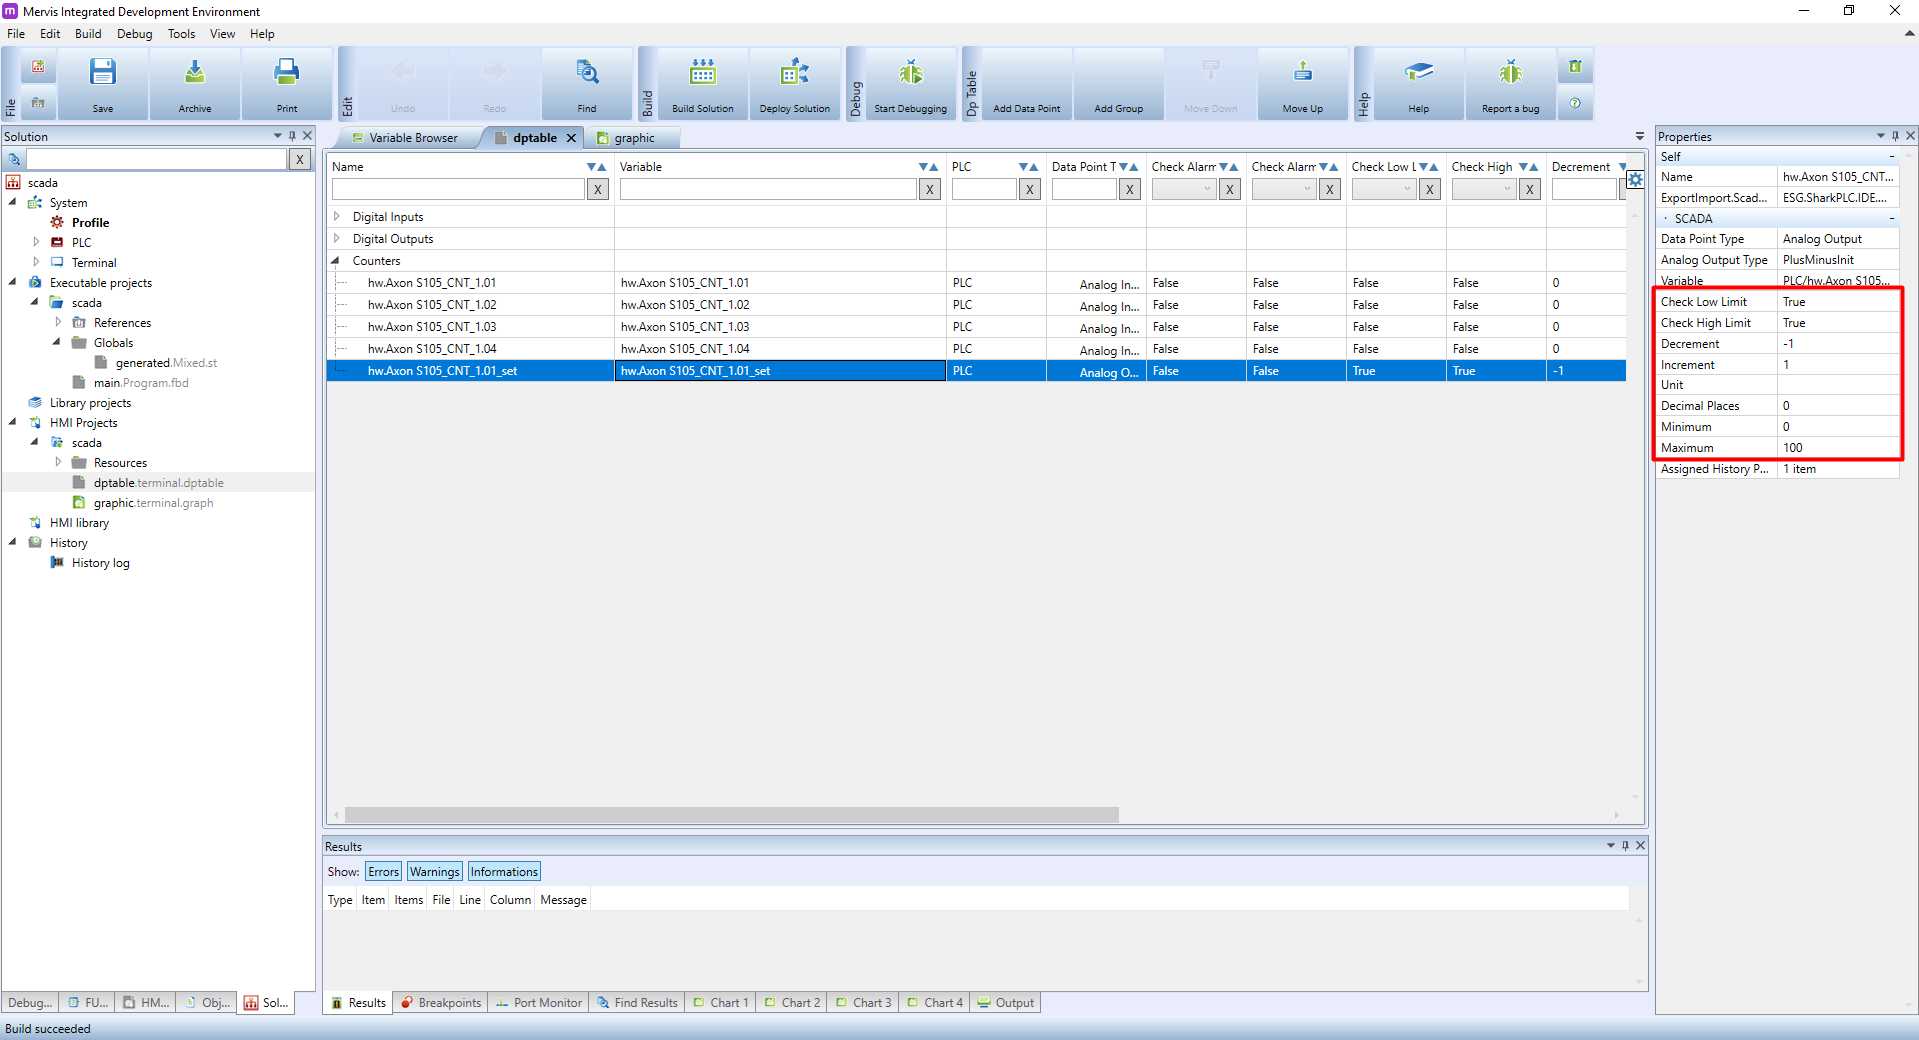
First, open the data point table in the Mervis IDE and click on the row with the required analog input. The right panel shows its properties, here are the important parameters:
- Check Low Limit - “True” must be turned on
- Check High Limit - “True” must be turned on
- Decrement - used to set the stepping using the buttons, the value must be the same as the increment, only negative
- Increment - the value must be the same as the decrement, only positive
- Unit - must be identical (watch out for invisible characters)
- Decimal Places - must be the same (integer)
- Minimum - can be set, but must be the same
- Maximum - can be set, but must be the same
Now open the graphic scheme for Mervis SCADA and find the “Analog Setter” element bound to the same variable you set in the previous step. Click on this element to display its properties in the right panel, here are the important parameters:
- Format - number of crosses # after the dot indicates the number of decimal places
- Unit - must be the same as the unit in the previous step
- Min. value - must be the same as the minimum in the last step
- Max. value - must be the same as the maximum in the previous step
- Step value - must be identical to the increment (decrement) from the previous step

Now you have all the necessary parameters set for these data points so that duplications do not occur.