This is an old revision of the document!
Uploading a RunTime configuration
Each time you wish to upload RT configuration changes, make sure, that you did not download the PLC config beforehand. We also recommend to double-check settings of your network card and make sure it is compatible with the required configuration (mainly if the DHCP client is enabled). After these checks, set the configuration.
After finishing the configuration, right-click on the PLC, select PLC Operation → PLC Setup → Upload configuration
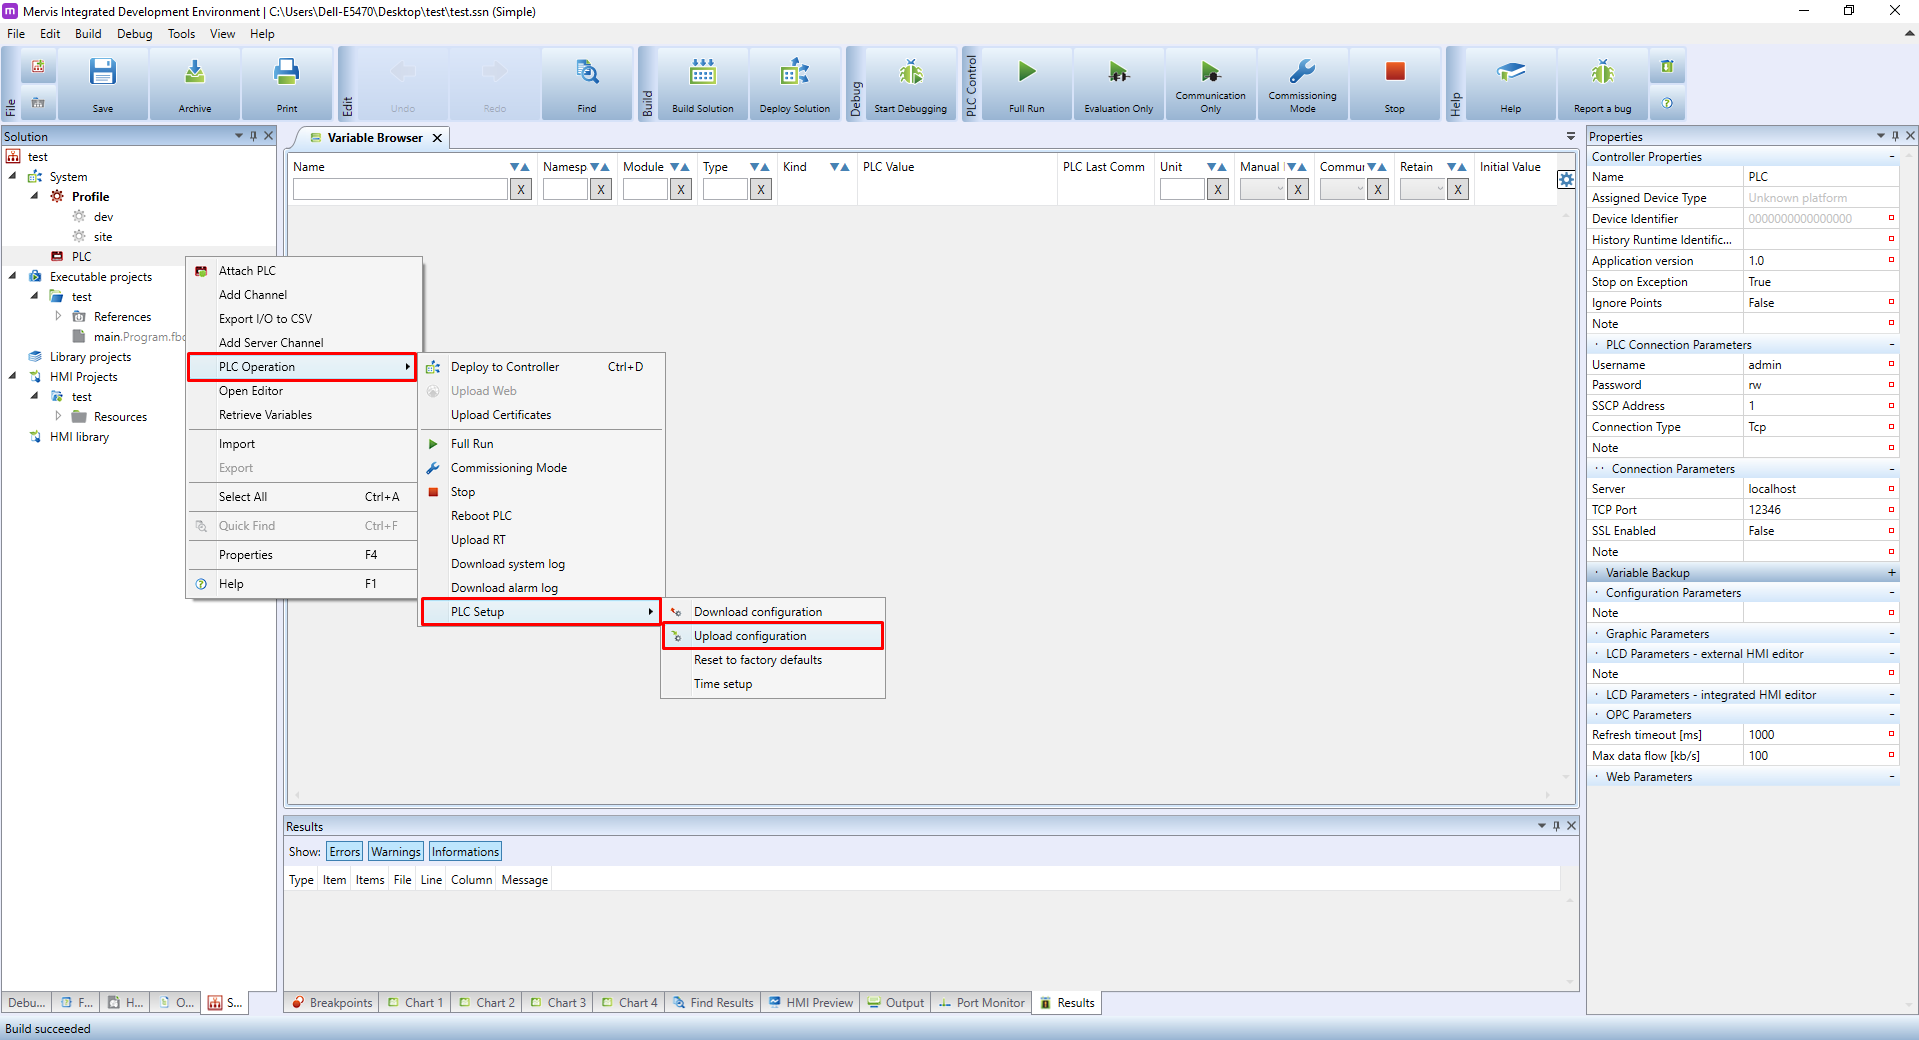
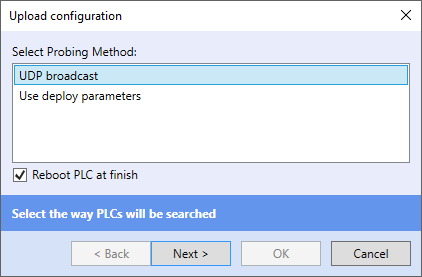
Now select UDP broadcast and click on Next, prompting the IDE to search for your PLC. Upon detecting the previously attached PLC the configuration will be uploaded into it.
UDP broadcast can be used only in a local network, and as such utilizes MAC addresses. It allows you to detect PLCs without the need to manually enter their IP address - this is also helpful in situations where you disable DHCP by mistake, or you set a wrong IP address.
Note: If you set up a new login and password, the old credentials are still used for the configuration upload. After a successful upload, you need to enter the new credentials again into PLC Connection Parameters. From that moment a new password is saved and each project uploaded into the PLC must use the new credentials.
For uploading configurations or projects, the fast and reliable TCP is used. However, this method also requires you to know connection parameters, such as IP address. Through the TCP it is possible to communicate also via a proxy server.
Caution: if you are unable to upload configuration, upload a new project etc. after a password change, the most likely cause is you uploaded a wrong password by error. If you can't remember the correct password, you can reflash the PLC's operating system as a last-resort solution. See the corresponding guides for Unipi Axon and Unipi Neuron/Unipi 1.1.

Configuration explained
The following articles will explain all configurations you need to perform before uploading the RT:
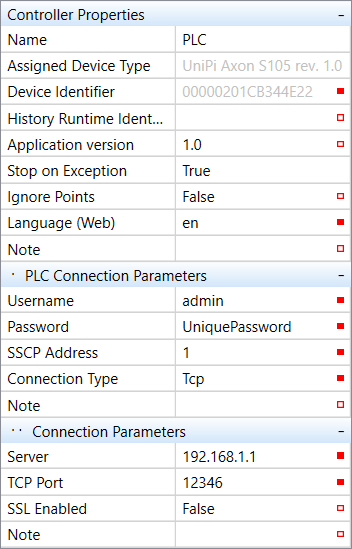
Controller properties
- Name → name of the PLC
- Device Identifier → MAC address
- Assigned Device Type → Model of the PLC
- History Runtime Indentification → Name used by Mervis DB
- Application version → enter the version of your program
- Stop on Exception → reaction to any forbidden program exceptions
- Ignore Points → (non)indication of memory usage
- Language (Web) → sets the language used by Mervis HMI (CZE/ENG)/
PLC Connection Parameters
- Username → the current username
- Password → the current password
- SSCP address → address of the PLC in SSCP protocol, used by both TCP and serial communication
- Connection Type → type of communication with the PLC
Connection Parameters
- Server → PLC address for communication
- TCP Port → TCP port number, default value = 12346
- SSL Enabled → SSL protocol settings
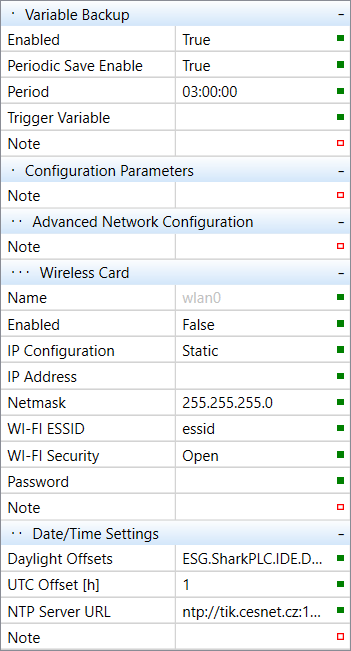
Variable Backup
- Enabled → enables the variable backup
- Periodic Save Enable → enables a periodic save
- Period → time period of the backup
- Trigger Variable → rising edge on the selected variable will trigger the save
Date/Time Settings
- Daylight Offsets → sets timezone and and time offset
- UTC Offset [h] → a difference between the selected timezone and the UTC timezone - information value only
- NTP Server URL → time synchronization server
- Additional info about time/date settings is available in this tutorial
Wireless Card
- Name → name of the Wi-Fi adapter
- Enabled → enables the Wi-Fi adapter
- IP Configuration → selects between static, dynamic and no IP address
- IP Address → IP address of the particular Wi-Fi adapter
- Wi-Fi ESSID → name of the network the PLC will connect to
- Wi-Fi Security → open, WEP, WPA, WPA2
- Password → password to the Wi-Fi network (if needed)

Networking
- Use DHCP → enables automatic allocation of IP addresses in the network
- IP address → IP address of the particular adapter
- Netmask, Gateway, DNS → network settings
- Enable Configuration over UDP → enables the configuration services (depends on network security)
- Enable Web Server → enables web server
- Web Server Port → TCP port used for connecting to web server ==== Mervis DB Parameters ==== * Enabled → enables saving into database * URL → database address * Communication period [min] → /interval of storing the internal buffer into database
- User Name → database access login
- Password → database access password
Proxy Parameters
- Enabled → enables connection to proxy server
- Proxy ID → proxy identification, used by PLC for accessing the proxy server
- URL → address of the proxy server the PLC should connect to
- Keep-alive Period → time interval of control messages (serves for prevent closure of TCP connection, recommended value is 10 seconds)
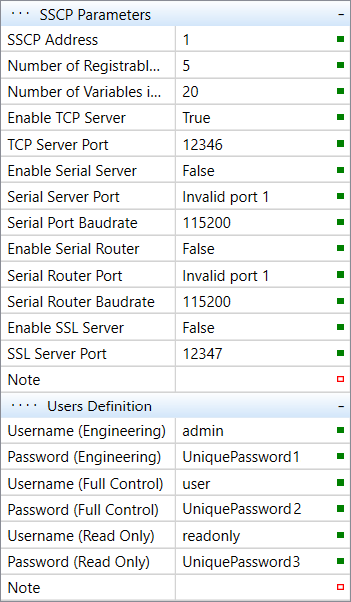
SSCP Parameters
- SSCP address → address of the PLC for SSCP protocol, used both for TCP and serial communication
- Number of Registrable Groups → number of variable groups
- Number of Variables in Group → number of variables in the variable group
- Enable TCP Server → enables the TCP communication
- Enable Serial Server → enables the serial communication
- Serial Server Port → TCP port number, default value = 12346
- Enable Serial Router →
- Serial Router Port →
- Serial Router Baudrate → serial line transmission speed
- Enable SSL server → enables SSL secure transmission
- SSL Server Port → number of the secure communication port, default value = 12347
Users Definition
- Username (Engineering) → user with full access to the PLC
- Password (Engineering) → his password
- Username (Full Control) → user able to read from or write into variables
- Password (Full Control) → his password
- Username (Read Only) → user able only to read variables
- Username (Read Only) → his password
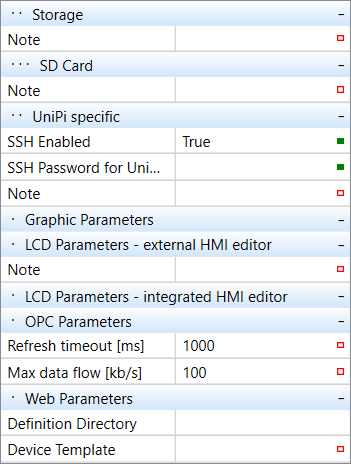
Unipi specific
- SSH Enabled → enables the SSH server connection
- SSH password for Unipi user → password for SSH access to the PLC (login: unipi)
OPC Parameters
- Refresh timeout [ms] → data refresh period
- Max data flow [kb/s] → max data flow from PLC to OPC