Table of Contents
Service mode
This mode serves for uploading or backing up the operating system, or for restoring access to the unit (restoring the default password via OS reflash, changing the network configuration or enabling/disablíng the SSH access). Only the service web interface is available in this mode, all remaining unit functions are disabled. This mode does not publish mDNS record.
Patron
Startup in a service mode
The SERVICE button, usually located next to USB labels, is important for accessing the service mode. The mode is indicated by the slow blinking of all LEDs both in the upper and lower LED row in section 1.
As the next step for both cases, enter the device's IP address into your web browser's address bar. Upon confirmation, you will be connected to the Unipi Patron service interface.
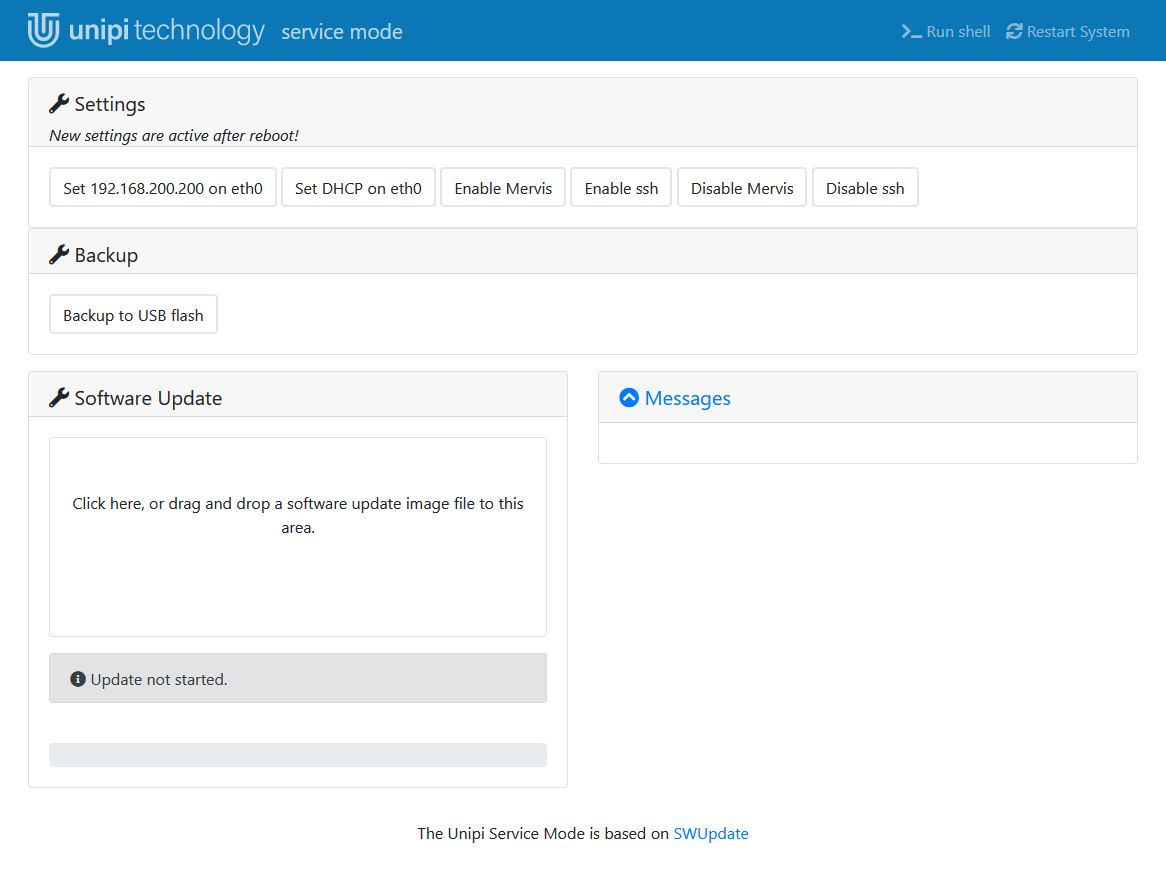
Description of the service web interface
Upon opening the service interface, you can see a blue ribbon on top of the screen and four dialogue windows.
On the right side of the ribbon, there are two buttons:
- Run shell → serves for access to a console with limited options (BusyBox)
- Restart system → reboots the unit
Under the ribbon are the following dialogue windows:
- Settings → contains four buttons, all of them useable only in the regular mode::
- Set 192.168.200.200 on eth0 → sets the ethernet interface to fixed 192.168.200.200 IP address
- Set DHCP on eth0 → sets the ethernet interface to obtain the address from DHCP
- Enable ssh → enables SSH access on port 22 (SSH is enabled by default)
- Disable ssh → disables SSH access
- Backup → contains the “Backup to USB flash” button which creates an OS back-up stored on a compatible USB flash disk (if inserted)
- Software update → serves for uploading the OS into the device
- A text field for uploading the archive.swu (containing the OS image) is placed directly under the window's label
- Messages → displays a list of performed operations
If Mervis is used, the Settings dialogue window can contain 3 additional buttons.
- Enable Mervis → launches Mervis RT on the device
- Disable Mervis → stops Mervis RT on the device