Table of Contents
First steps
Unipi 1.1
The Unipi 1.1 device does not contain internal storage, so it is necessary to purchase a memory card for each device. For more detailed information and recommendations on which card to choose, see the SD card article.
Available OS images for Unipi 1.1 devices are based on the Linux Debian system and may also contain pre-installed software (SW), such as Mervis.


Note:
This article assumes the choice of Base OS.

To use Mervis system the Mervis OS must be flashed onto the SD card. After connecting the power supply continue with First project with a Unipi unit.
Each Unipi 1.1 complete set is shipped with a request for a Mervis RT license.

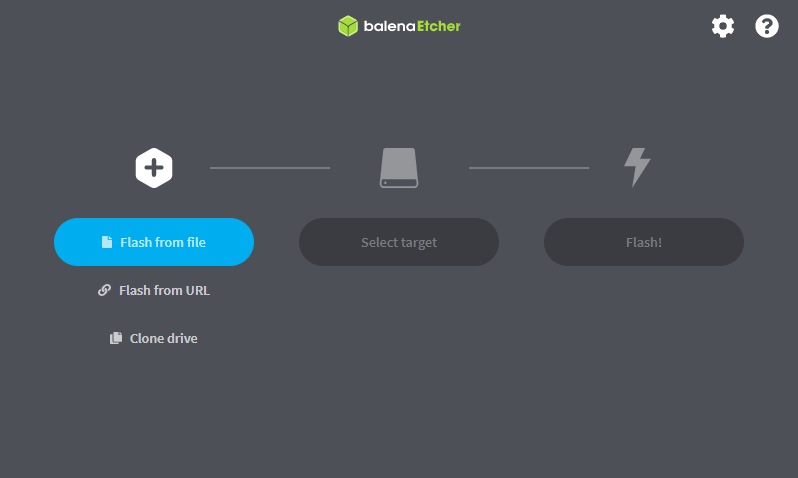
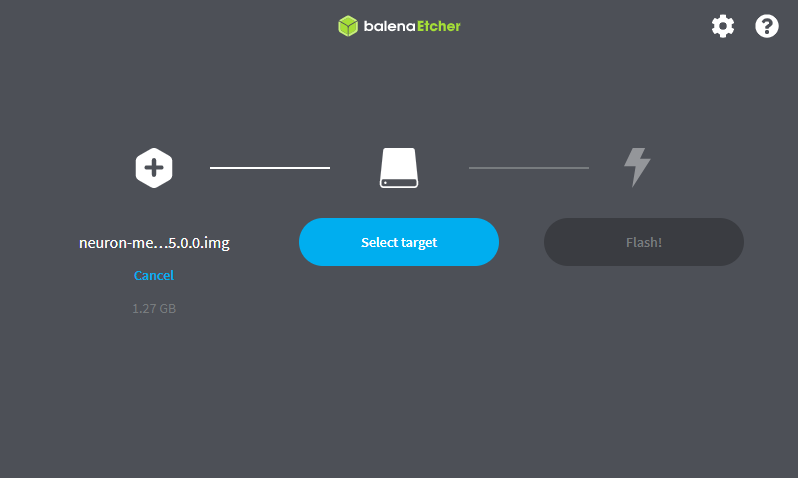
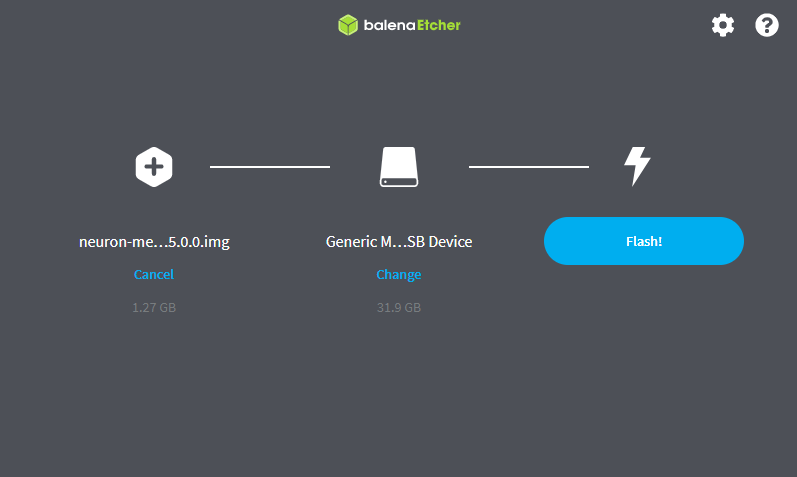
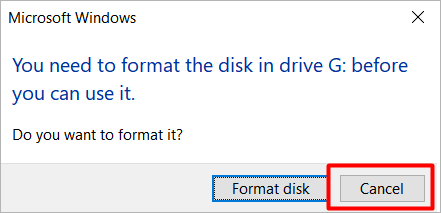
Flashing OS


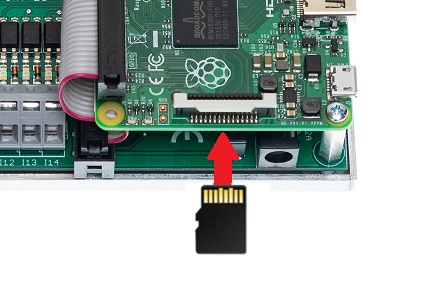
Connection
Before the first startup, it is necessary to insert an SD card with a flashed OS into the unit.
Instructions for flashing the OS can be found on this link.
Connecting peripherals, sensors, control elements and communication cables
Before connecting the power supply it is necessary to connect all other terminals and interfaces.
For now, only connecting an ethernet cable to the ethernet interface is needed.
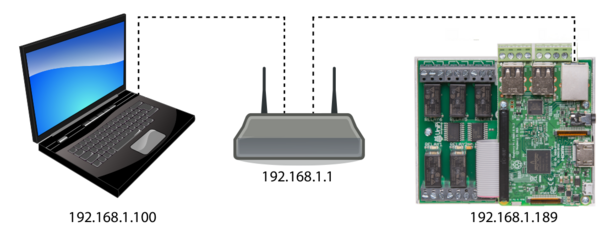
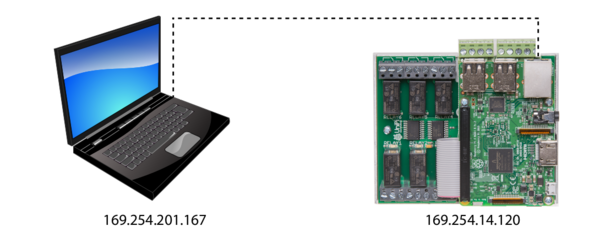
Unipi 1.1 / Lite can be connected as follows:
- To the network with DHCP server
- Directly to the PC/Notebook


Connecting the power supply


Warning:
Take extra care when plugging in, there is a risk of electric shock! Always ensure and check that the environment and device are disconnected from all voltage sources before starting work.

Attention:
Make sure to connect the power supply last. Connection and disconnection of other interfaces should be done with power supply disconnected; otherwise, the device can be damaged.
To ensure correct operation of the device, it is necessary to first connect the 5 V power supply. For information on recommended supply voltage tolerance and power consumption, refer to the manual.
Warning:
The device has appliance class III. To protect against electric shock the circuit should not leave SELV.
Accessing the device
The device will startup fully a few seconds after the power supply is plugged in, it may take even longer for the first startup.
Device address
Unipi 1.1 / Lite can be addressed with mDNS record. mDNS address format is as follows:
- [model]-sn[serial number].local
Example:
UNIPI1-sn126.local
Model and serial number can be found on the product label.
Note:
Alternatively the Unipi 1.1 / Lite can be addressed via its IP address.
The IP address can usually be found on the DHCP server or by using a network scanner (such as Advanced IP Scanner).

When the Unipi 1.1 / Lite is connected to a network without DHCP server (for example directly to a PC or laptop), the Unipi 1.1 / Lite assigns itself a random IP address from the range 169.254.XXX.XXX.
Connecting via SSH
The unit is now ready to house the implementation of any project done in Base OS. To install additional SW and to create control logic, it is necessary to connect via SSH using the address from previous step.
Username for the SSH connection is unipi. The user password is the one that was inserted on the SD before. For further information see Passwords.