Table of Contents
Node-RED for Unipi Axon
This manual will guide you through the entire process of installing Node-RED into your Axon unit. Before the installation please make sure your unit was delivered undamaged and without any visible defects.
Axon
To install Node-RED you need to re-flash the current OS in the unit by a new one. This specific OS containing preinstalled Node-RED software is available in the OS images, chapter Axon Node-RED OS. Download it and extract it into a new folder in your PC.
Flashing OS using the service web interface
Flashing OS via the service interface on Axon units can be performed in three ways:
1) In a local network (with DHCP):
- Connect the unit to your local network, plug in the power supply and wait at least for a minute before the unit boots and gets an IP address from DHCP. After that unplug the power supply
- Press and hold the Service button located (with exceptions) in the upper row of the connector labels to the left from USB port labels
- Plug in the power supply. After few moments the unit will switch to the service mode indicated by the slow flashing of all diodes in section 1 (except PWR and RUN)
- Now you can release the Service button.
- You now need to get the unit's IP address. You can obtain it either from the DHCP server or using a suitable application such as Advanced IP Scanner → user manual
2) Direct connection to the unit (without DHCP):
- Connect to the unit using a network cable (RJ45)
- Press and hold the Service button located (with exceptions) in the upper row of the connector labels to the left from USB port labels
- Plug in the power supply. After few moments the unit will switch to the service mode indicated by the slow flashing of all diodes in section 1 (except PWR and RUN)
- Now you can release the Service button.
- Set the PC's IP address to
192.168.200.100, mask255.255.255.0 - The Axon's IP is now set to
192.168.200.200
3) Via a Wi-Fi hotspot
- Press and hold the Service button located (with exceptions) in the upper row of the connector labels to the left from USB port labels
- Plug in the power supply. After few moments the unit will switch to the service mode indicated by the slow flashing of all diodes in section 1 (except PWR and RUN)
- Now you can release the Service button.
- Connect to Wi-Fi network with SSID:
UNIPICONFIG, usingunipi.technologyas password. Wait until your unit obtains an IP address from the DHCP server running in the unit - The Axon's IP is now set to
192.168.201.1
Next steps:
- Enter the unit's IP address into your web browser. After confirmation, the Axon service interface will display
- Drag the archive.swu file from the OS image archive and drop it into the Software dialogue window
- Wait until the unit finishes the entire process. You can monitor its progress in the Messages dialogue window
- The unit will automatically reboot
Flashing the OS using USB flash disk
- Prepare a USB flash disk with a capacity of at least 2 GB and a FAT32 partition
- Copy the whole content of the ZIP archive to the flash disk
- Insert the flash disk into the unit's USB2 port
- Press and hold the reset button located next to the upper row of connector labels
- The unit will automatically start the reflashing process, indicated by progressive blinking of LEDs. You can now release the reset button
- Once the LEDs stop blinking the reflash is completed. After that, the Axon will automatically reboot to its normal state
Only the USB2 port can be used for reflashing.
In case the used flash disk is not compatible, Axon will boot to the Service mode and the progressive blinking of LEDs is not indicated. In this case it necessary to use different flash disk or the above mentioned Service web interface.
Pre-installed SW
The OS image you just uploaded into your unit also contains the preinstalled EVOK open-source software - an Unipi-developed application programming interface (API) for direct communication with Unipi hardware.
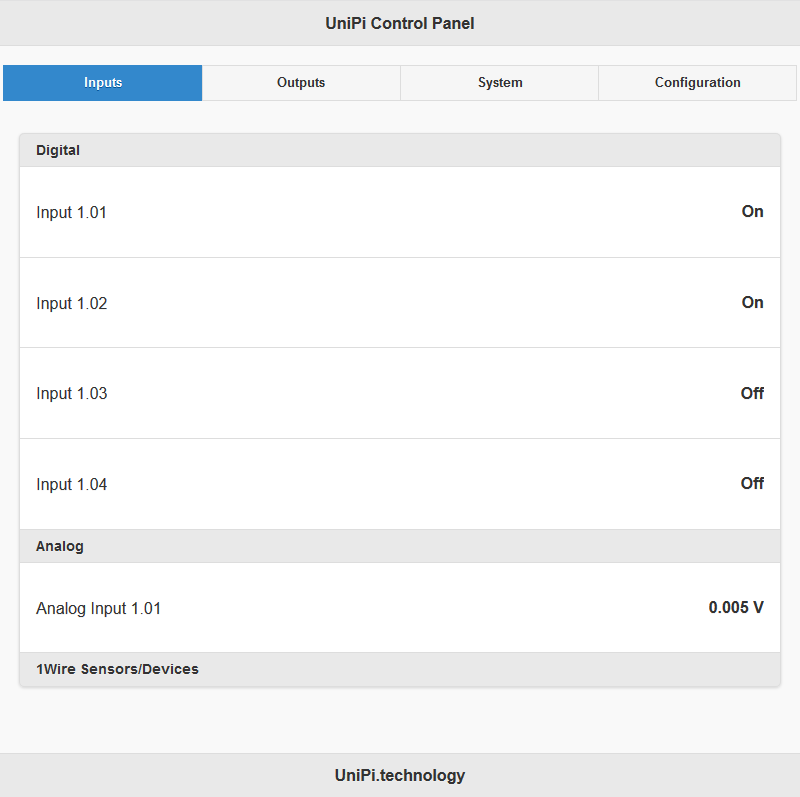
Also available is a practical demonstration of using the API in the form of a simple web application (Unipi Control Panel) serving as a user interface for all inputs and outputs on the unit. To access this interface, open your web browser and enter the IP address of your unit with the port number :80. Port number is optional, as it is the default webserver port.
For example:
192.168.1.10
or
192.168.1.10:80
The application's interface looks like this:
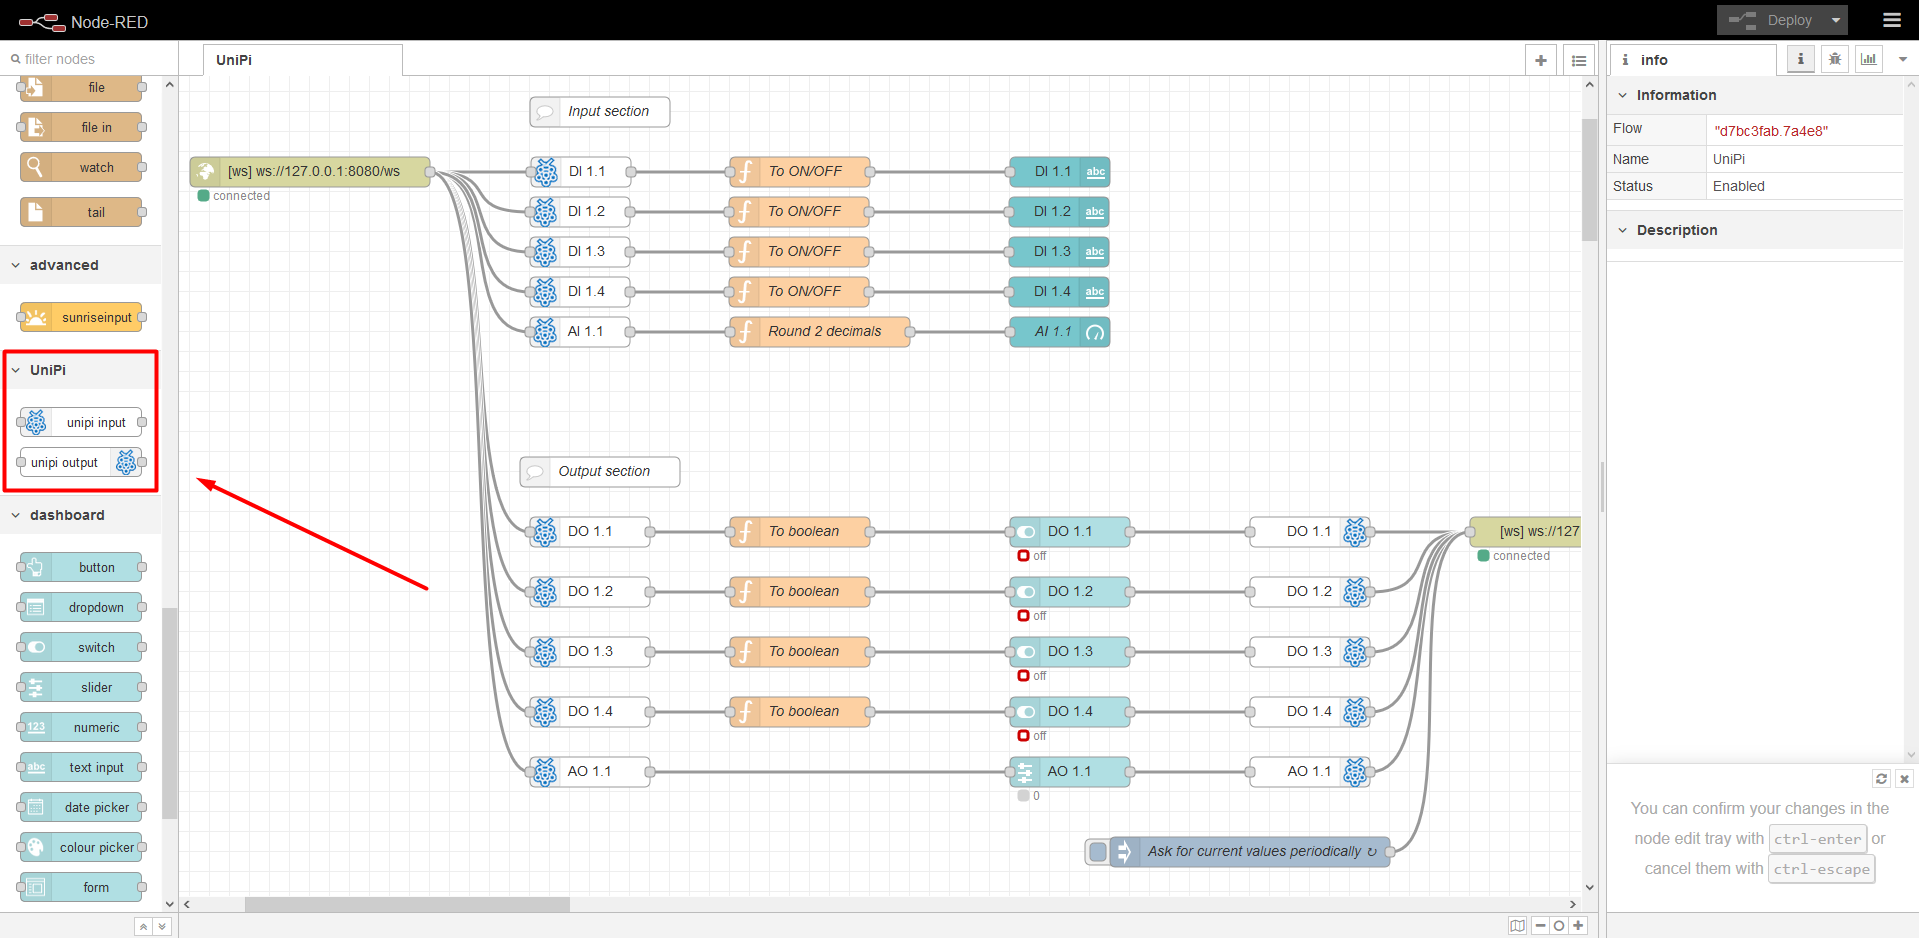
Another software included in the disk image, which is now also uploaded in your unit, is Node-RED. It is an open-source programming tool for connecting hardware devices, various APIs or online services. In this case, the Node-RED software already contains the EVOK API. This API is represented by a pair of nodes in the left panel, section Unipi - unipi input and unipi output made to control both analog and digital inputs and outputs.
Connecting to the Node-RED interface
To access the Node-RED programming interface, open a web browser and enter the unit's IP address into the address tab. Don't forget to add the :1880 port number.
For example:
192.168.1.10:1880
The following interface will appear:
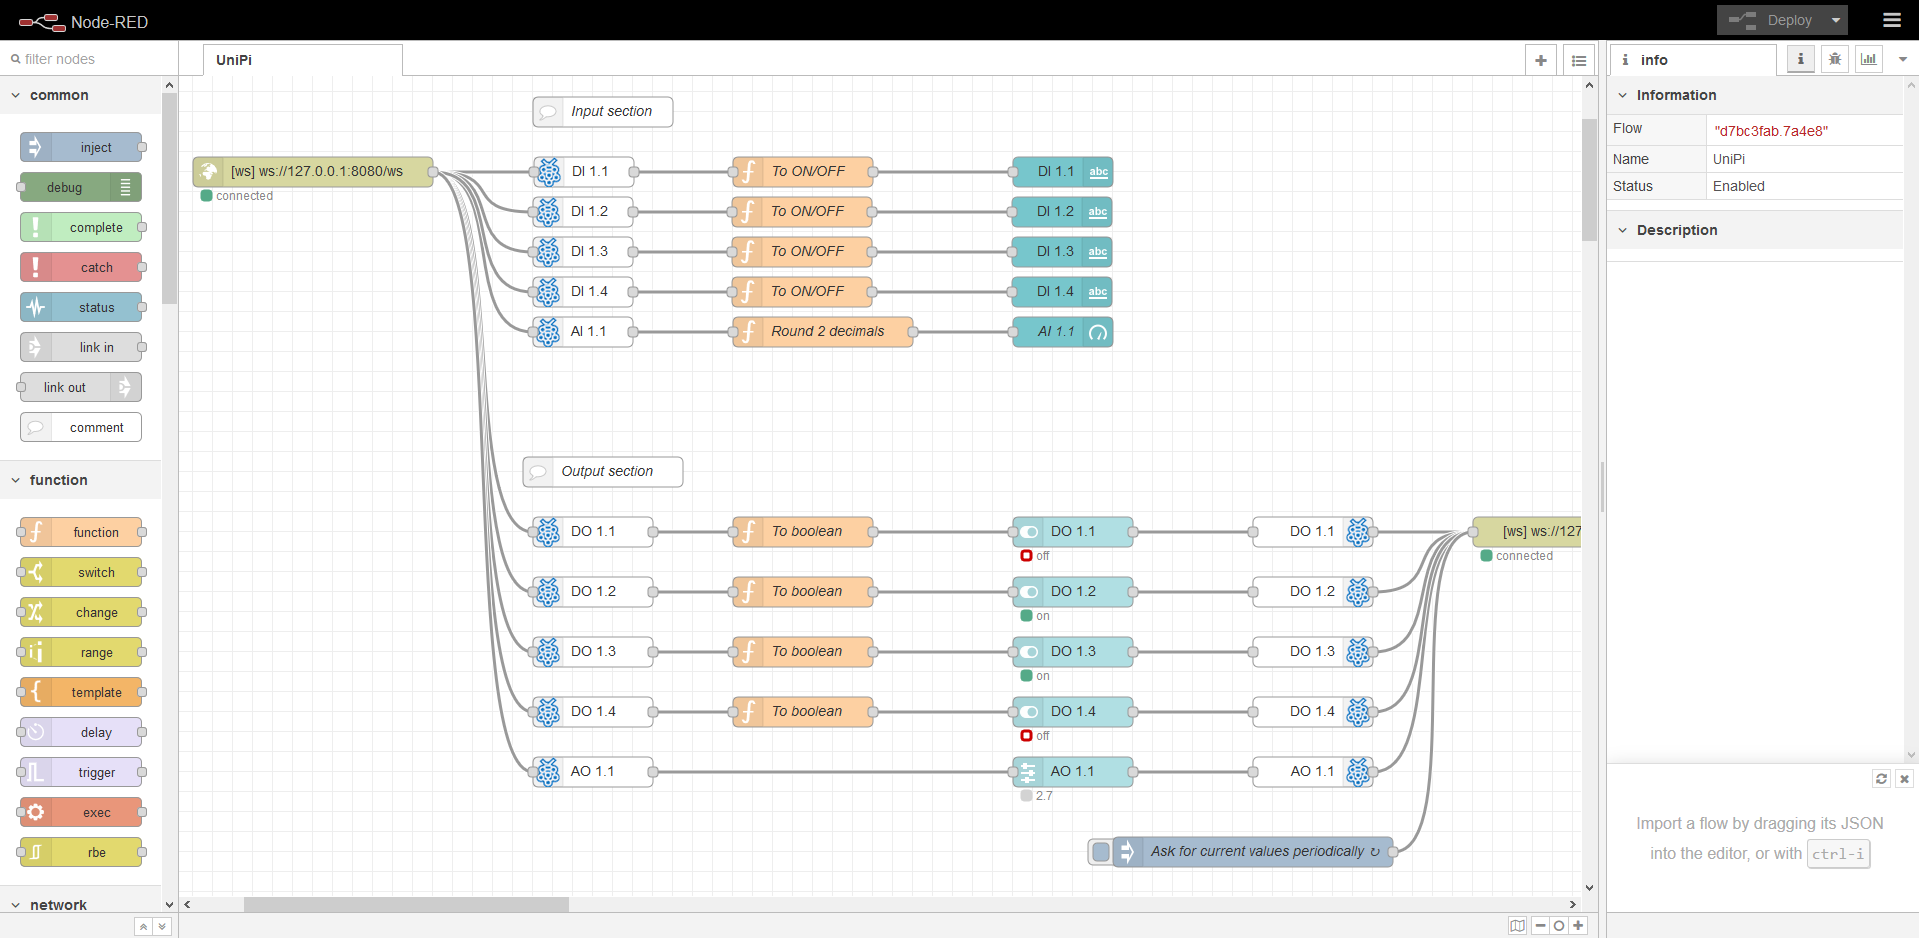
You have probably noticed the interface already contains a project. It is a demonstration project for reading inputs and writing to outputs, which is connected with a web user interface → so-called Dashboard. This project (flow) is available for download at the end of the article.
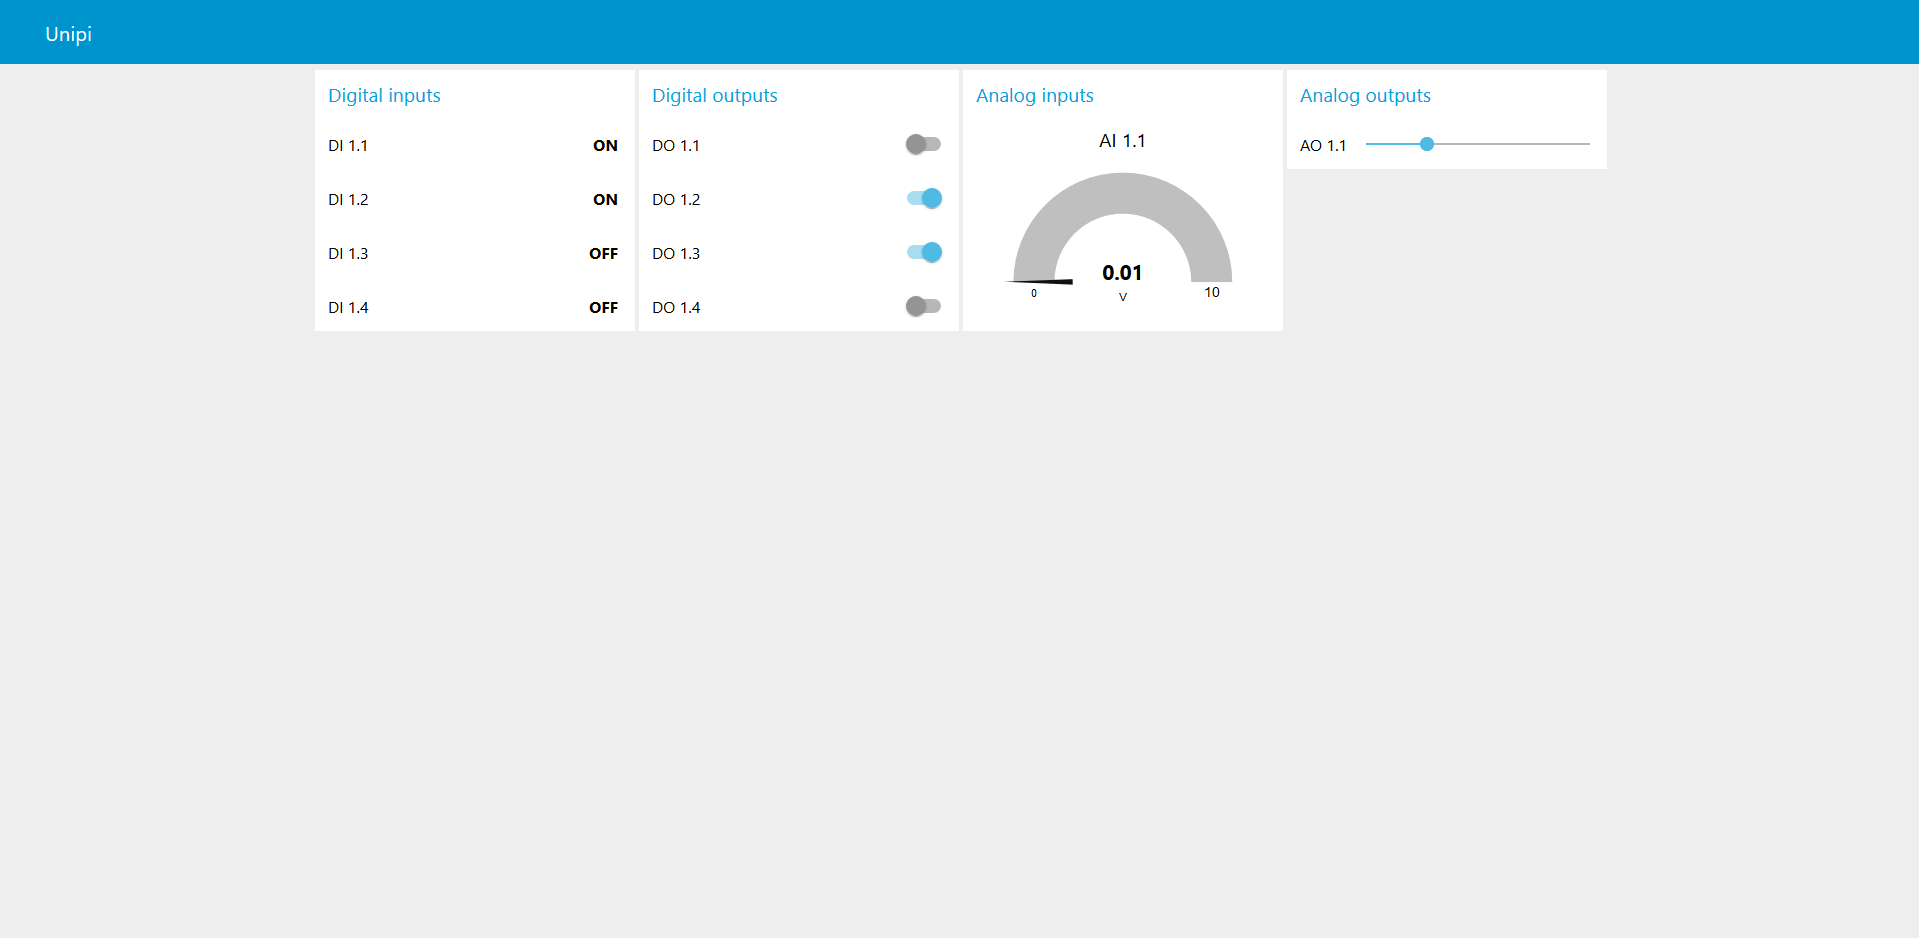
To access the interface, add /ui suffix behind the address with the port number.
For example:
192.168.1.10:1880/ui
The following interface will appear:
You now have everything you need to create your projects.
Node-RED security
If you did not set up login using the following guide, you expose yourself to a risk of unauthorized access to the Unipi unit. That may lead to potentially dangerous changes resulting in downtimes or limitations. At the worst, unauthorized tampering can damage connected technologies or endanger personnel at installation sites.
That said, it is very important to have your system secured every time you create a new project.
As you will communicate with the unit using the SSH protocol, you need to know the unit's IP address and to have an SSH client installed on your unit. Among the most frequently used programs is the PuTTy application - if you don't have it already, follow this guide.
For transfer files between your PC and the Unipi unit you can use the WinSCP utility. Login is the same as for SSH.
After that, just follow this guide on the official Node-RED webpage.
Downloadable projects
Node-RED projects are called flows. On the link below you can download a file with a flow for Unipi Patron / Neuron / Axon units.