Connecting Unipi units to the Internet using an external LTE modem
This tutorial describes the connection of any Unipi controller to the Internet using an LtAP-LTE device (RB912R-2nD-LTm&R11e-LTE) from Mikrotik manufacturer and its configuration. This application is particularly suitable for Unipi Neuron and Gate, as well as Patron, Axon, and Unipi 1.1. It is also a great choice for existing installations that need to be supplemented with LTE connectivity.
Patron
Neuron
Gate
Unipi 1.1
Axon
Used Elements
- Network cable (RJ45, Cat6)
- LtAP-LTE (RB912R-2nD-LTm&R11e-LTE) + accessories
- Computer with internet browser (for LtAP-LTE configuration)
Description
LtAP-LTE is a small waterproof (IP54) device combining LTE modem, WiFi AP/client, and GPS. It is suitable for use on buildings, but also in vehicles. Using the included PoE injector, power supply (in the range of 12-57 V⎓) and data can be combined to the device with only one network cable (min. UTP Cat5e). Since the package also includes a DC jack, it is possible to power the LtAP-LTE from the same power supply that is used to power the Unipi unit. However, for this connection, we do not recommend using the power supply from the LtAP-LTE package, but another power supply with an output current suitable for powering both devices.
The device is connected to the Unipi units via a network cable. If the LtAP-LTE is correctly configured and has access to the Internet, the Internet connection is shared with the Unipi unit.
If the LTE or GPS signal is insufficient, the device can be modified and expanded with external antennas.
Package contents Mikrotik LtAP-LTE
- LtAP-LTE (RB912R-2nD-LTm&R11e-LTE)
- Passive PoE injector
- DC jack
- 24 V⎓ / 1.2 A power adapter (not for Unipi power supply)

Fig.1 - Passive PoE injector

Fig.2 - DC jack
Connection

Preparation of LtAP-LTE device
 Before connecting the power supply, a SIM with the set data connection must be inserted in the device. The device has two SIM slots labeled slot 1 (one dot) and slot 2 (two dots).
For older firmware (FW), slot 2 is considered the primary slot for SIM. As of FW v6.48.2, slot 1 is already the primary one. It may happen that the device does not connect to the mobile network (LTE) after FW upgrade. The solution is to move SIM between slots (with power off).
First connection to LtAP-LTE
The device must be configured before use. Connect to the device with a network cable or WiFi. The device contains a DHCP server that assigns an IP address from 192.168.88.10 to 192.168.88.254 to all connected devices.
The device can be configured in the WebFig web interface. Use the IP address 192.168.88.1 to connect to this interface. After this first connection, an automatic login will take place and the following interface will be displayed:
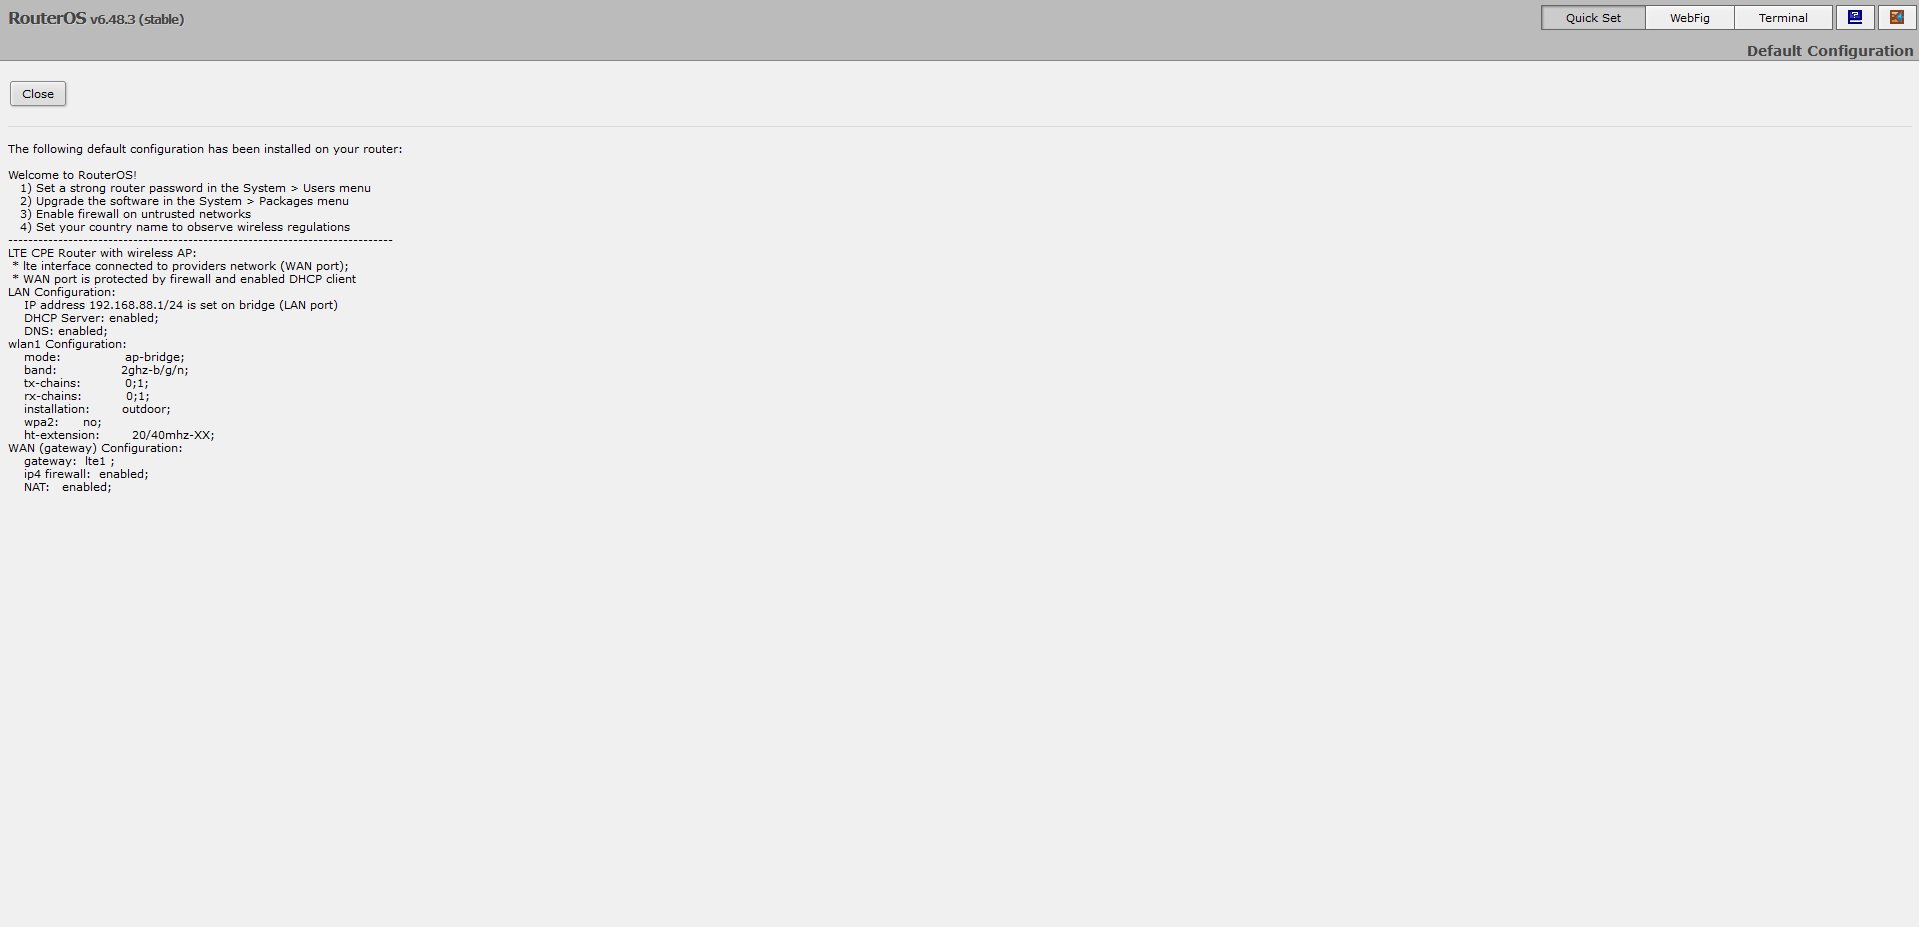
Click Close. This will display a simplified interface in which it is possible to set most of the required settings, including the password for WiFi, PIN to SIM, etc. Unfortunately, it is not possible to set the APN for the connection or update the FW. This additional setting is only possible from the full-featured WebFig interface. Click the WebFig button in the upper right corner.
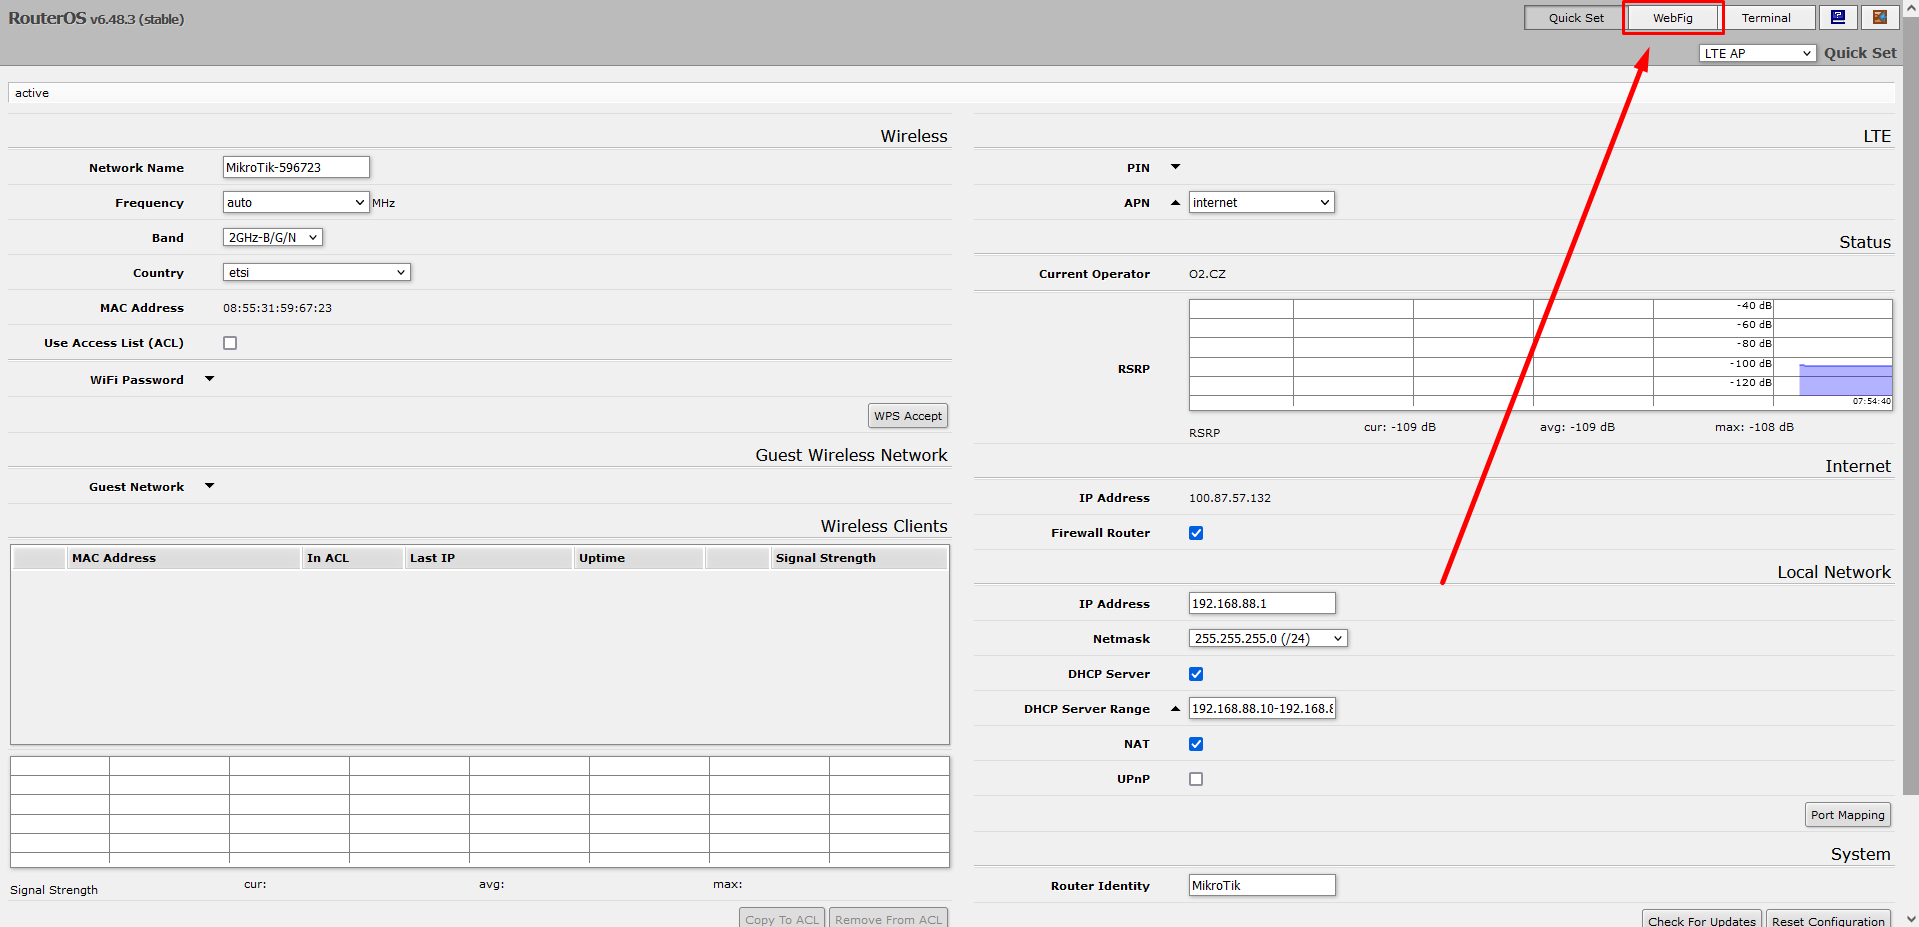
In the full interface, you will find the left sidebar. Some pages also have a topbar for additional changes.
Setting the main password
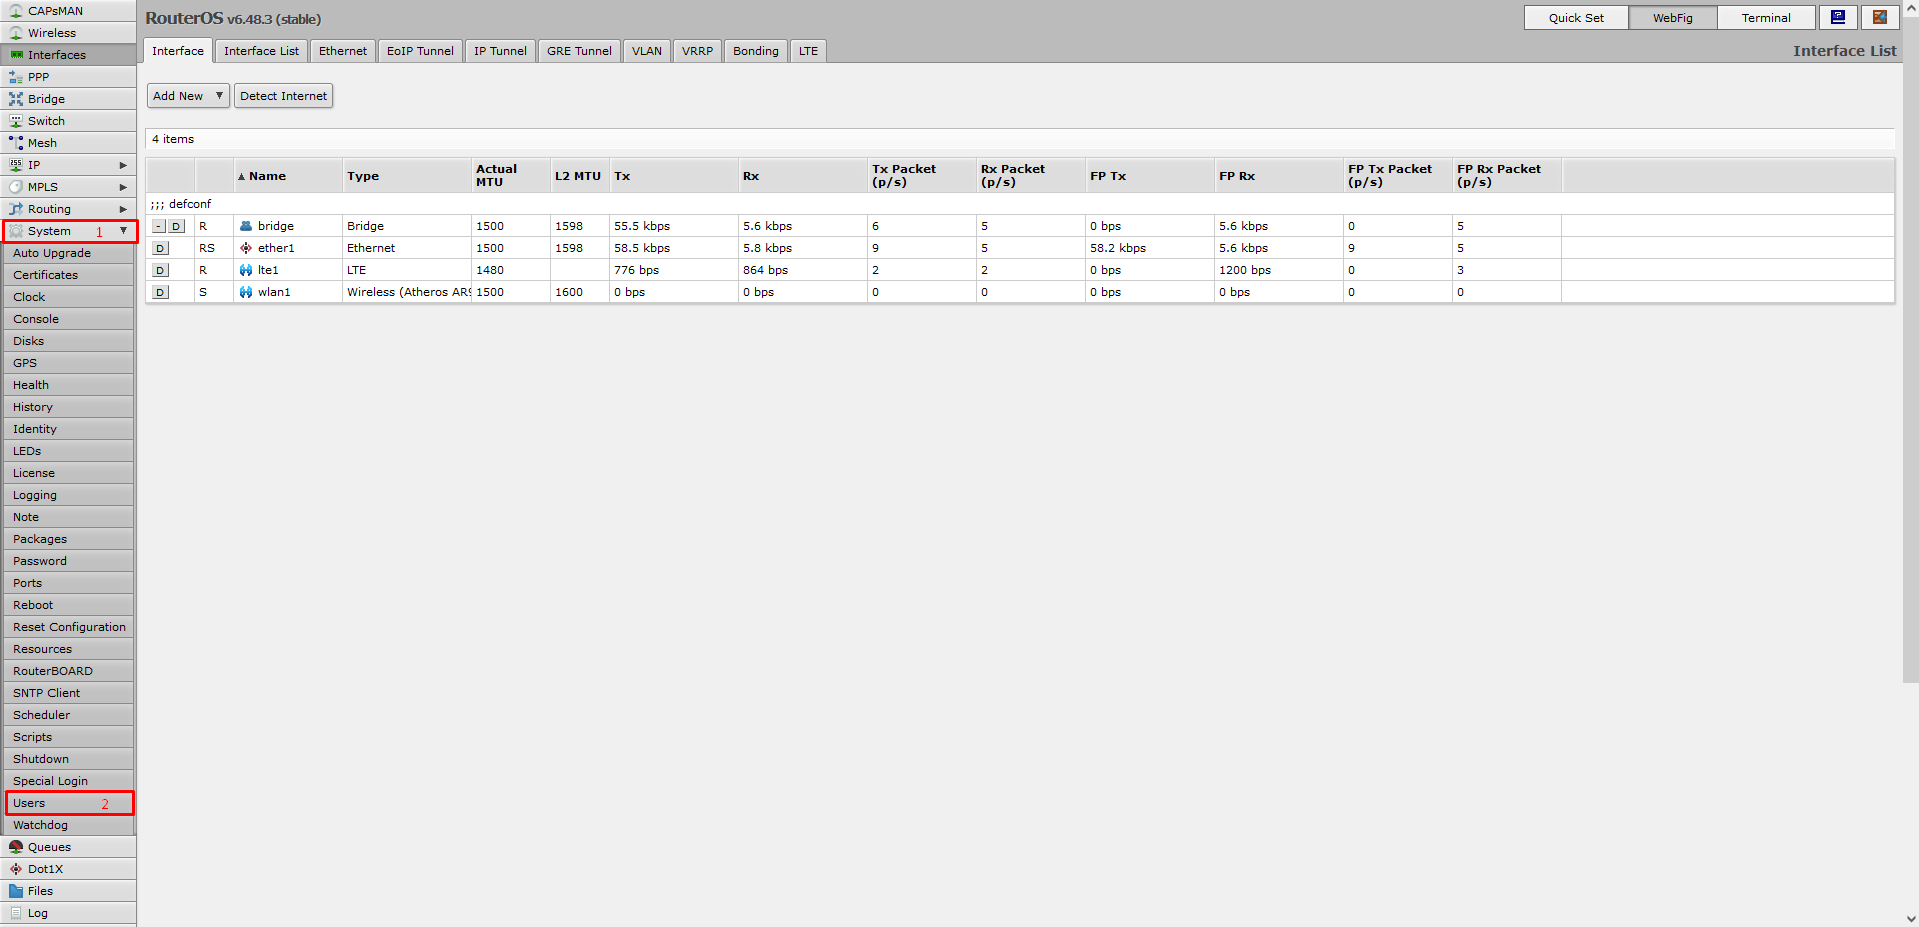
The first important step is to set the main password. To set this, click the System button in the left sidebar, which displays additional items, and then click the Users button.
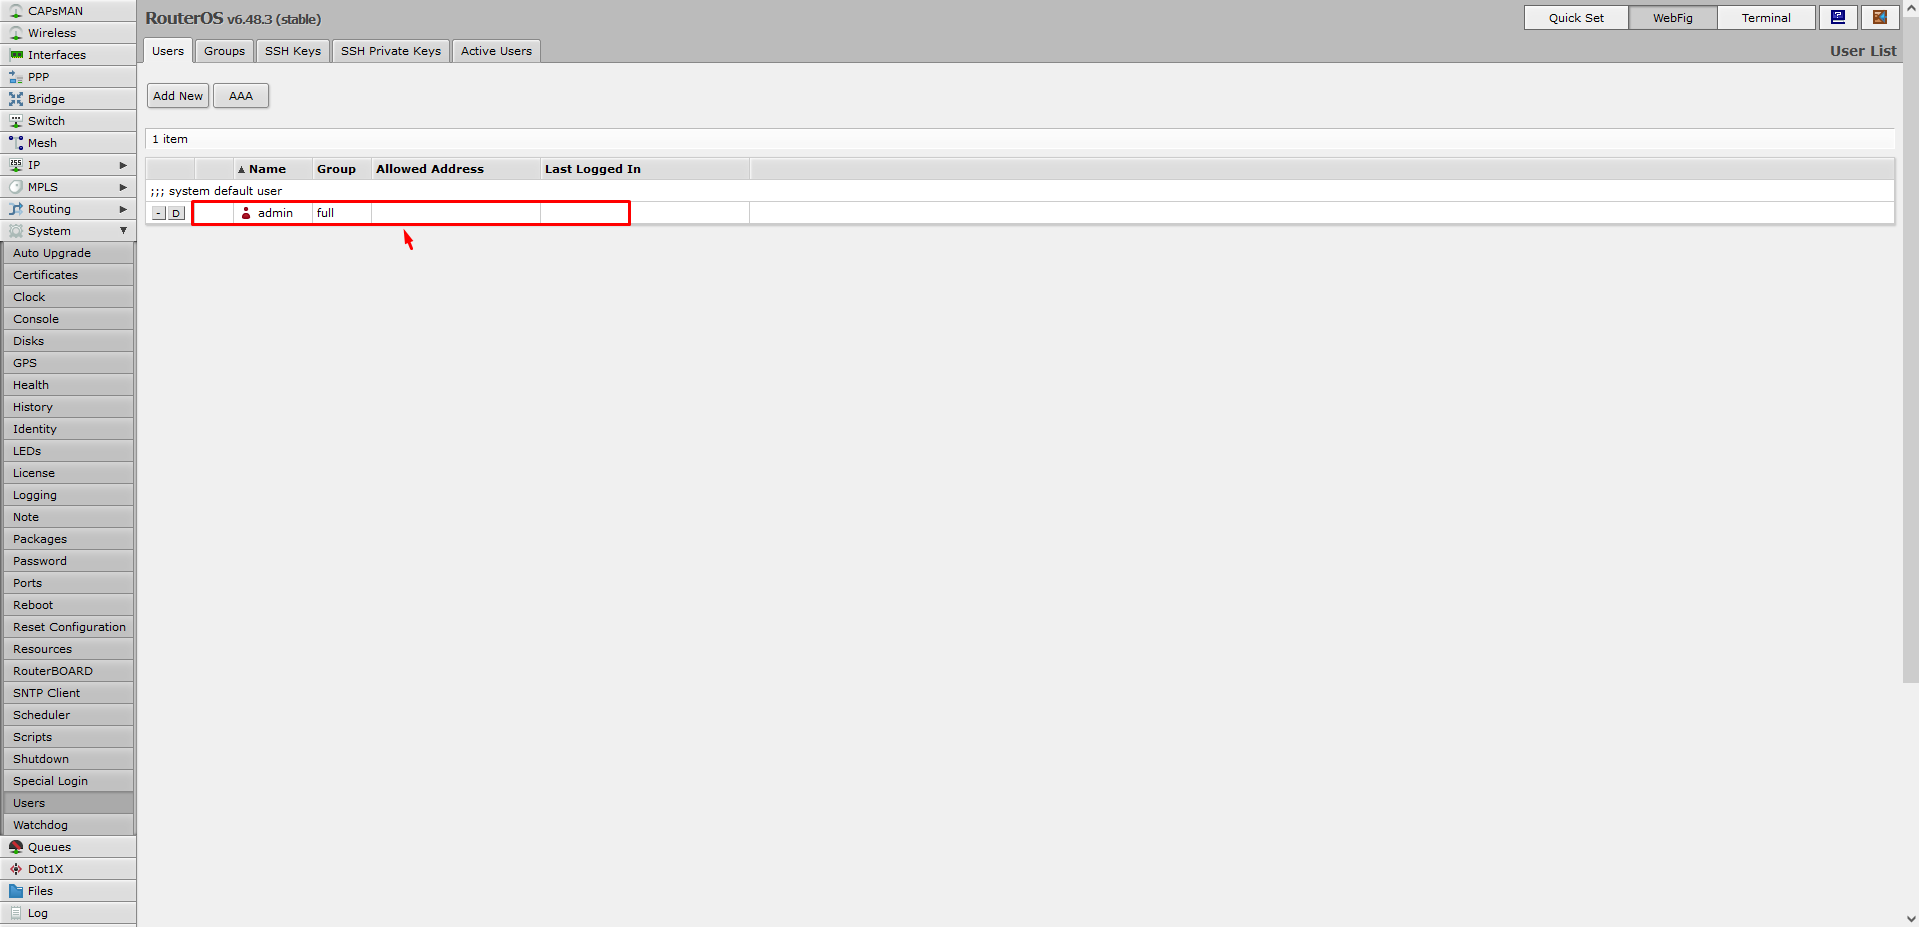
A list of all users is displayed, by default there is only the admin user. Therefore, click on the line with this user.
In the user settings, click the Pasword… button.

Set a strong password, we recommend using a combination of uppercase and lowercase letters, numbers, and characters. Then repeat the password, click the Apply button, and then OK.
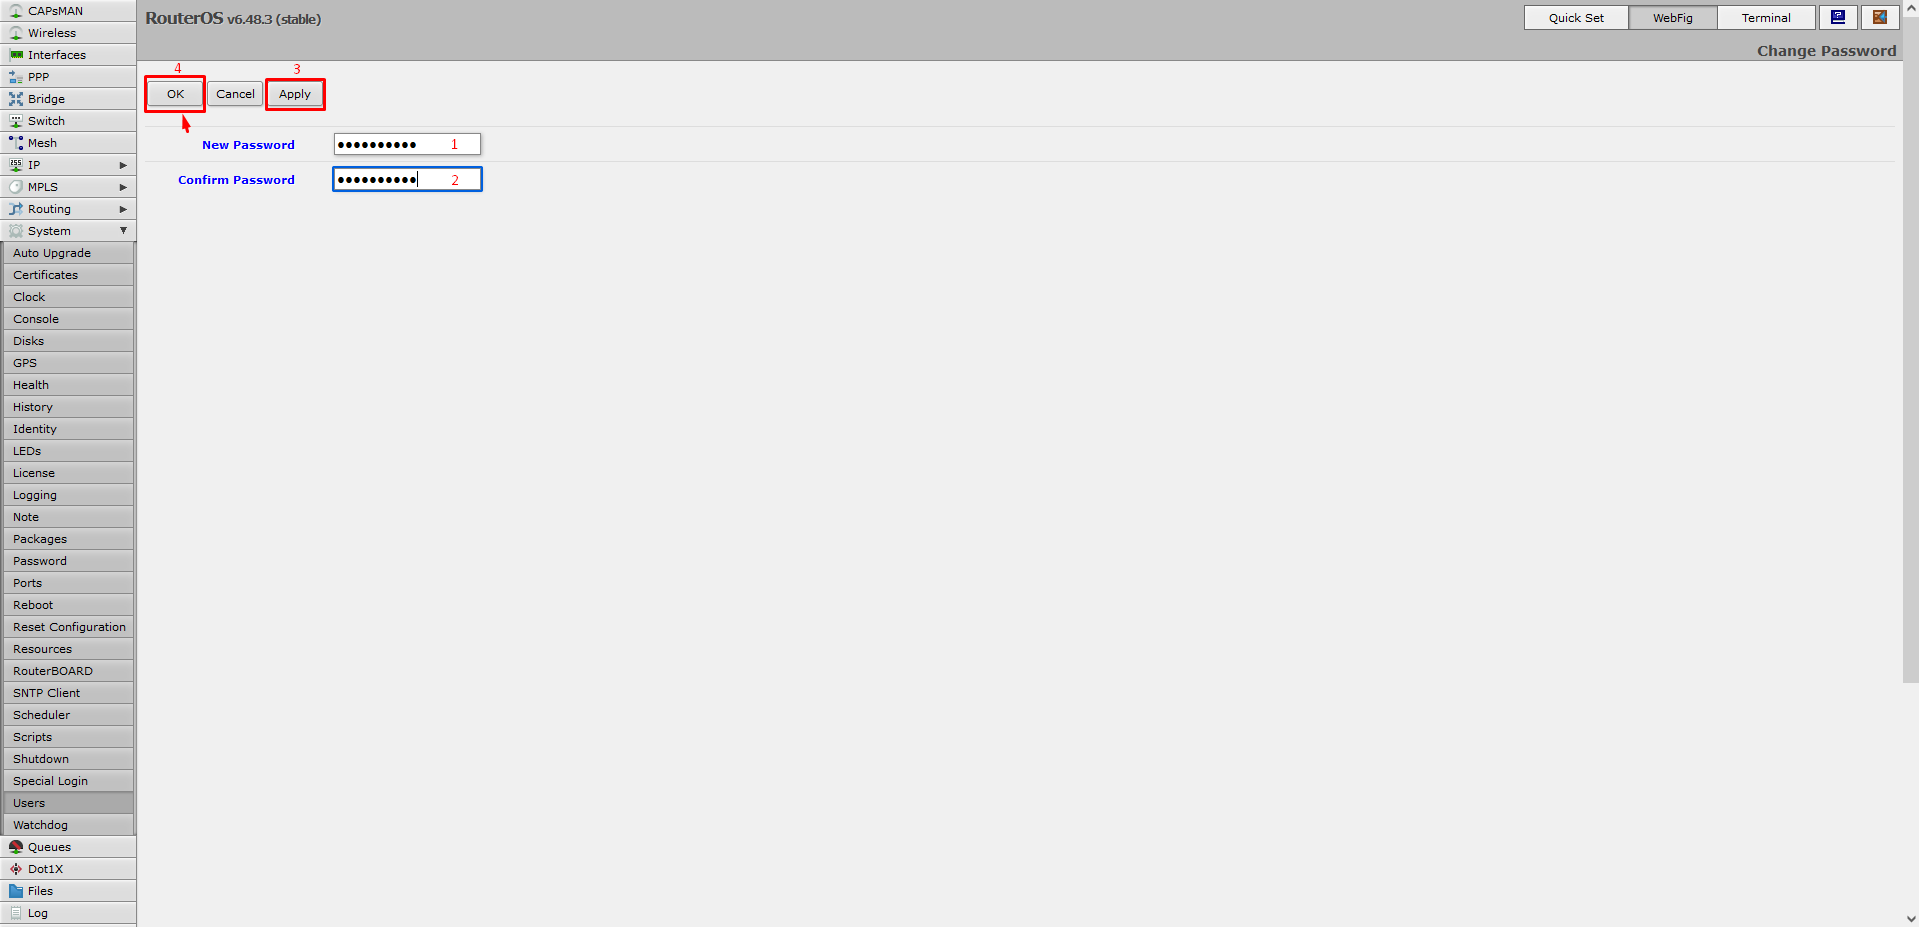
In the user settings, click the Apply button again and then OK.

Upgrade FW
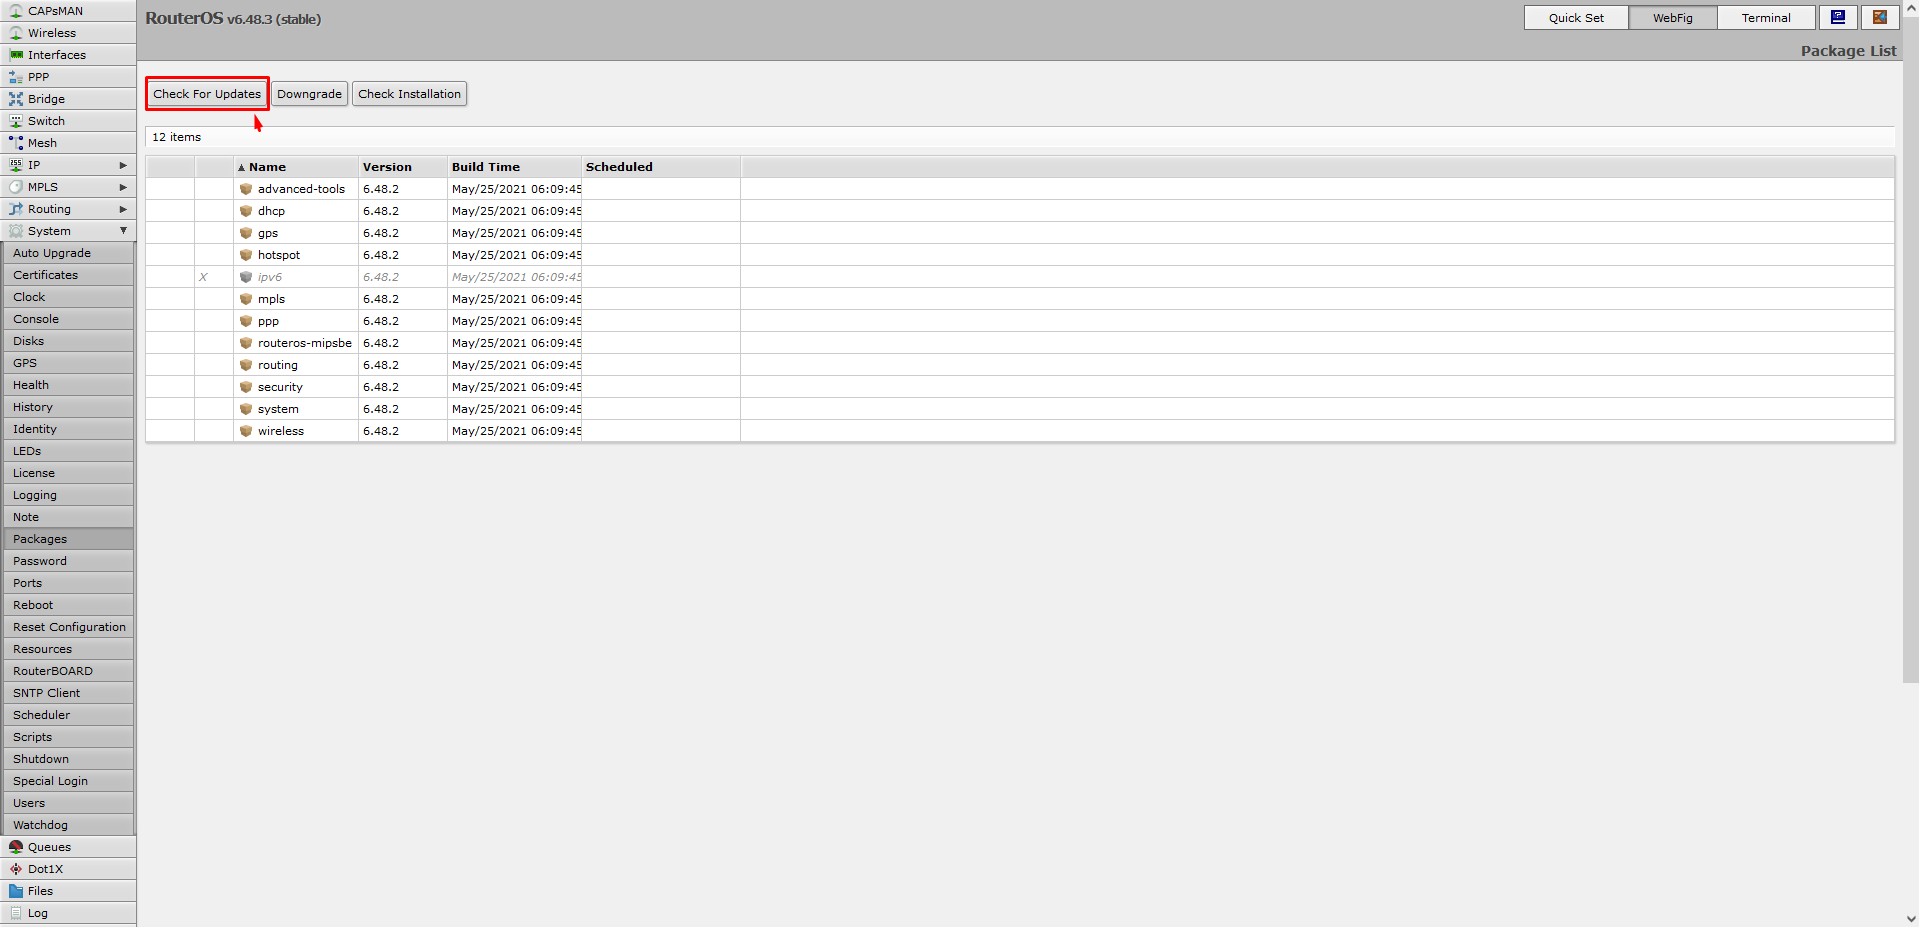
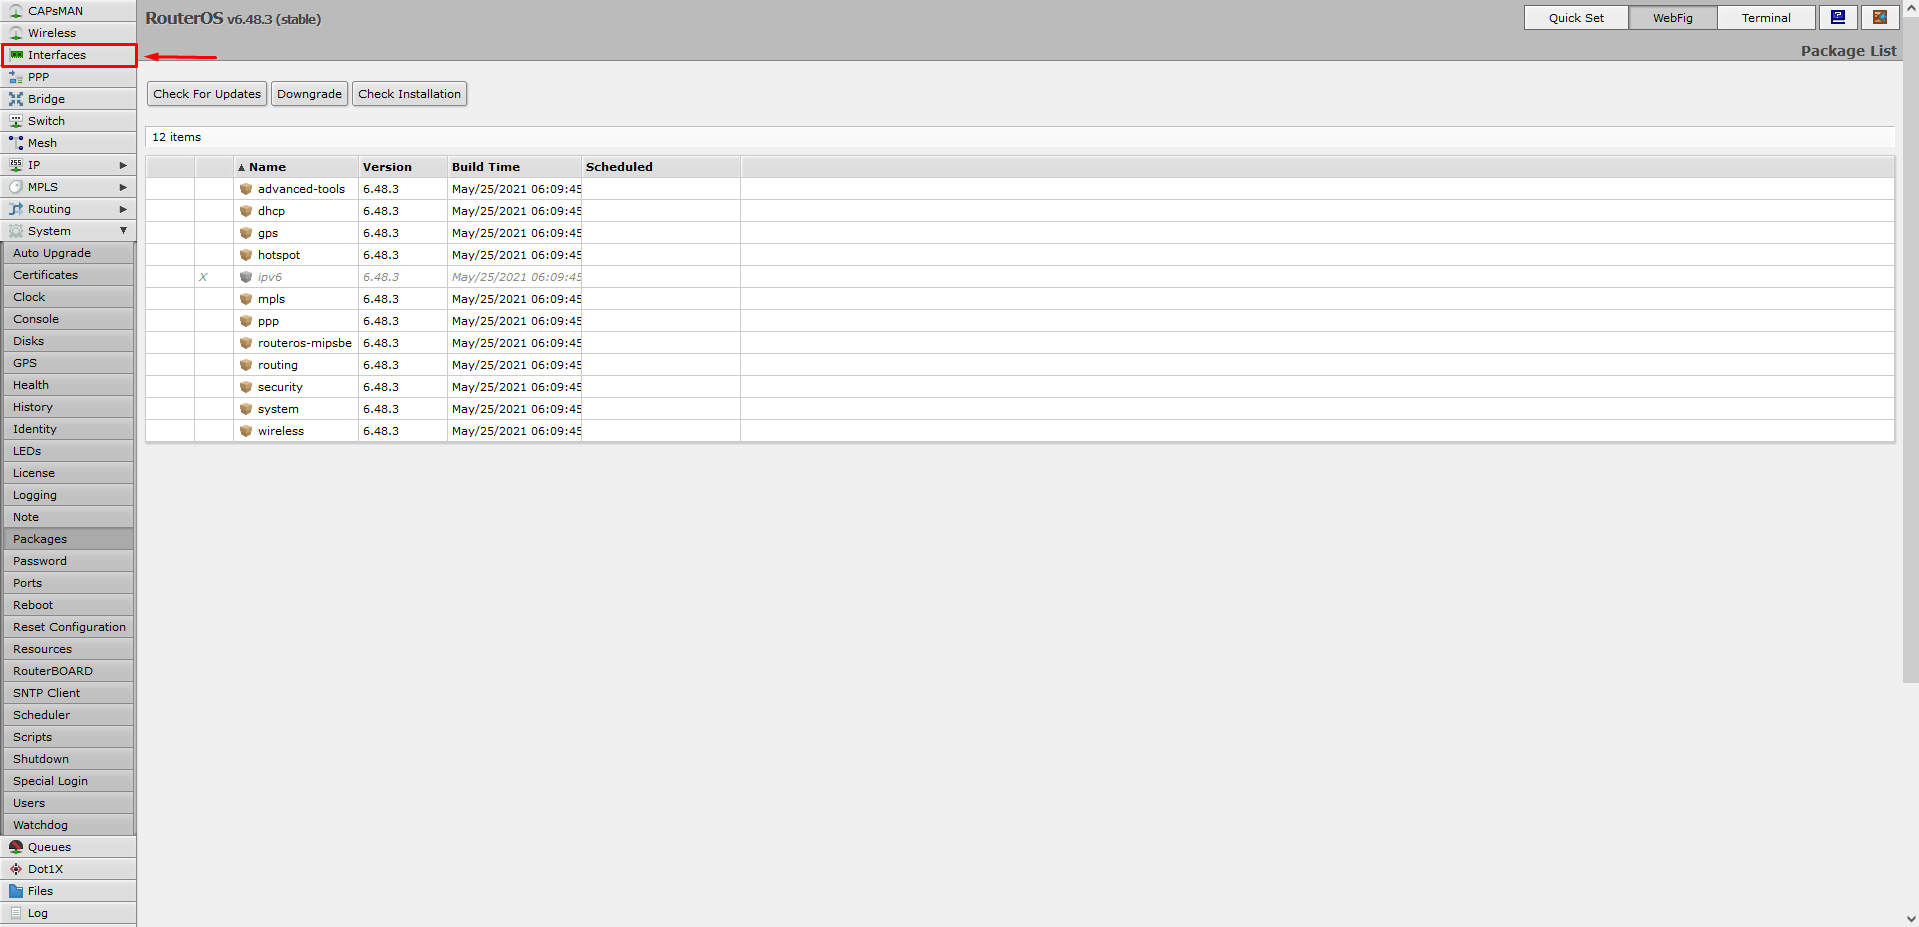
Another important step is to update the FW to the latest version due to security patches and to enable new functionality. Click on the Packages button in the System category in the left sidebar.

A list of packages with versions and release dates is displayed. Here click the Check For Updates button to find the latest package versions. In this step, the device must have access to the Internet, e.g. via the LTE mobile network.
After searching for package updates, select Channel: stable and click the Download&Install button.
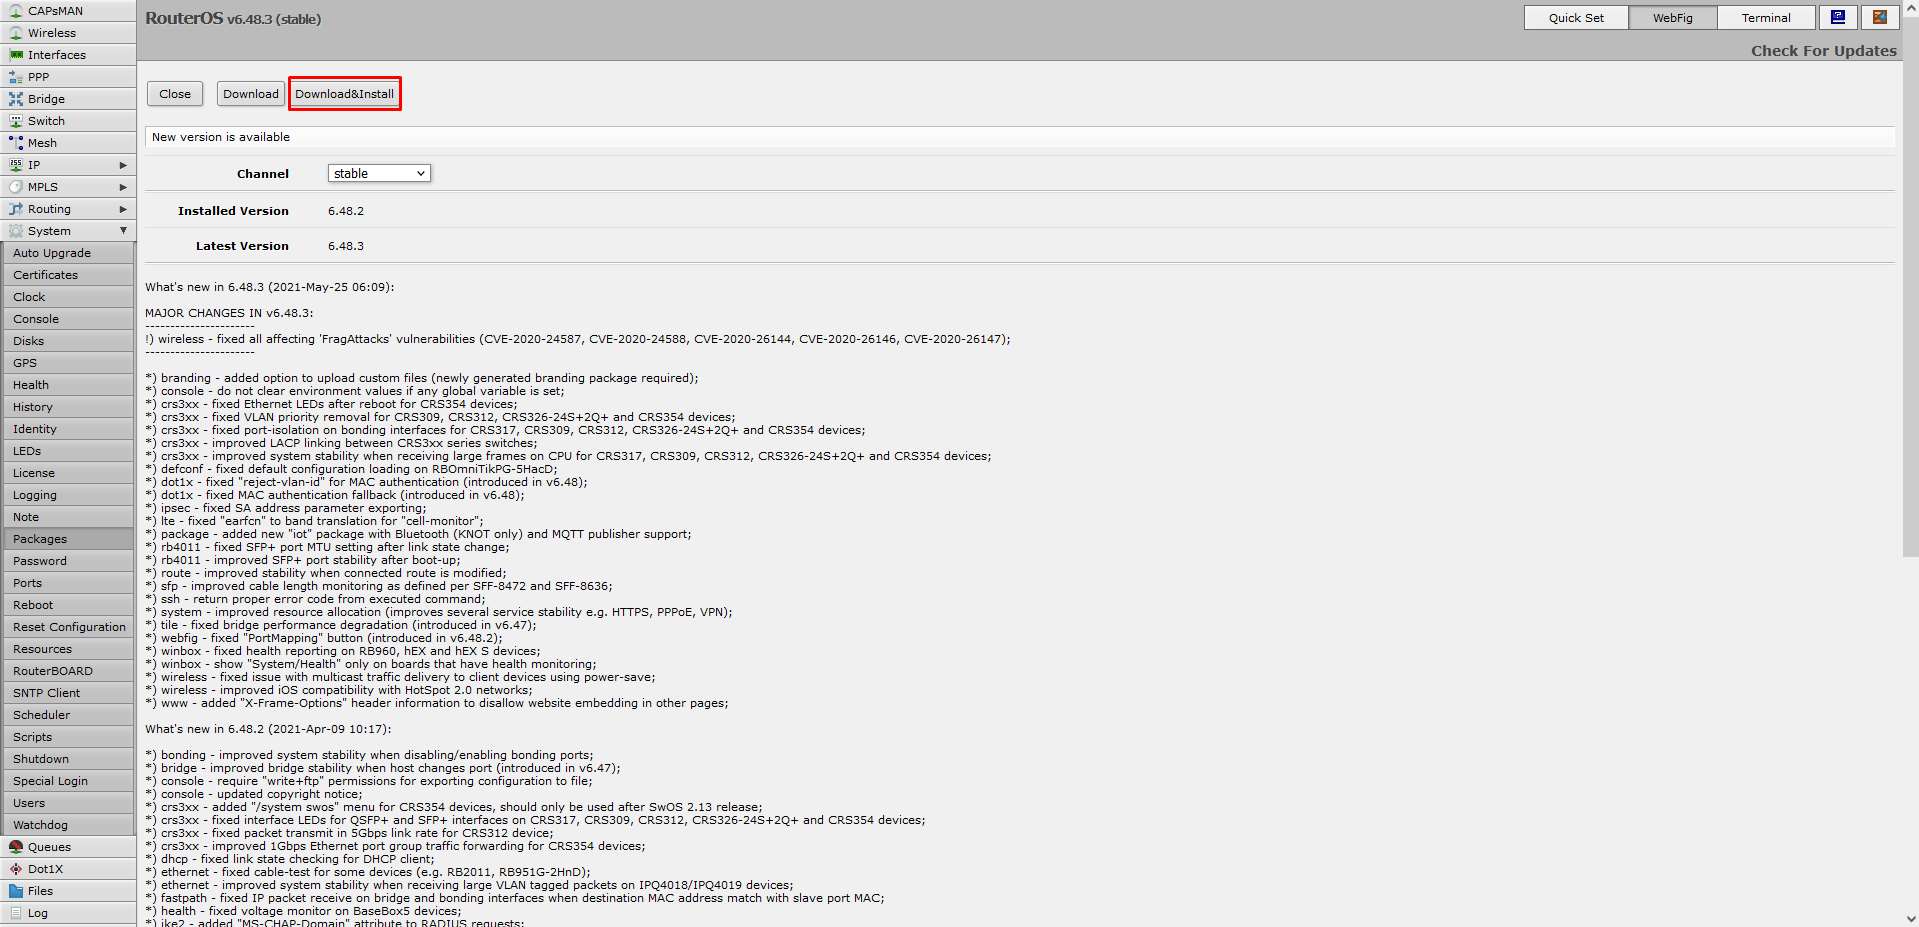
Now wait for the latest versions to download and install.
WiFi interface configuration
If you plan to use the WiFi interface, you need to secure it. Otherwise, we recommend disabling it.
WiFi interface security
Click the Wireless button in the left sidebar.
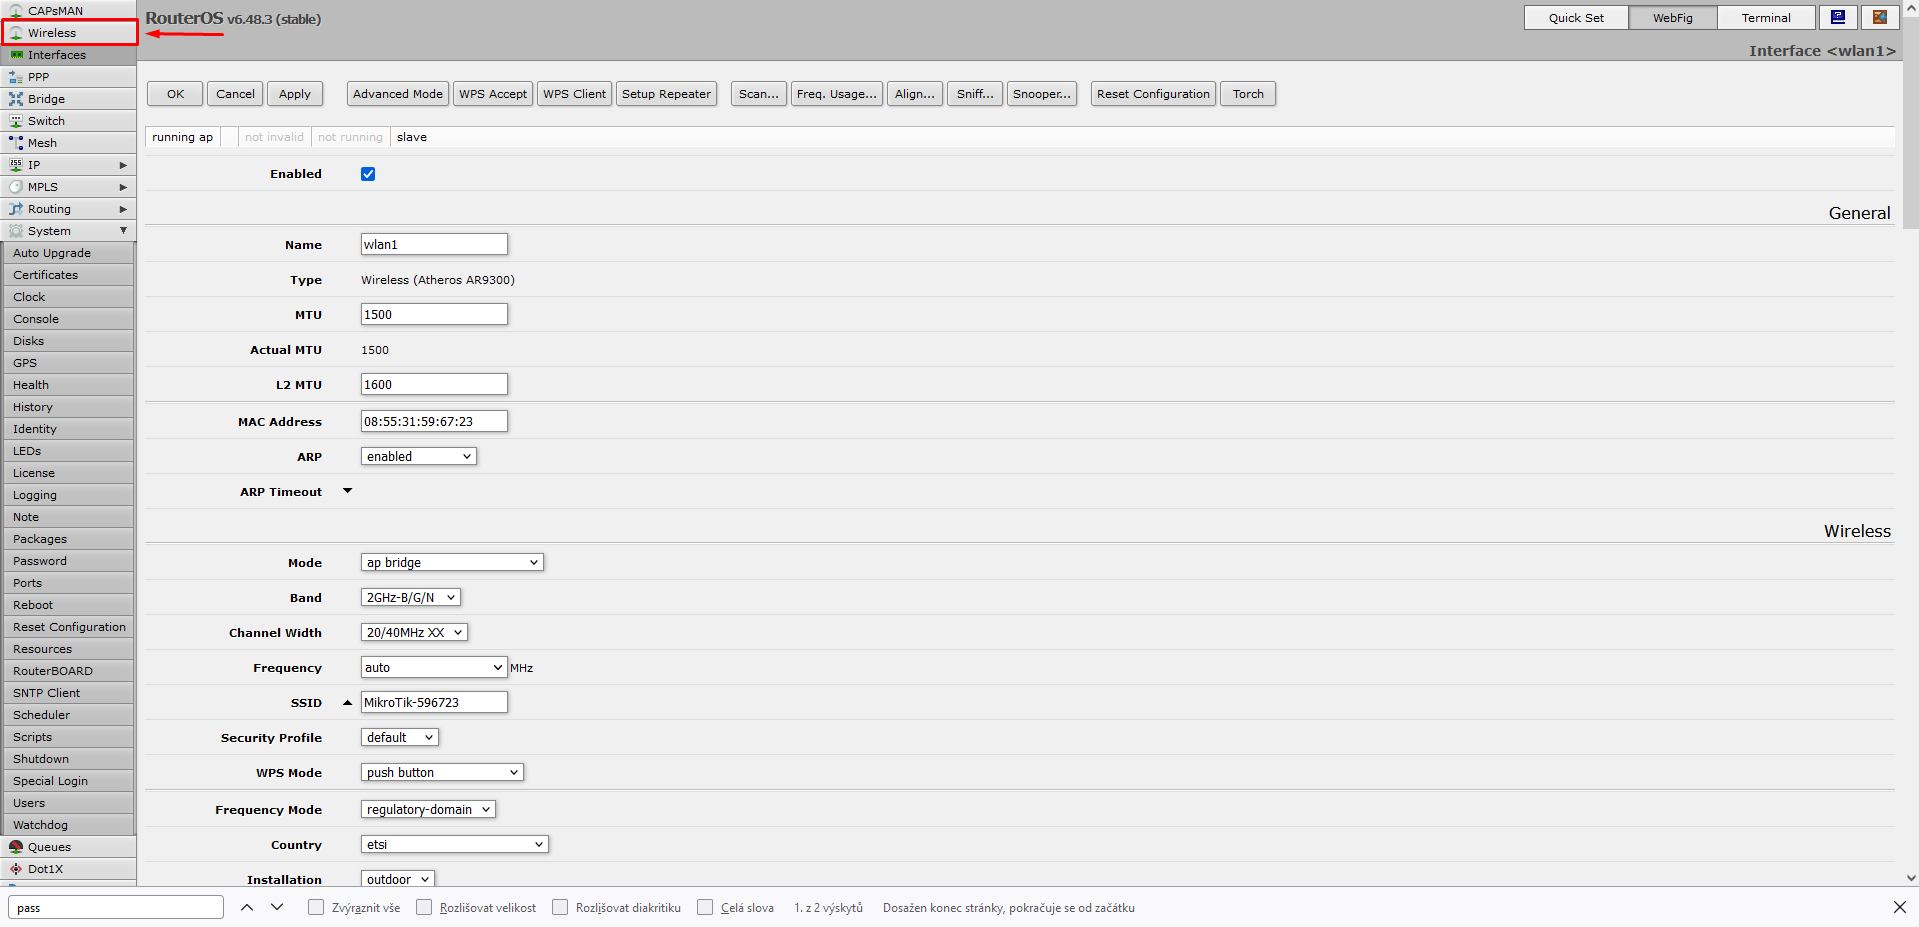
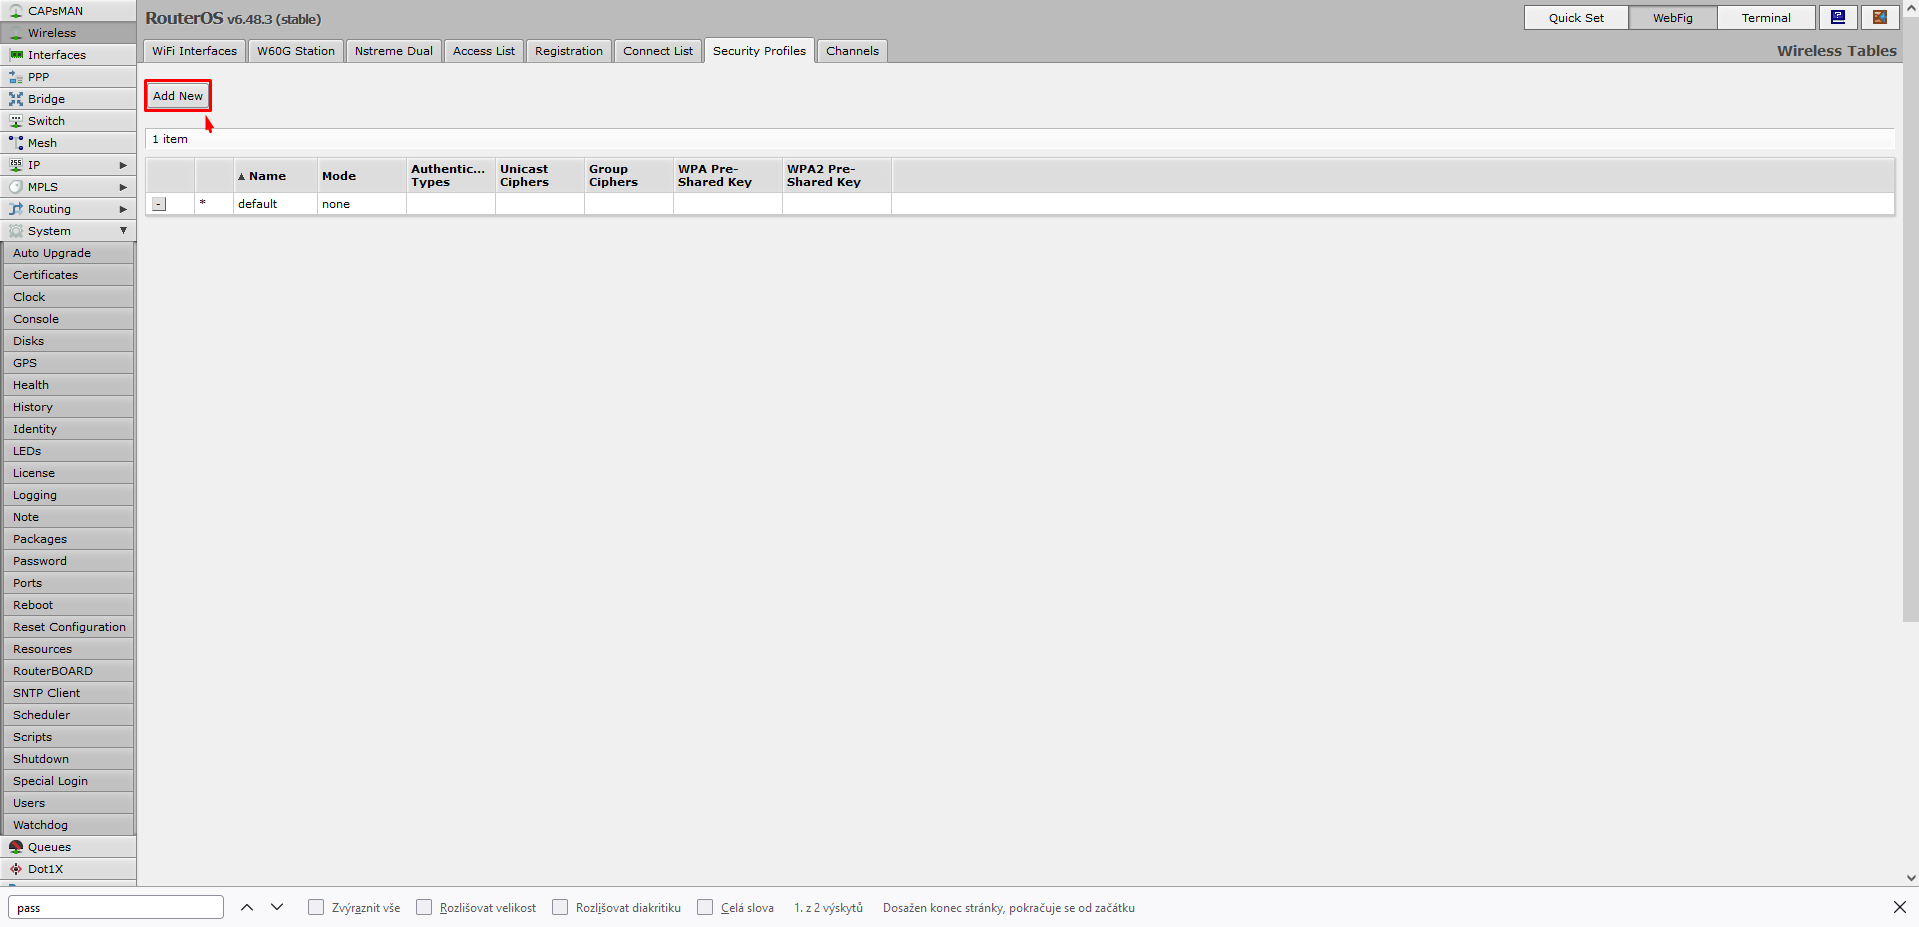
The settings with all WiFi interfaces open, by default only wlan1. In the topbar, click the Security Profiles button.

Add another item using the Add New button.
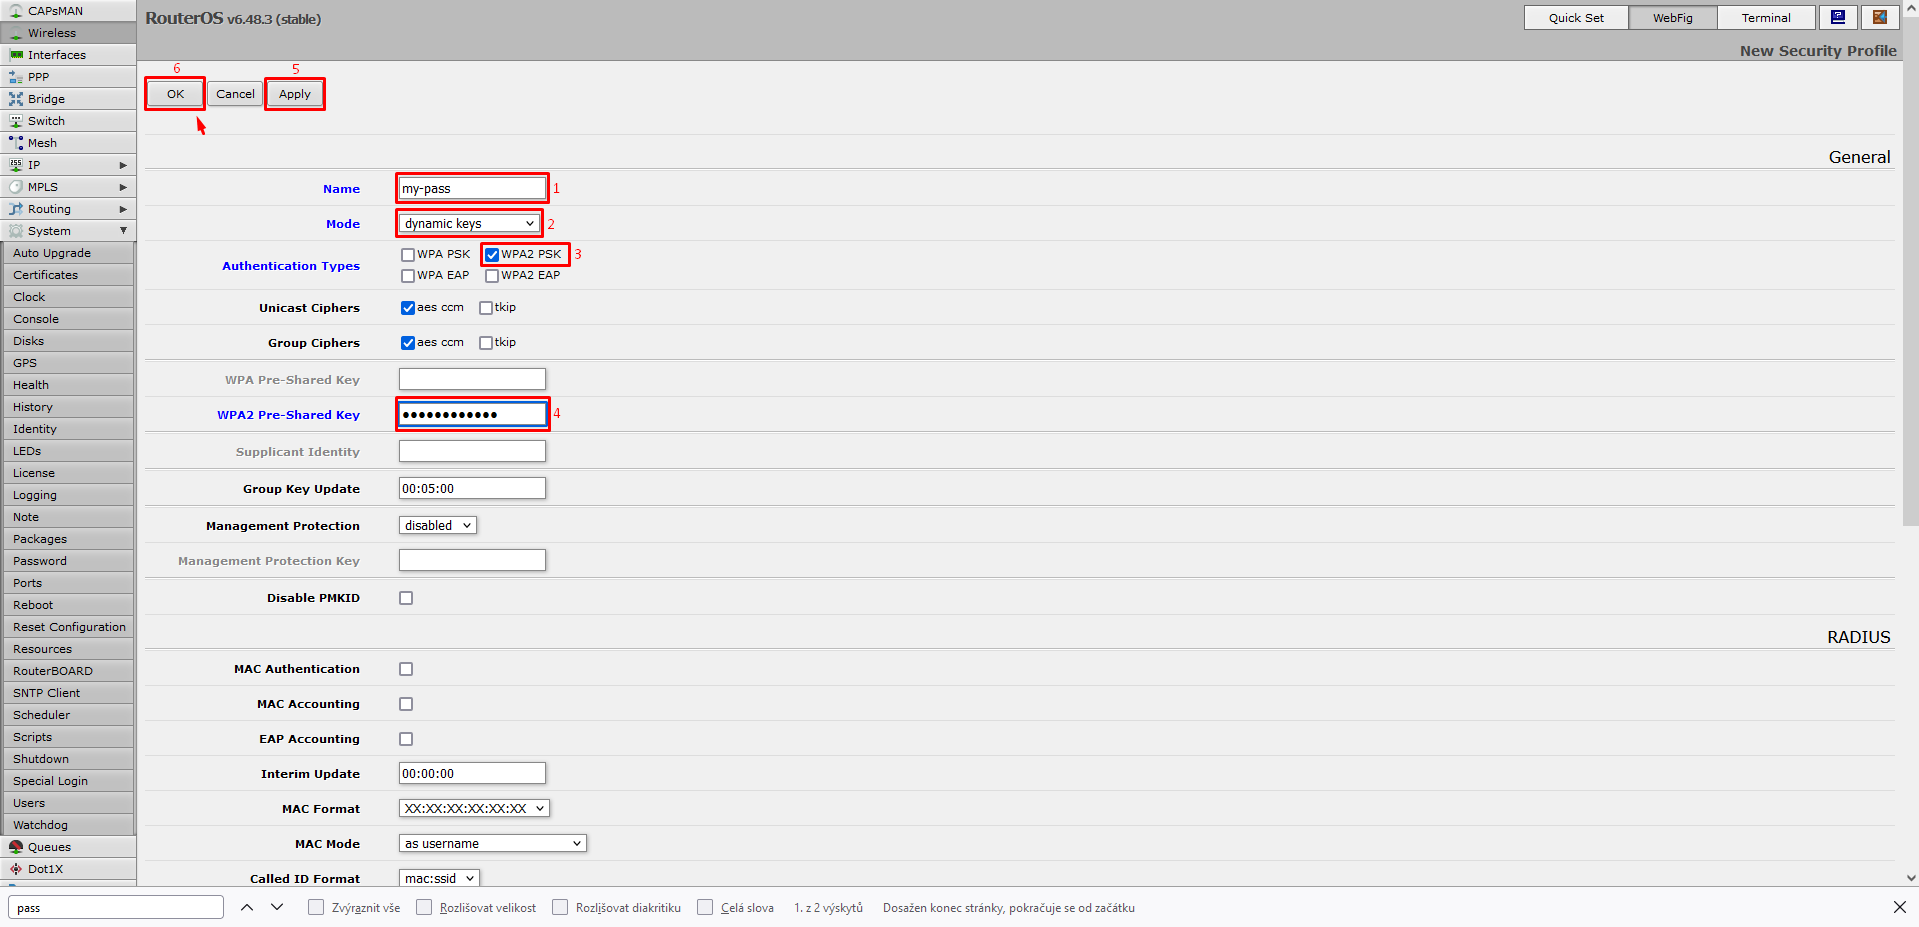
At least 4 parameters must be set here:
- Name - profile name, enter a unique name – e.g. my-pass
- Mode - security mode, select dynamic keys
- Authentication Types - security type, select WPA2-PSK
- WPA2 Pre-Shared Key - WPA2 password, enter your own password (must contain 8-63 characters)
Then click the Apply and OK buttons to confirm.
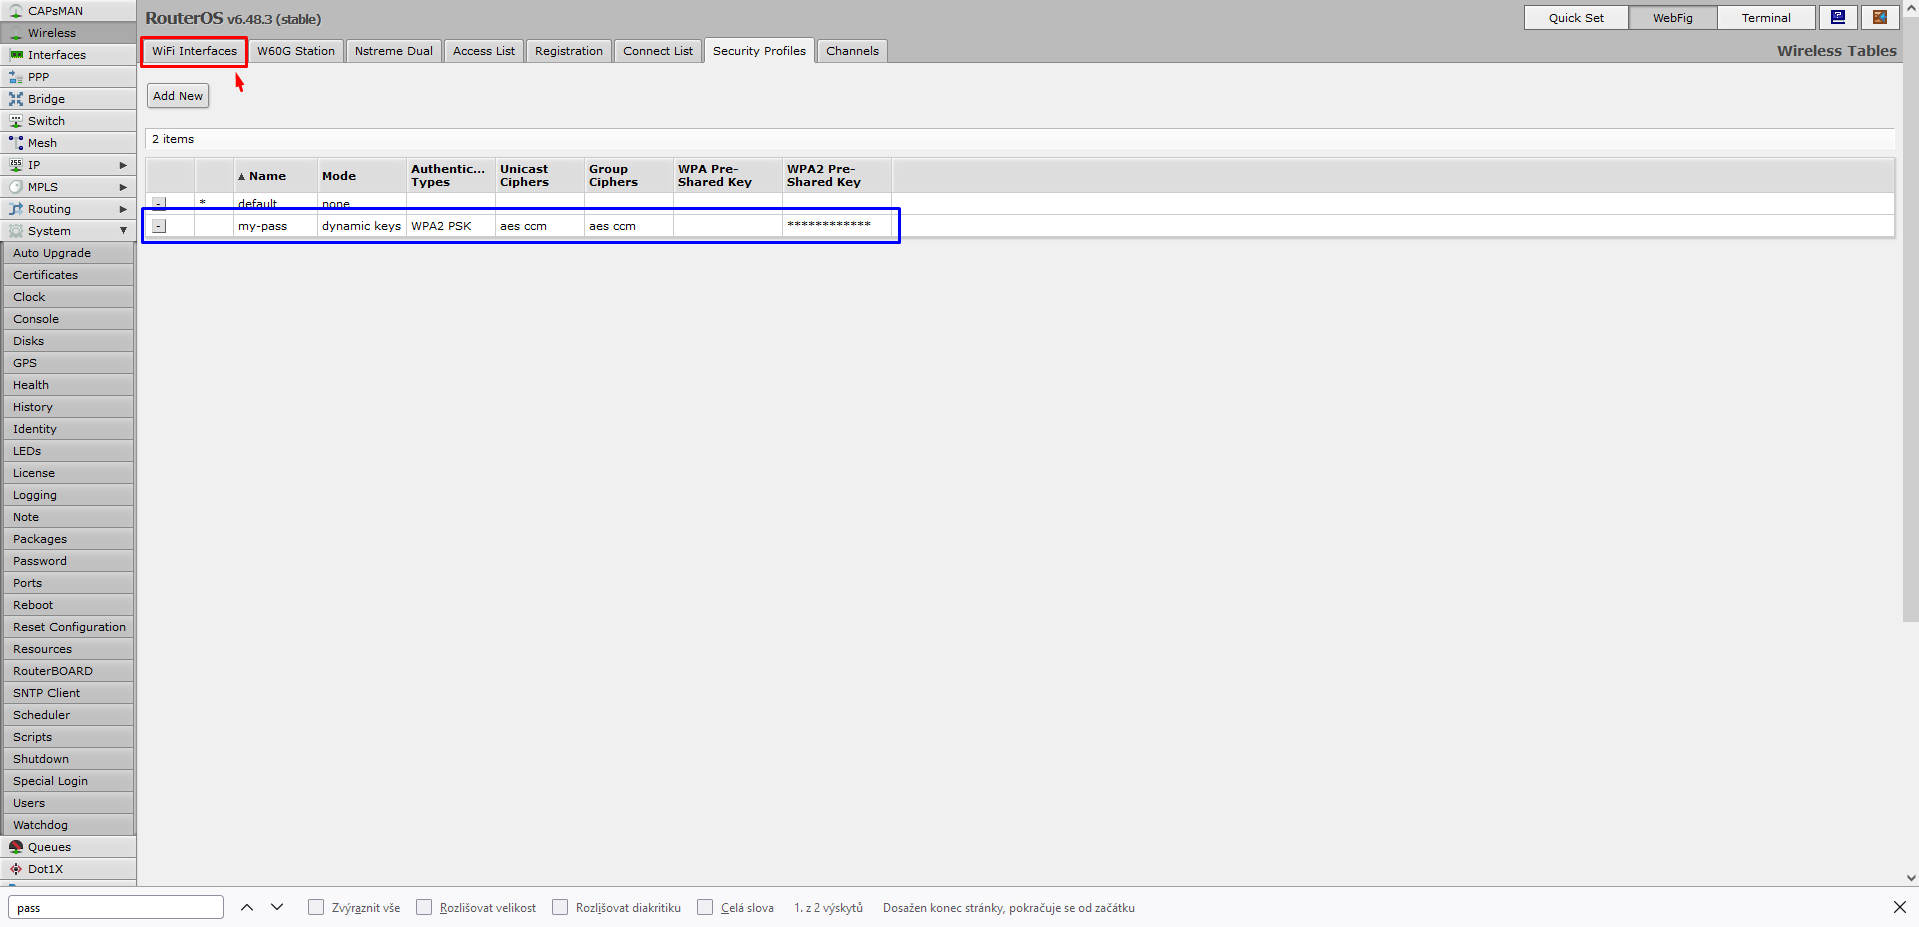
After confirmation, you may notice that the newly created profile appears in the list.
Now click on the WiFi Interfaces button:
On this page, click on the line with the wlan1 interface:

The settings of this interface will open, where next to the Security Profile item click on the drop-down box and select the profile you created. In this case, it's called my-pass.
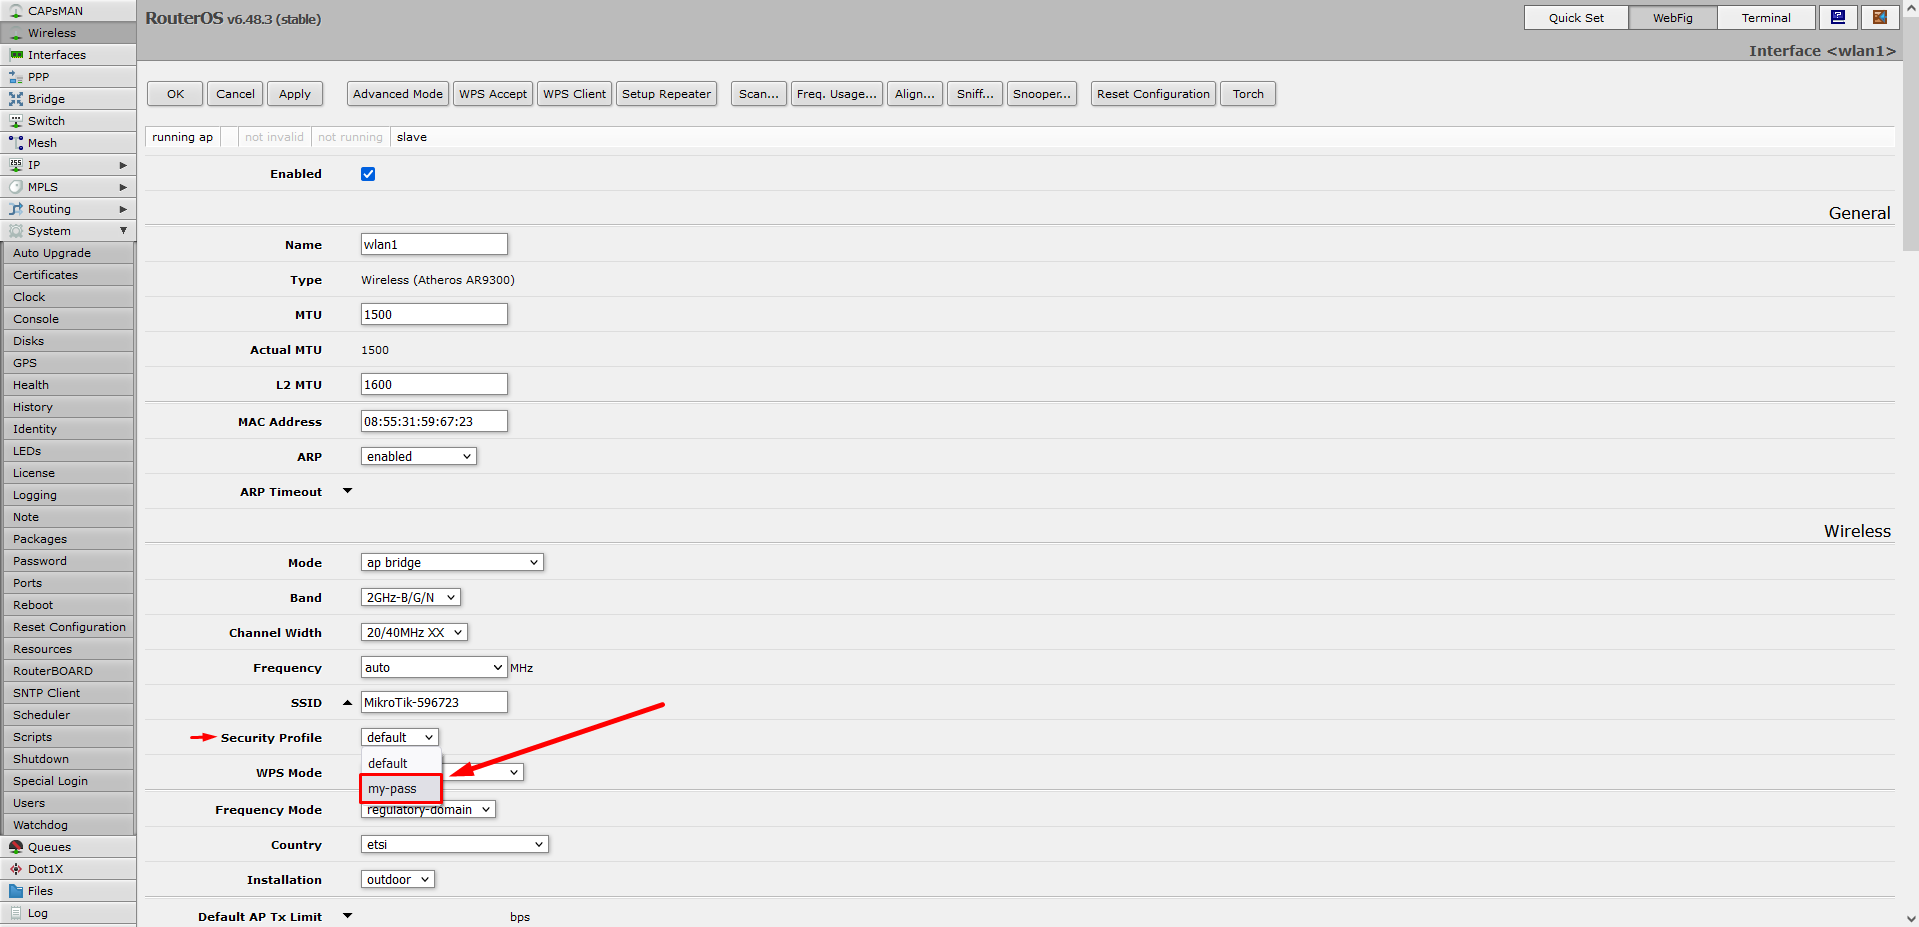
Then click on the drop-down box next to Country and select your location. The allowed frequency bands are automatically set to meet the legislative requirements of the selected location.

Finally, set the WiFi network name next to SSID, then click Apply and OK to confirm.

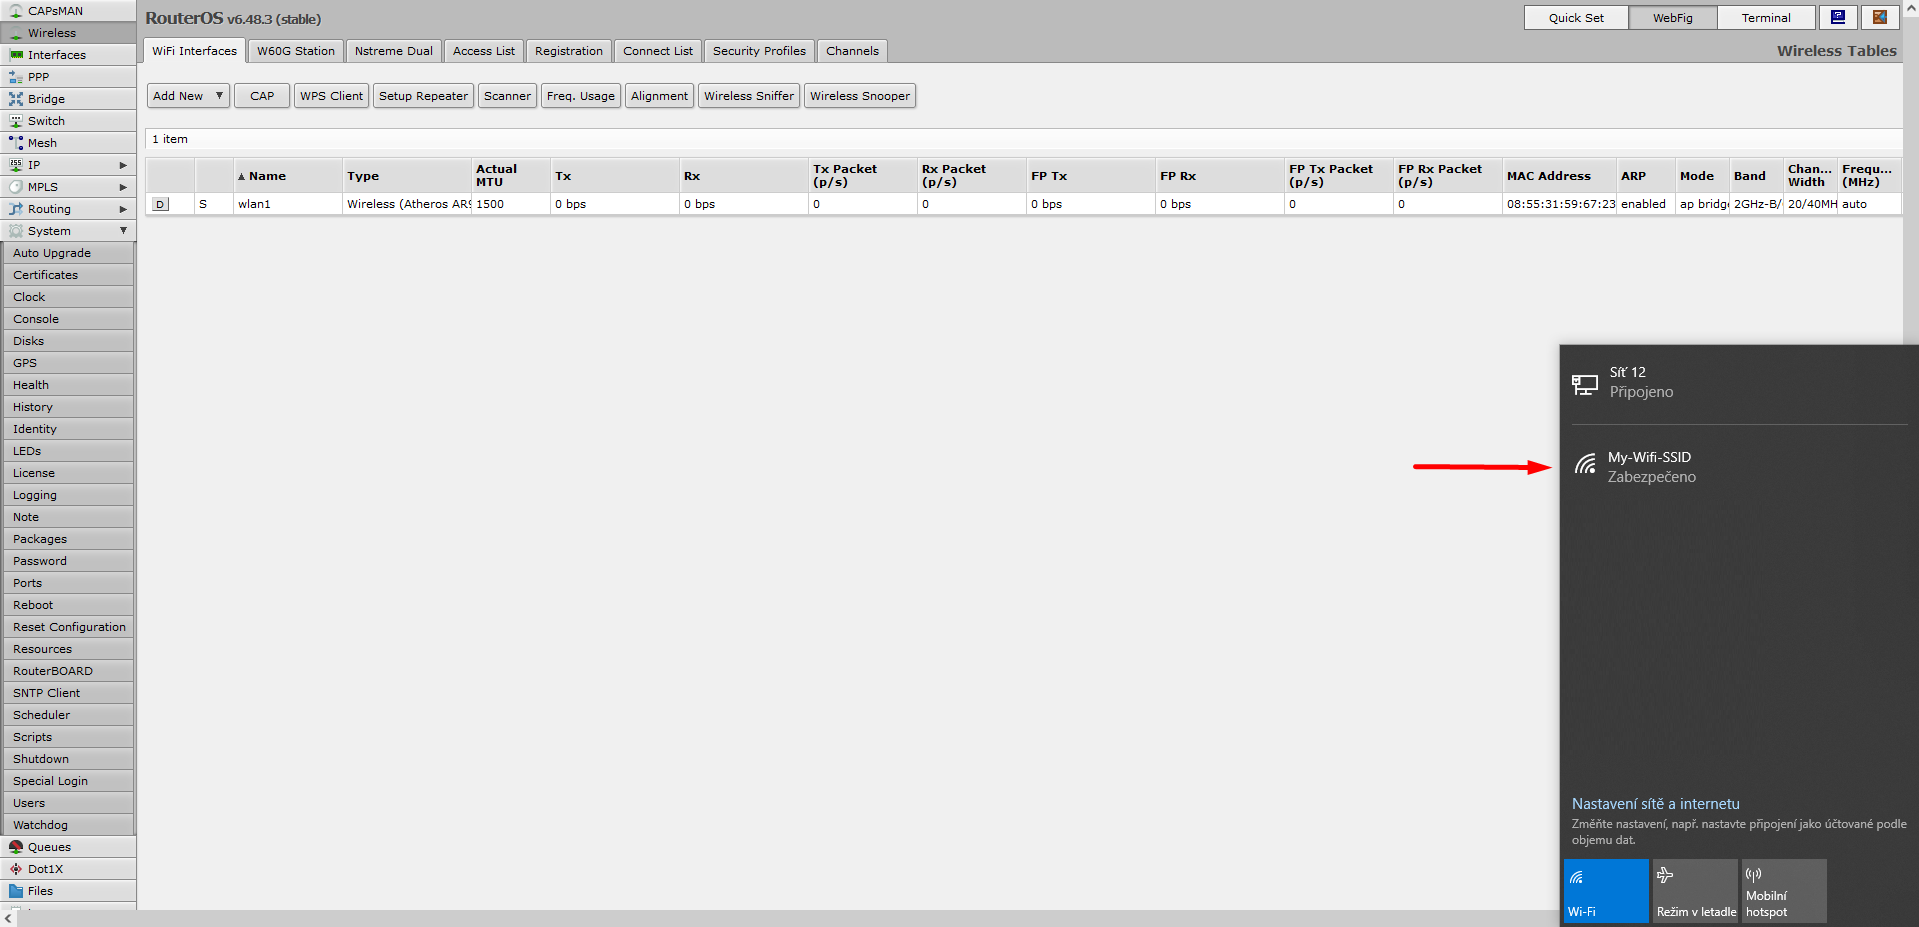
In the following picture you can see the available WiFi networks, where the network is My-Wifi-SSID, which is secured. So the setup was successful.
Disable WiFi interface
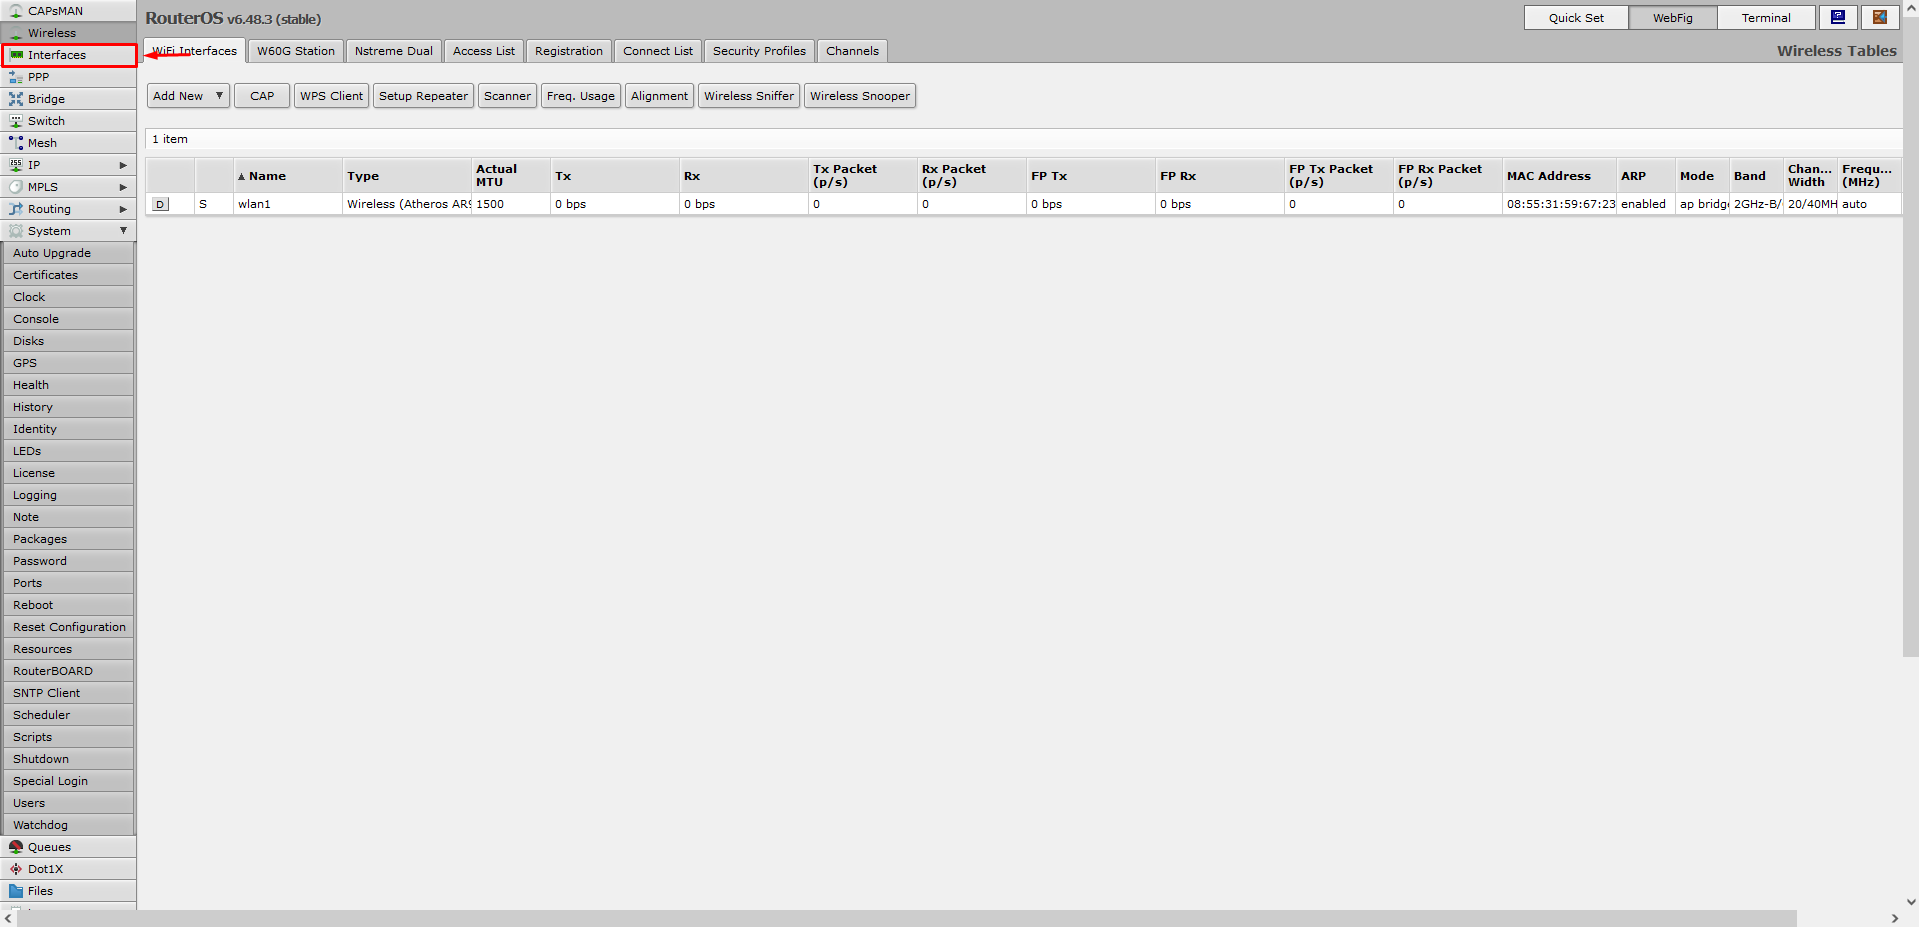
To enter the WiFi settings, click on the Interfaces button in the left sidebar.
A list of several interfaces is displayed. Click on the line named wlan1.

Click the Enabled check box and then the Apply and OK buttons.
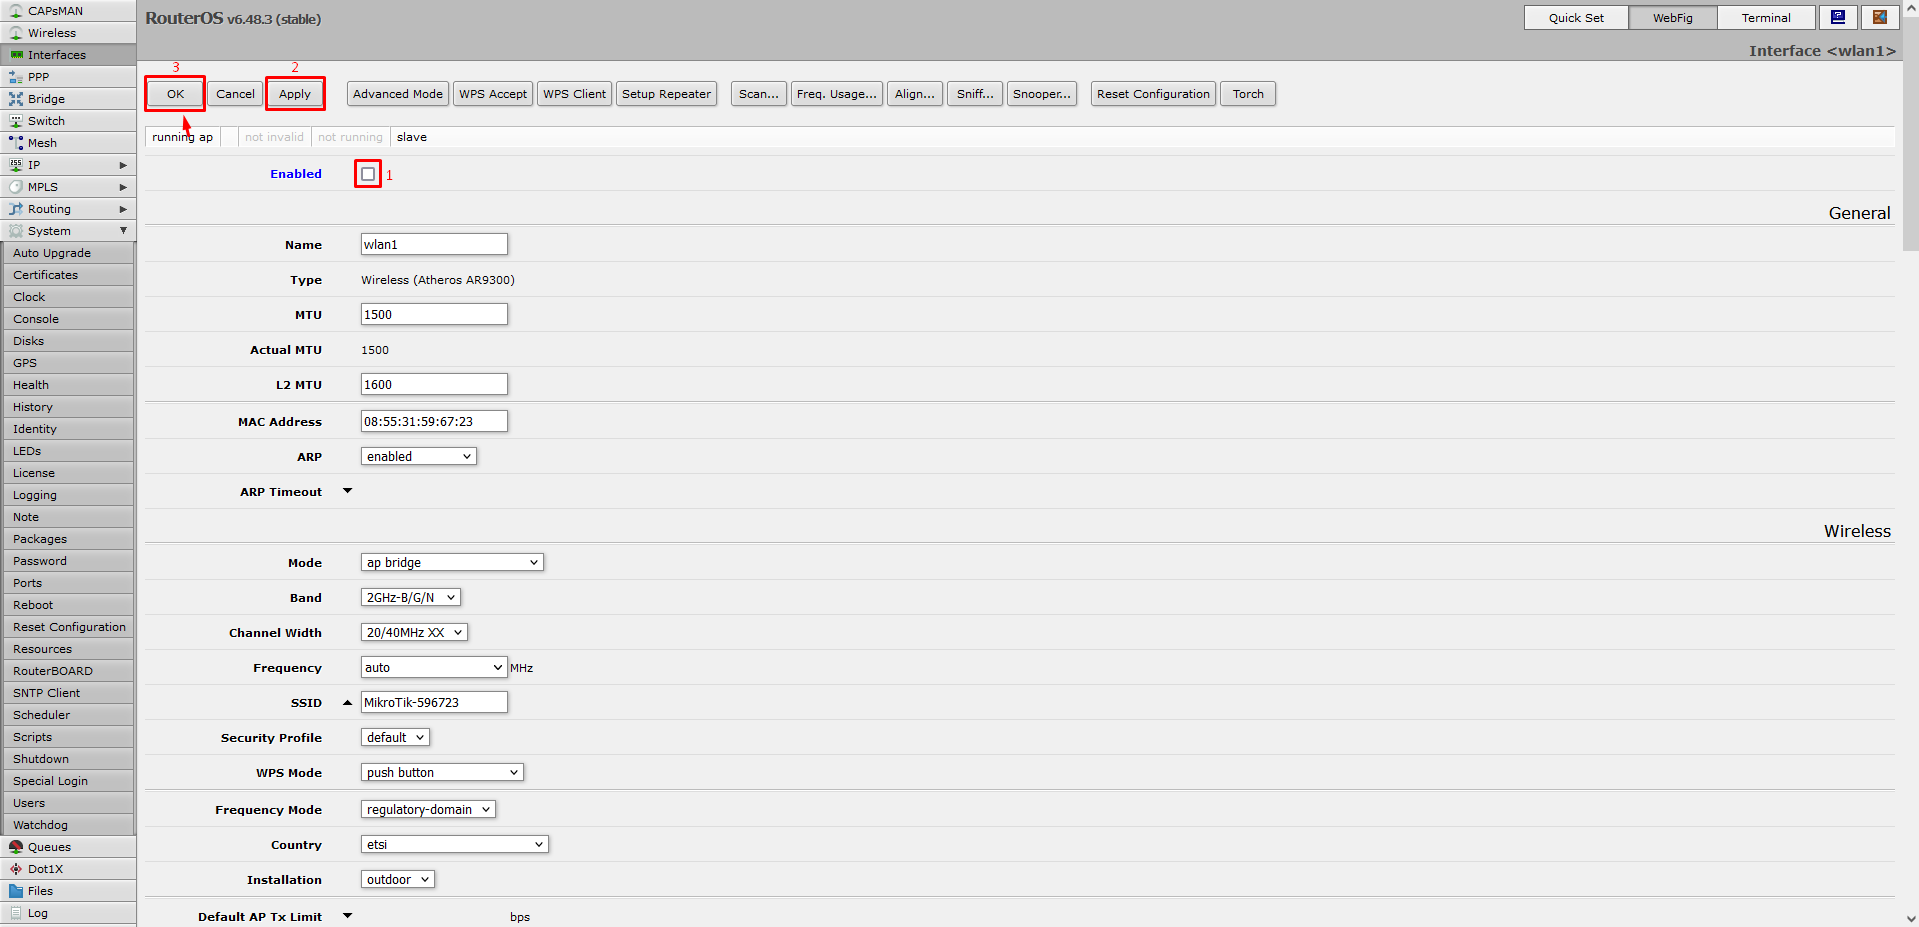
When finished, the interface will deactivate.
APN settings
The last setting applies to the LTE connection itself. If the modem is already connected to the Internet, you can skip the following settings. If you have connection problems, the selected operator requires settings other than the default.
Example of default settings:
- APN: internet
- IP Type: IPv4
In this case, click on the Interfaces item in the left sidebar:
In the topbar, select LTE and then click the LTE APNs button:
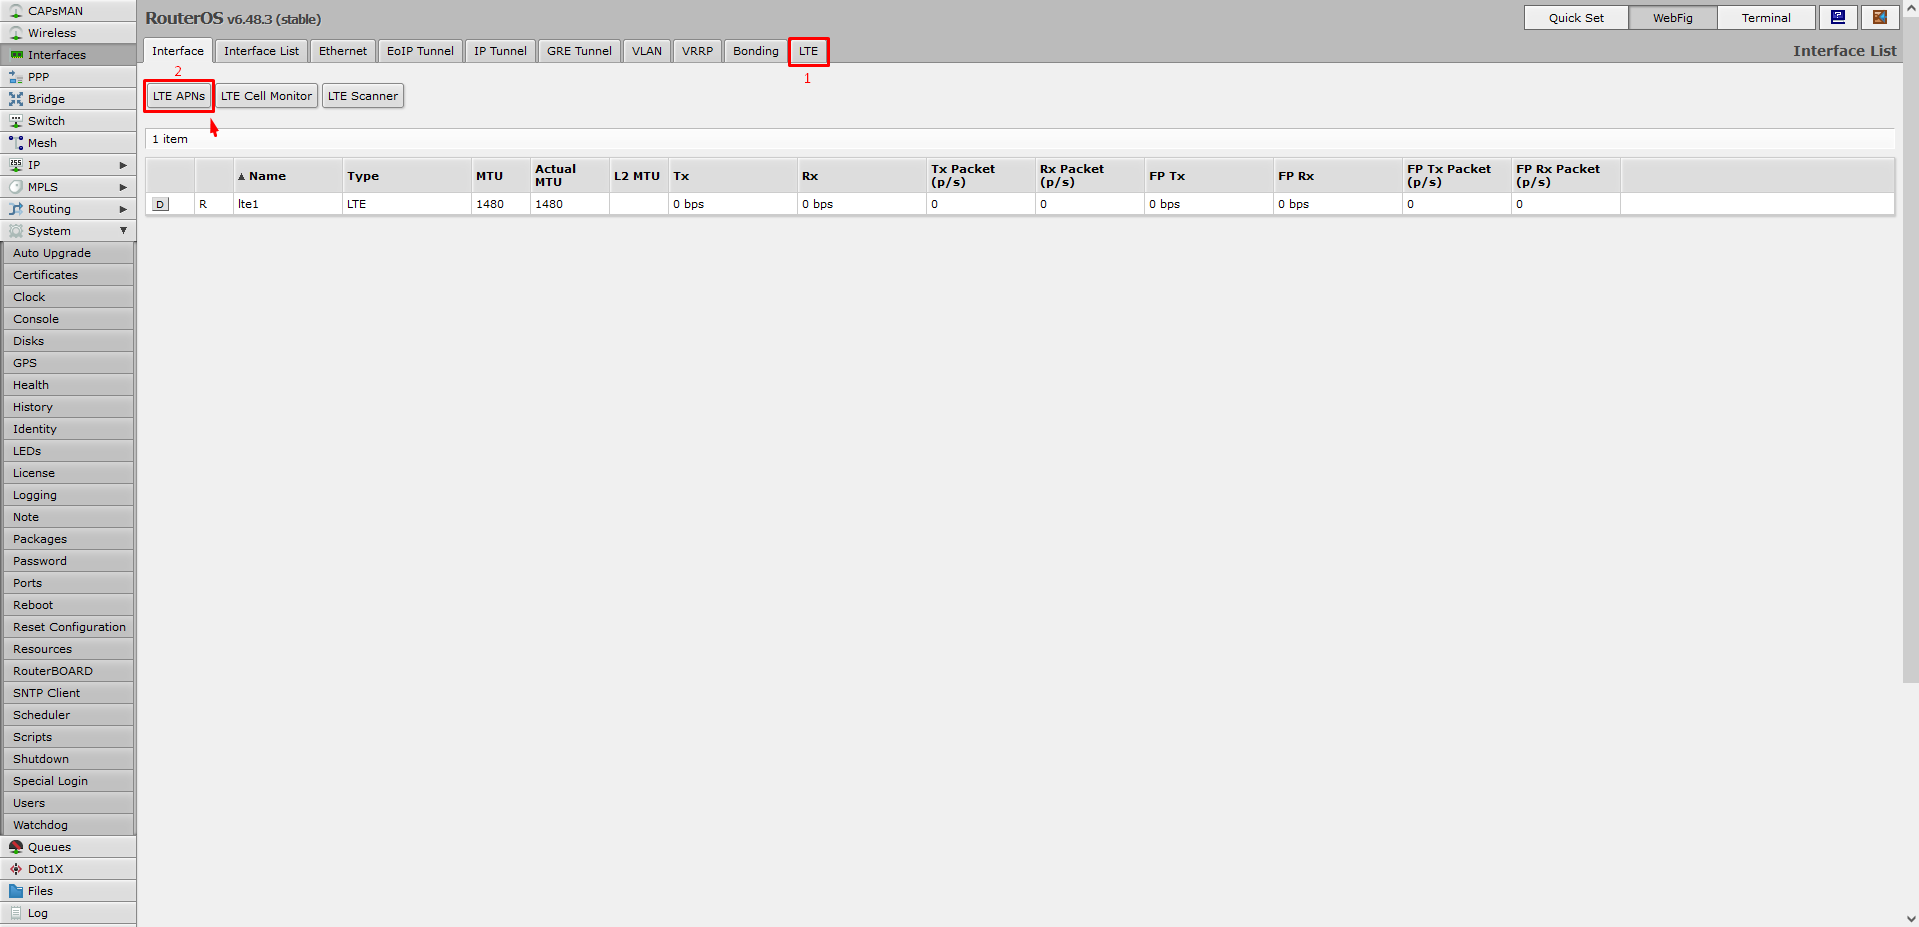
Now click the Add New button.

Fill in the following parameters according to the settings obtained from the specific operator and then click the Apply and OK buttons to confirm.
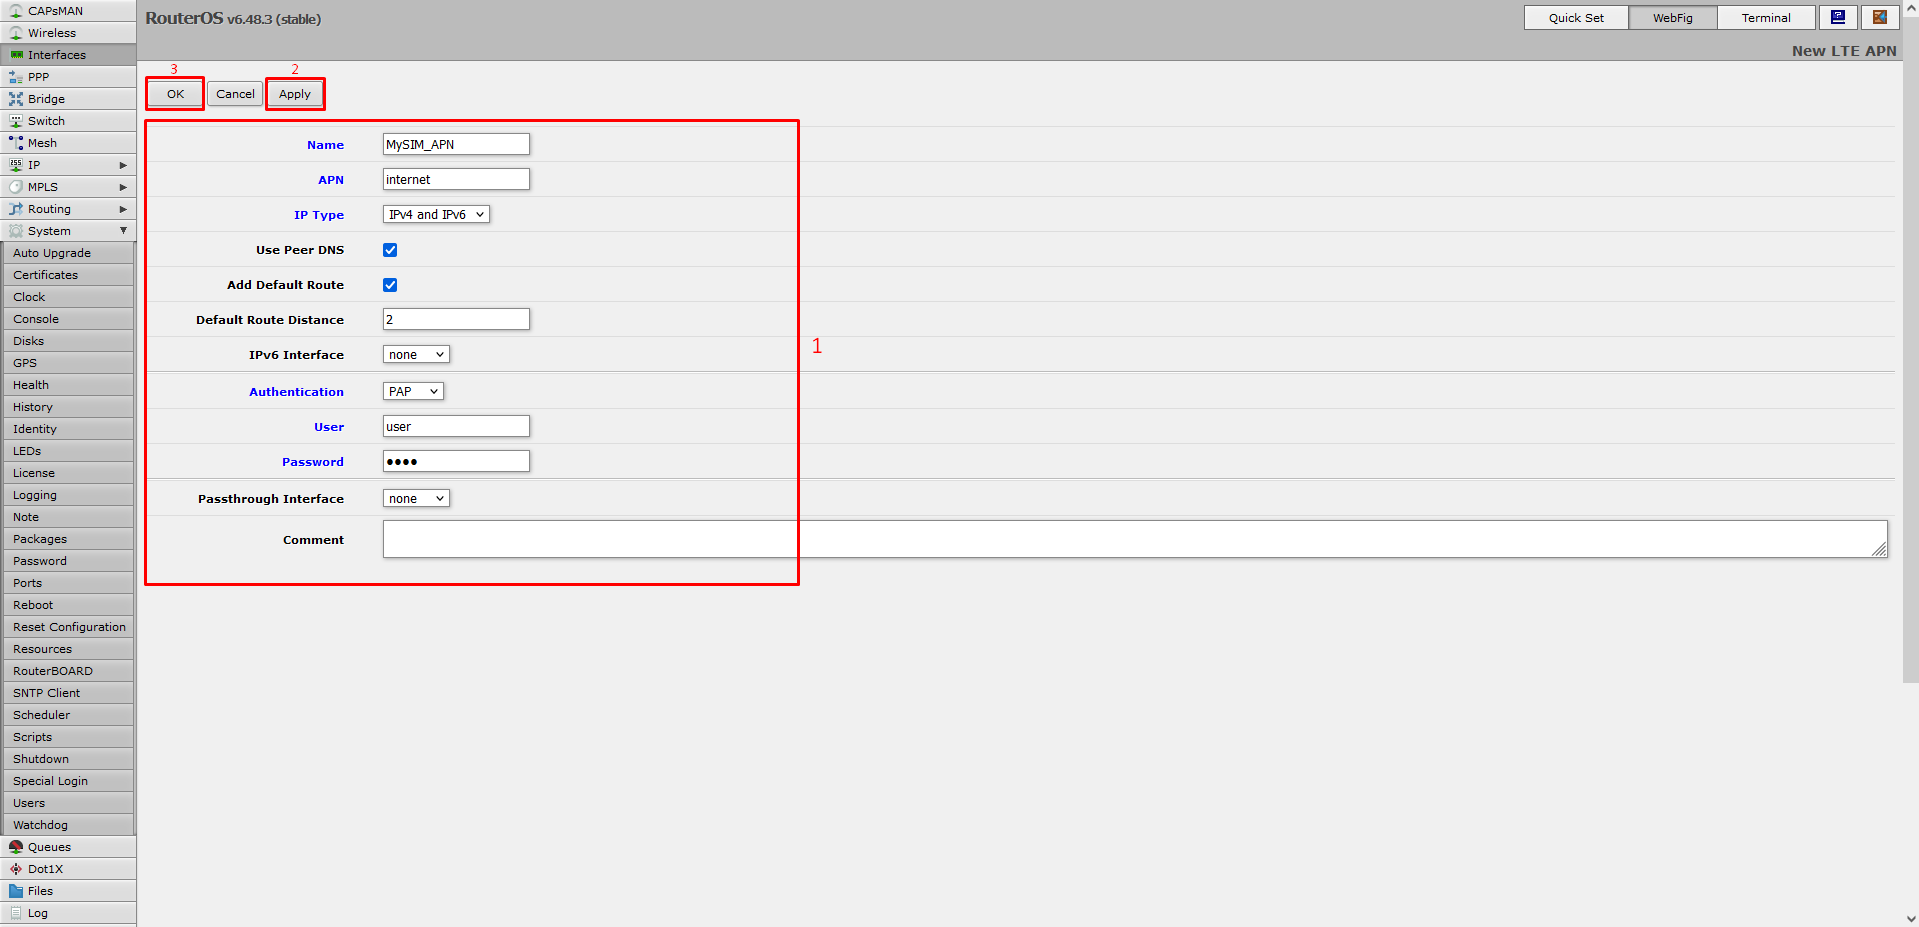
After confirmation, the new profile will appear in the APN list.

Click the LTE button in the topbar again, and then click the lte1 line.

The settings of this interface will open, where next to the APN Profile item click on the drop-down box and select the profile you created. In this case, it is called MySIM_APN.
If the SIM card is secured via PIN code, click on the arrow next to the PIN and insert it in the box.
Finally, click the Apply and OK buttons to confirm.

The device should now be able to connect to the Internet without difficulty.
Links to other manuals
As there are a large number of ways to fully use this device, we have prepared a summary of links to the most interesting manuals