This is an old revision of the document!
Secondary ethernet configuration
Available since v2.2.0
Some of our PLCs are equipped with secondary ethernet interface. In this tutorial, we will cover the configuration of this interface in Mervis.
The possible settings of the second interface include:
- Static IP or DHCP client
- Bridge interface for a primary network (e.g both interfaces act as a switch)
- Secondary ethernet cannot act as a backup internet connectivity
- PLC cannot act as a router between networks
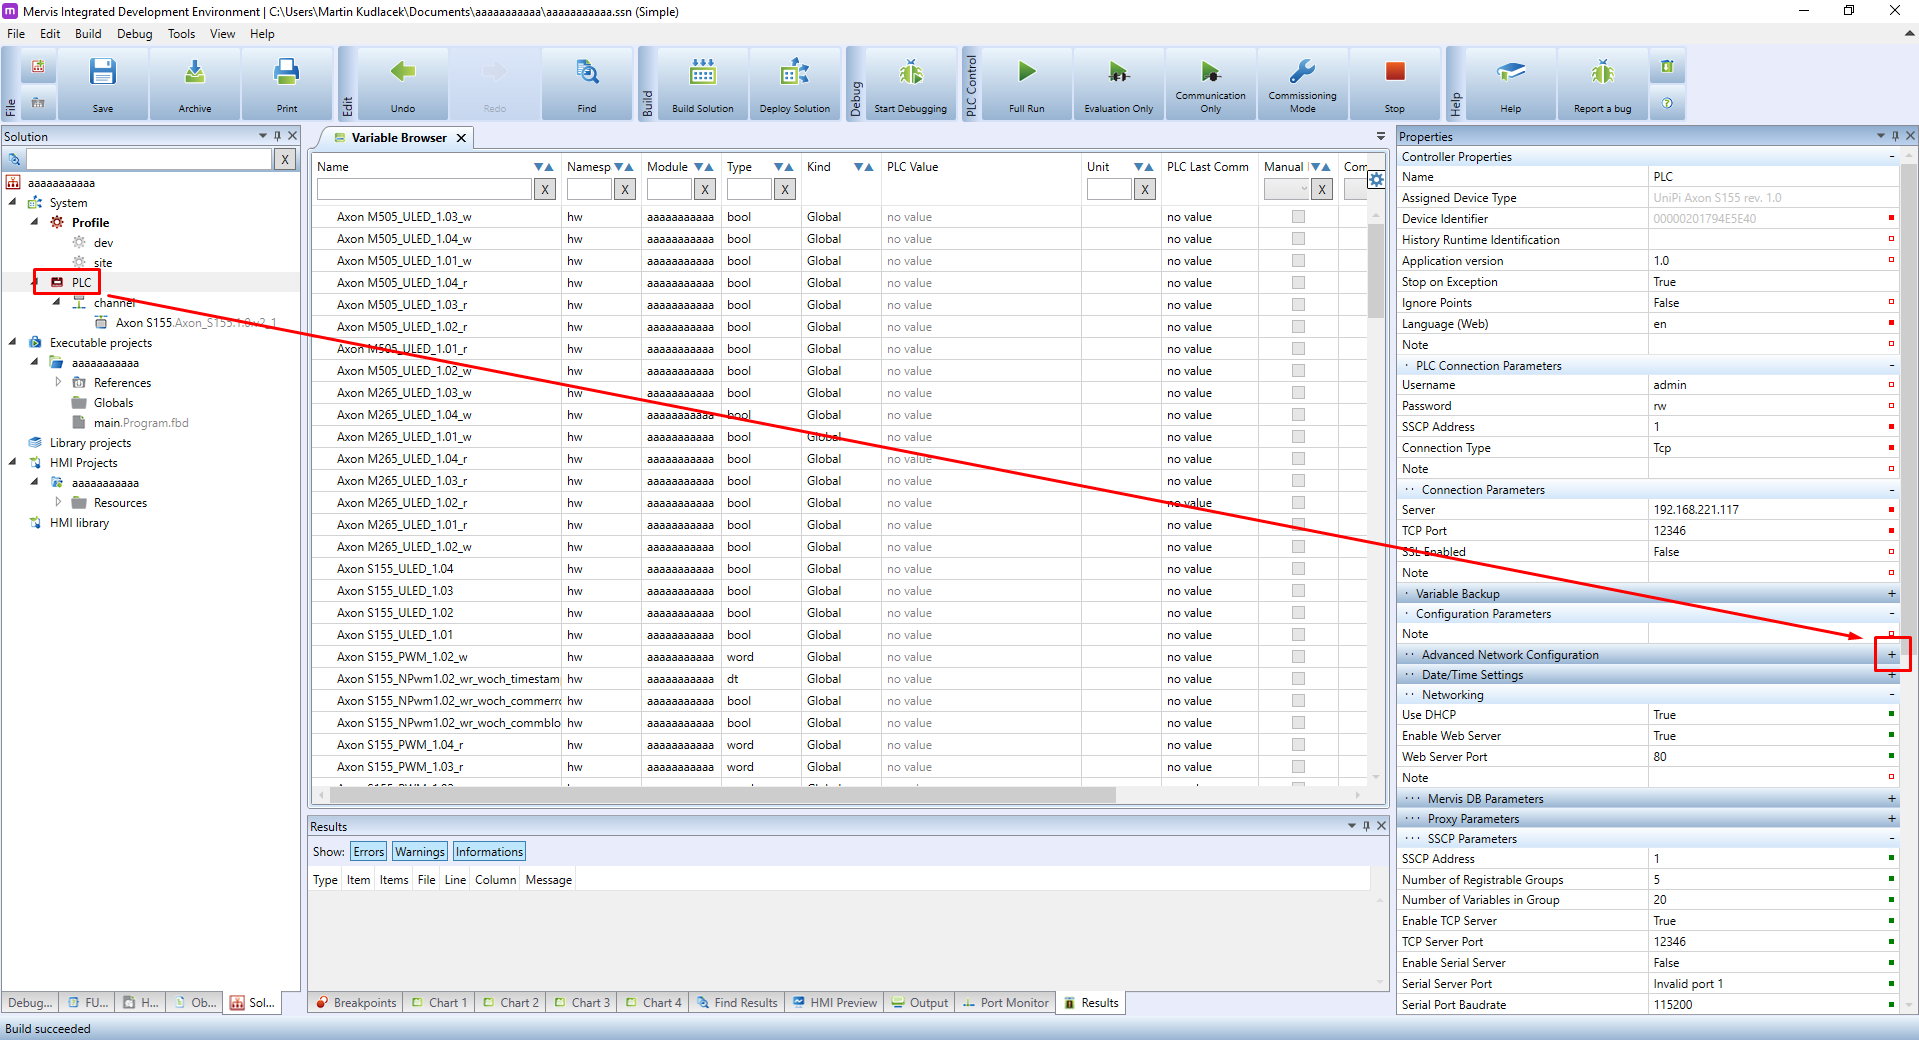
In your solution, left-click on the PLC in the Left panel, move over to the Properties panel, scroll down until you find a section called “Advanced Network Configuration” and click on the plus sign to reveal more properties.
Locate the subsection called “Network card”:

The options are:
- Name: internal name of the interface, it cannot be changed and you will not see it anywhere else
- Enabled: When disabled, the interface will be put into a bridge mode together with a primary network interface. When enabled, following IP settings will take effect
- IP Configuration: Whether the IP will be set manually or taken from DHCP server
- IP Address: static IP address for the interface, to be used together with IP Configuration = Static
- Netmask: netmask of the IP range, to be used together with IP Configuration = Static
Change the settings according to your dispositions.
These options change the configuration of the MervisRT. As such, the configuration cannot be applied by deploying the project, but rather through “Upload configuration”. Right-click on the PLC in the Left Panel, then on the PLC Operation → PLC Setup → Upload configuration.