Changing prototypes
A “prototype” is a definition of a device (unit, extension, sensor,…). It contains information about device's available inputs and outputs, which you can use in your project. The prototypes are (not often) changing in time, mainly with new HW revisions, or with introduction of a new functionality.
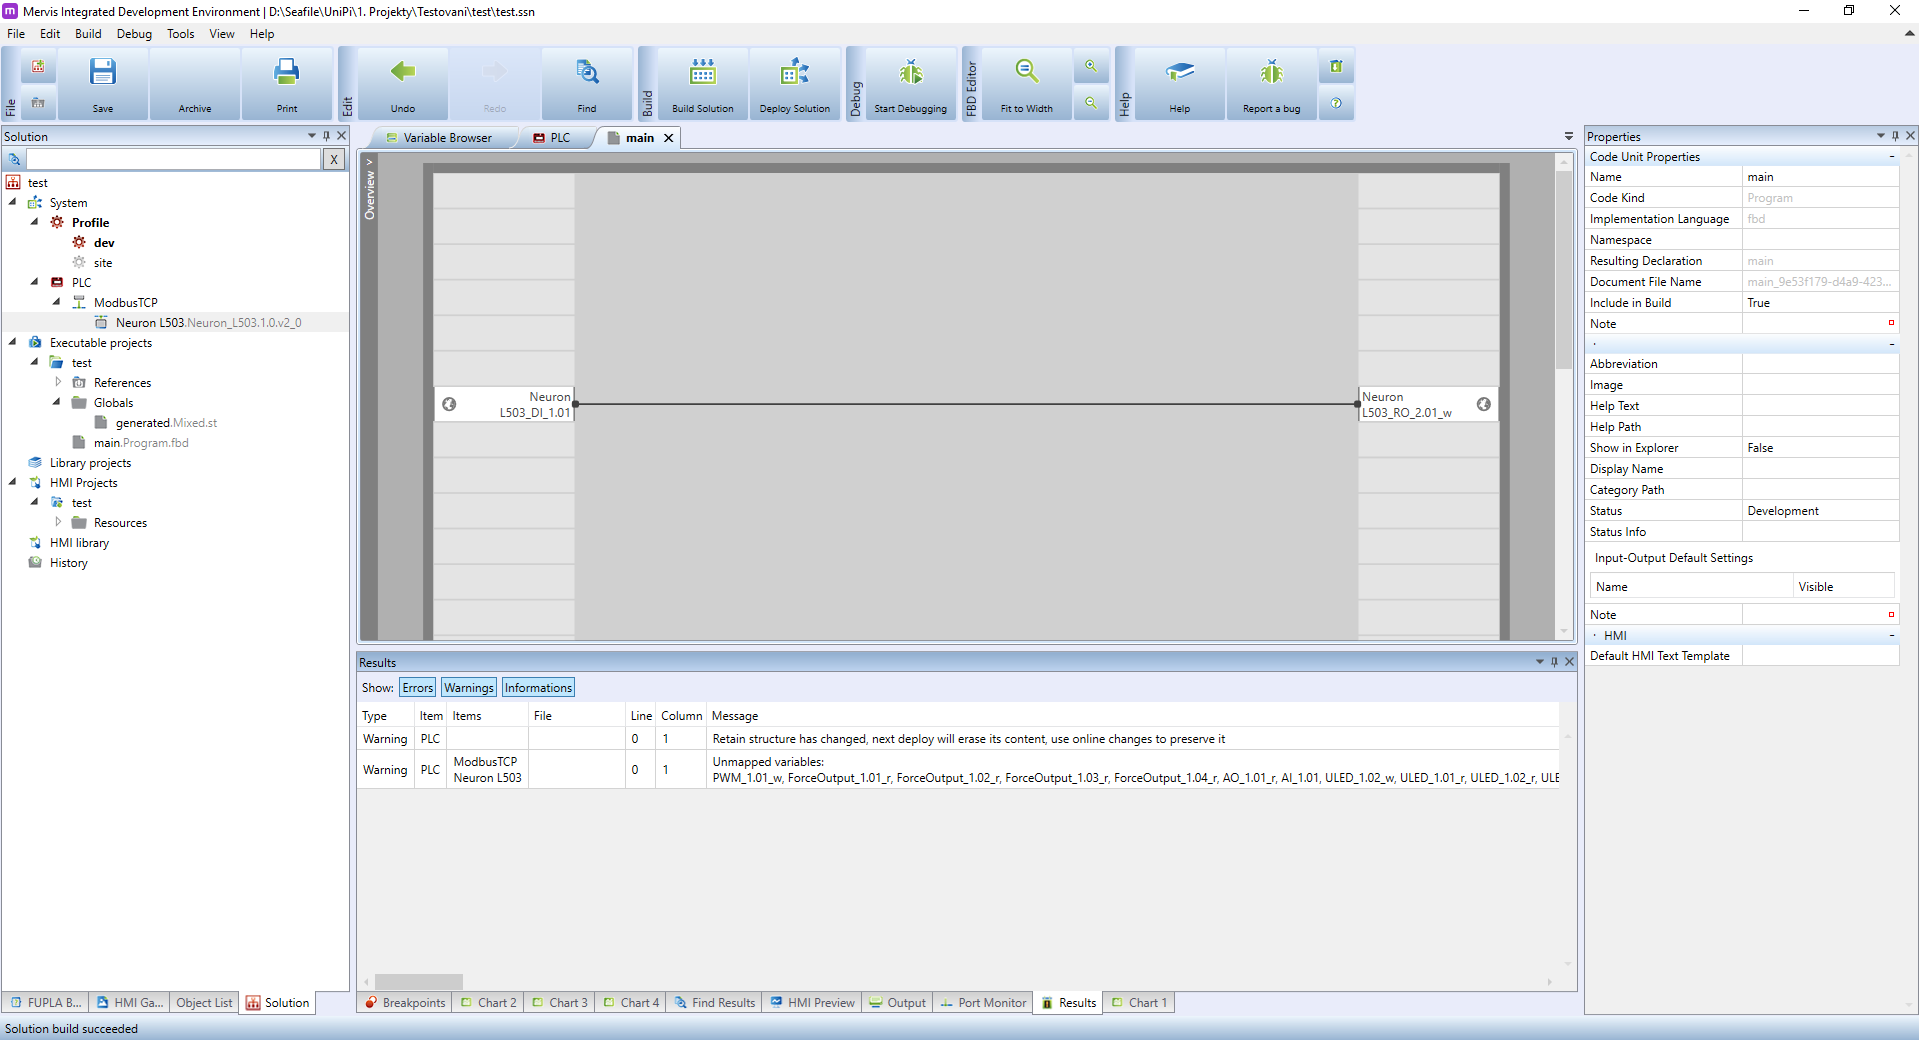
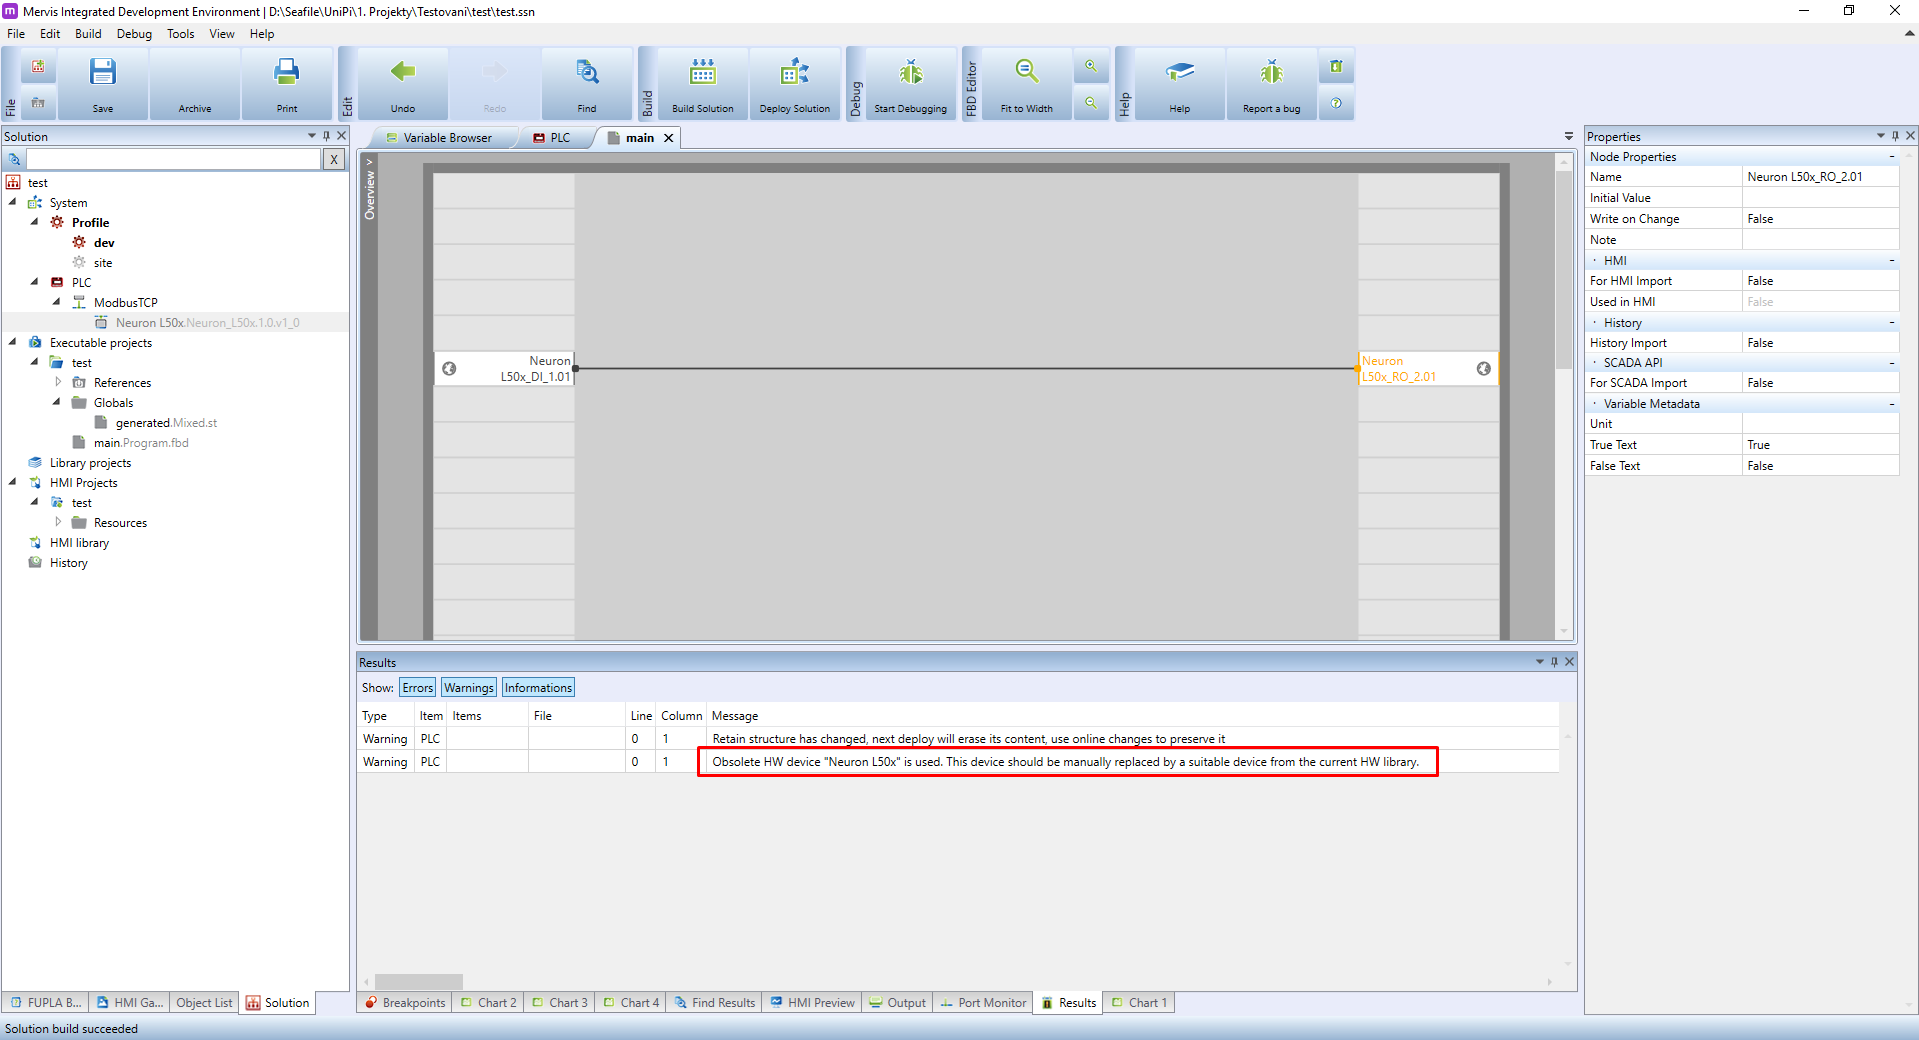
The prototype definitions are shipped with MervisIDE. When you create a new project, you will be offered the most recent version of prototype. But when you open project created in older MervisIDE, the current MervisIDE will use old prototype. This behaviour ensures backward compatibility. The MervisIDE will only give you warning upon building a project with old (obsolete) prototypes:
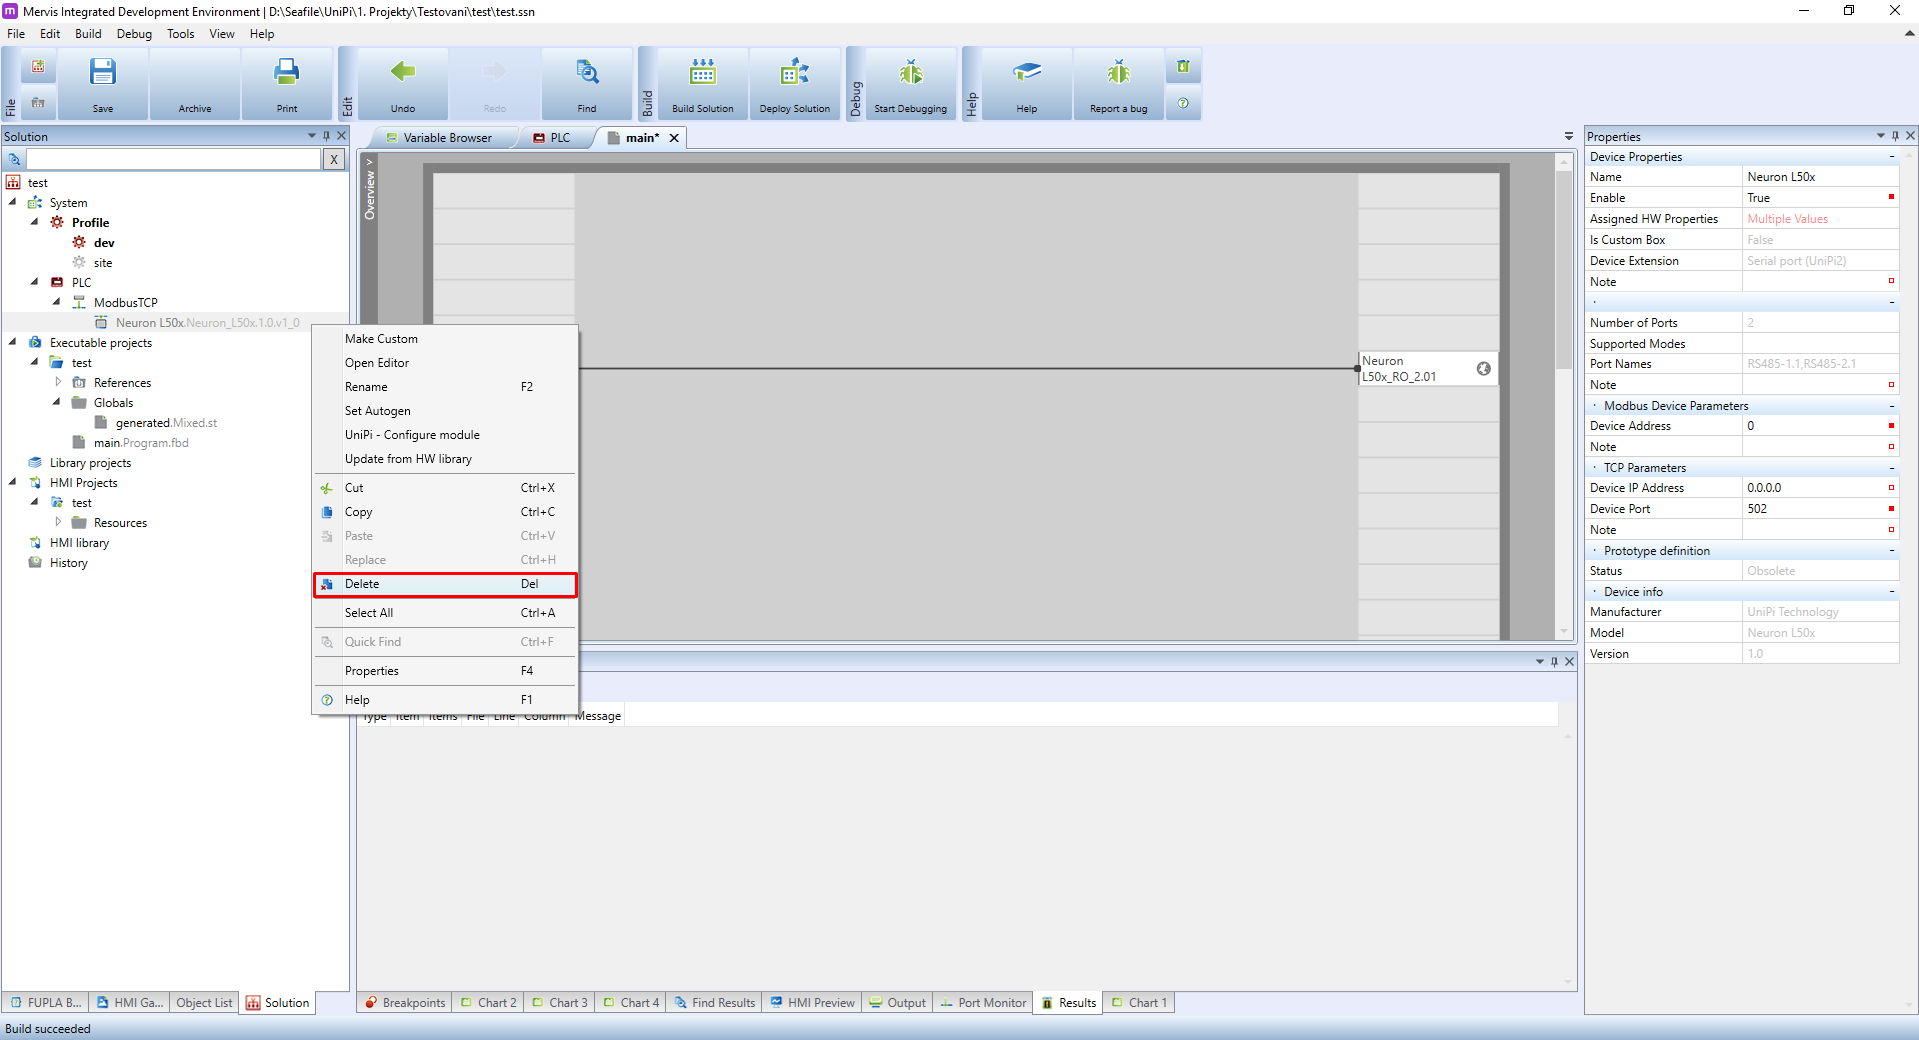
To access the new functions, you need to change the prototypes to up-to-date version. This process typically involves a certain amount of manual work, which depends on the complexity of your project. Let's demonstrate that. We have a simple project using a Neuron L503. The old prototype is called “Neuron L50x”. To change the prototype in your project, first delete the old one. Right click on the prototype name in the Left Panel and in the context menu click on Delete.
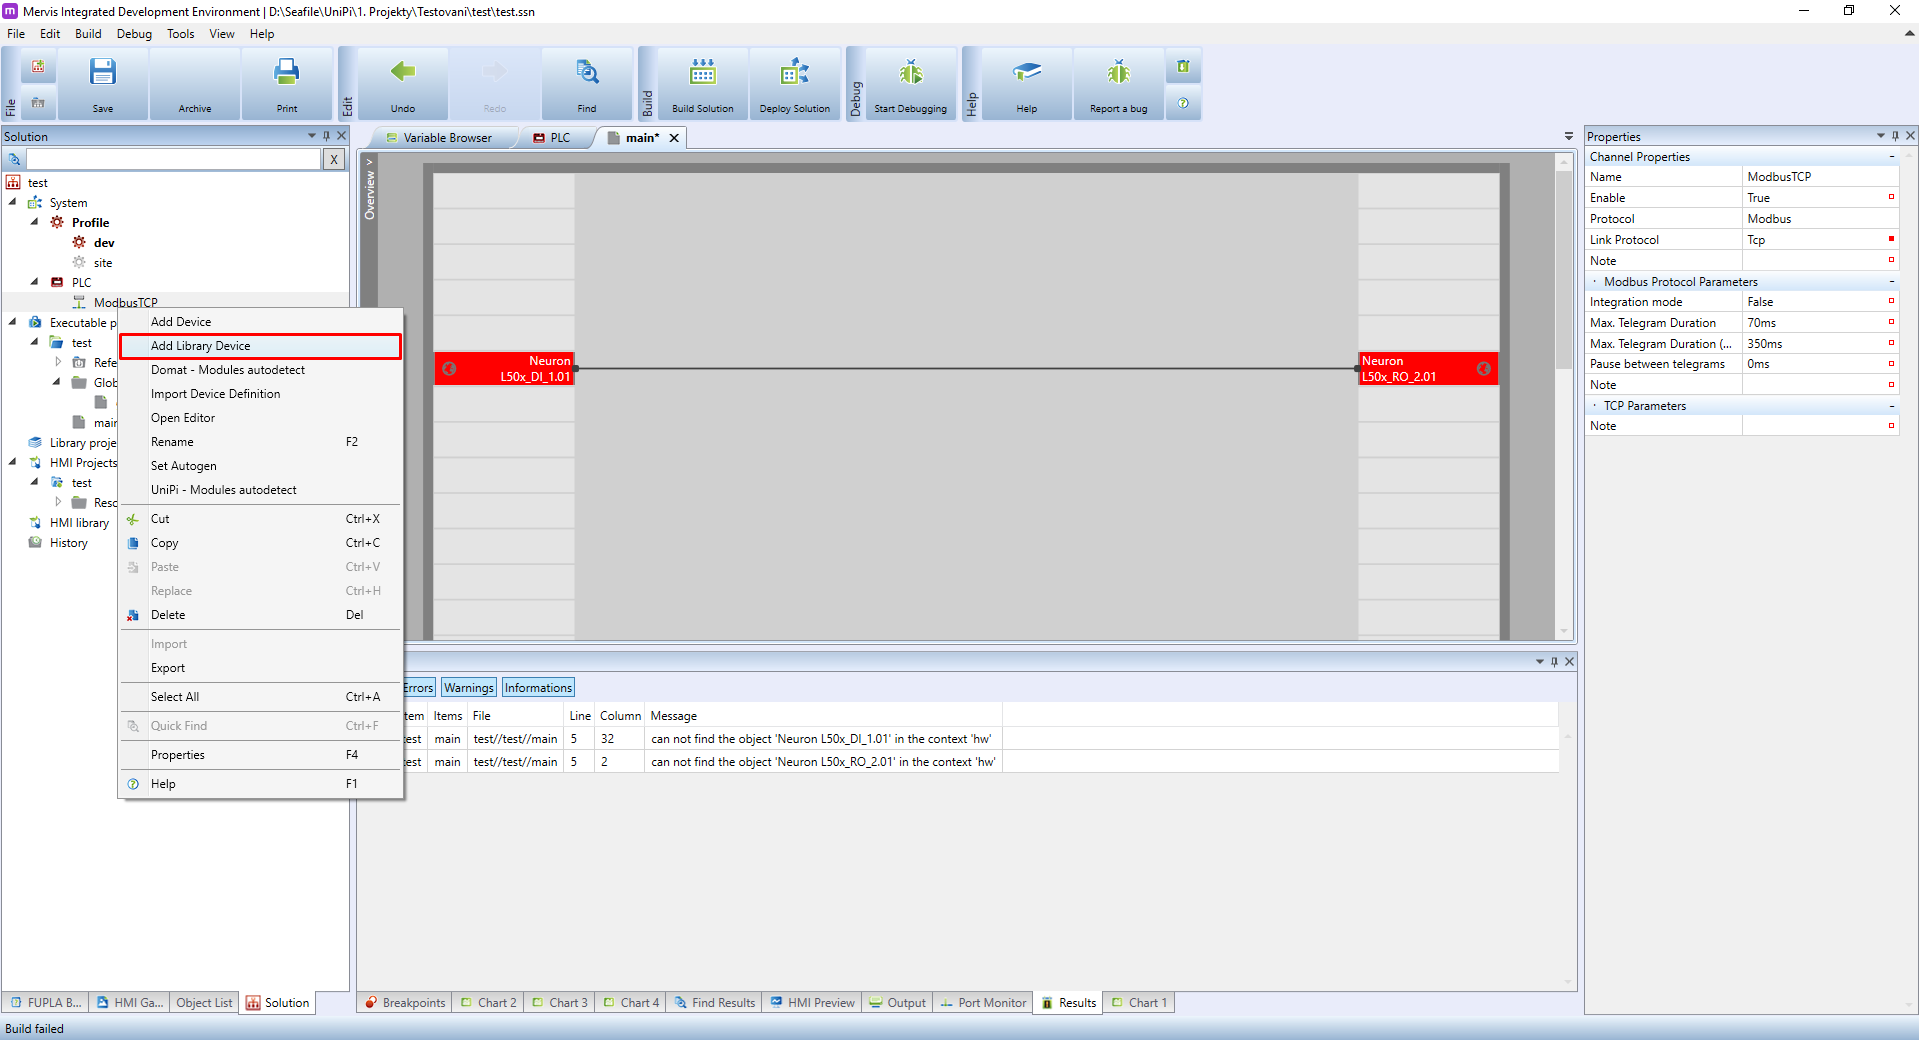
Right after the delete, the MervisIDE will rebuild the project to check for changes. We removed the definition of inputs and outputs and on all places where we used this IOs we will see a red boxes and the build will fail.

This is a good reference point for fixing the problems. Now add the new prototype. Right click on the channel in the Left Panel and select Add Library Device.
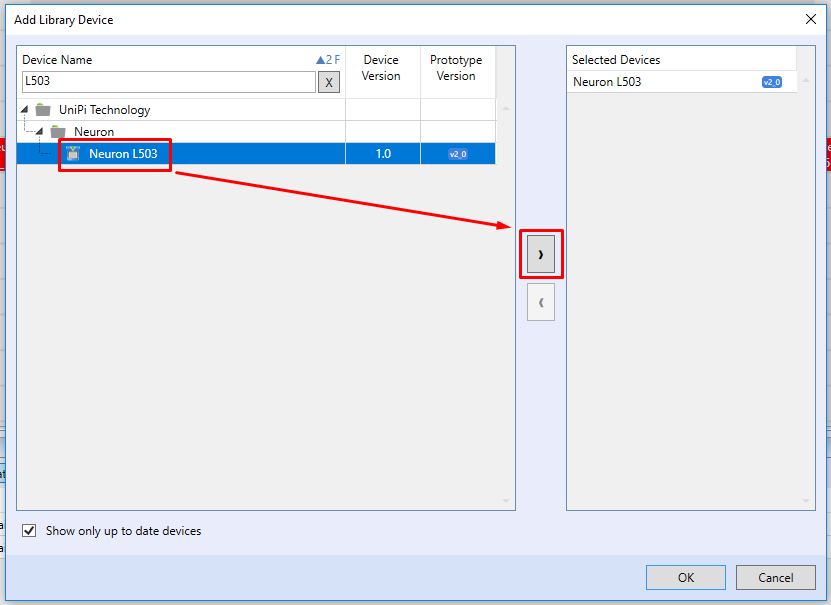
In the Add Library Device dialog search for the appropriate device, add it to the right list and confirm by clicking on OK.
As we added the new prototype, the project still doesn't know about the IOs. We need to set the autogen. For now, you can set autogen on whole device but the better way is to set autogen only on the IOs you want to use. You can learn why and how to do it in this tutorial.
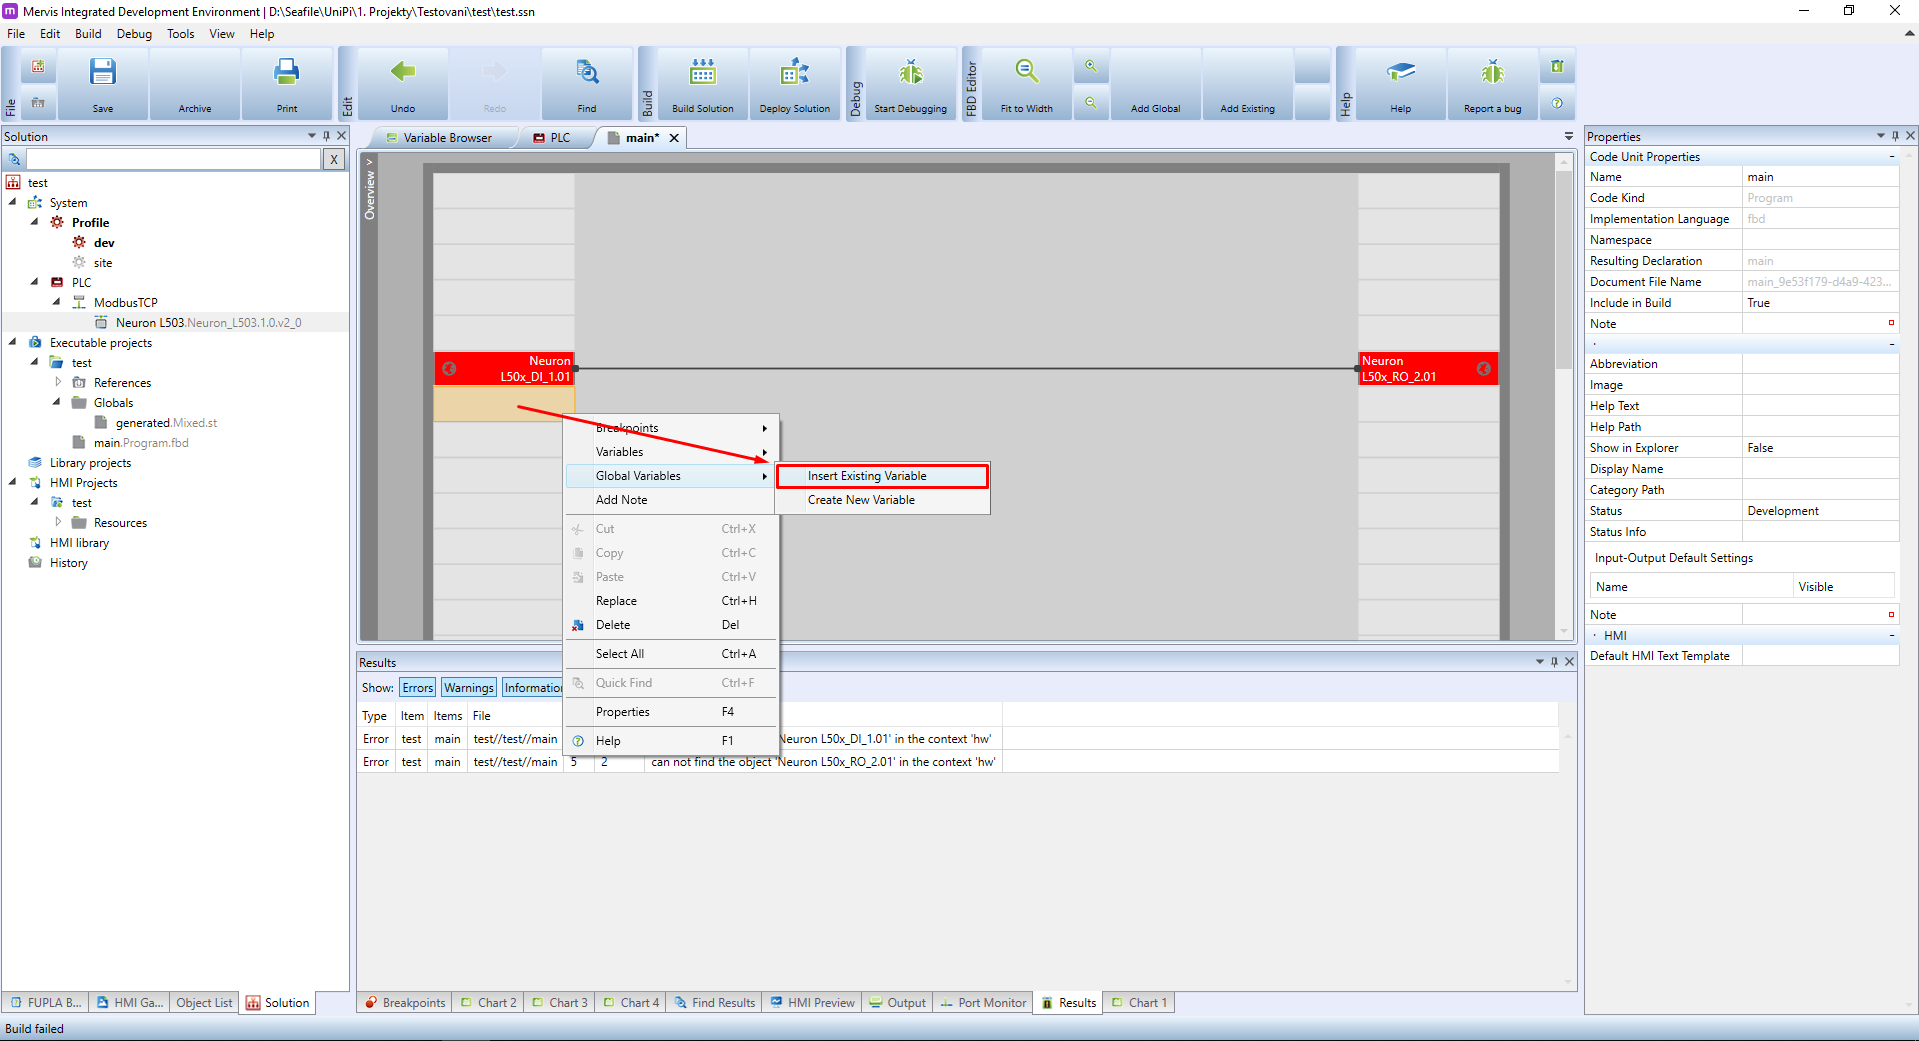
After setting the autogen, you can start replacing the wrong IOs in your program with the correct one. We will start with replacing the “Neuron_L50x_DI_1.01”. We have a free space under this block, so we will right-click on it and in the context menu select the “Global Variables → Insert Existing Variable”.
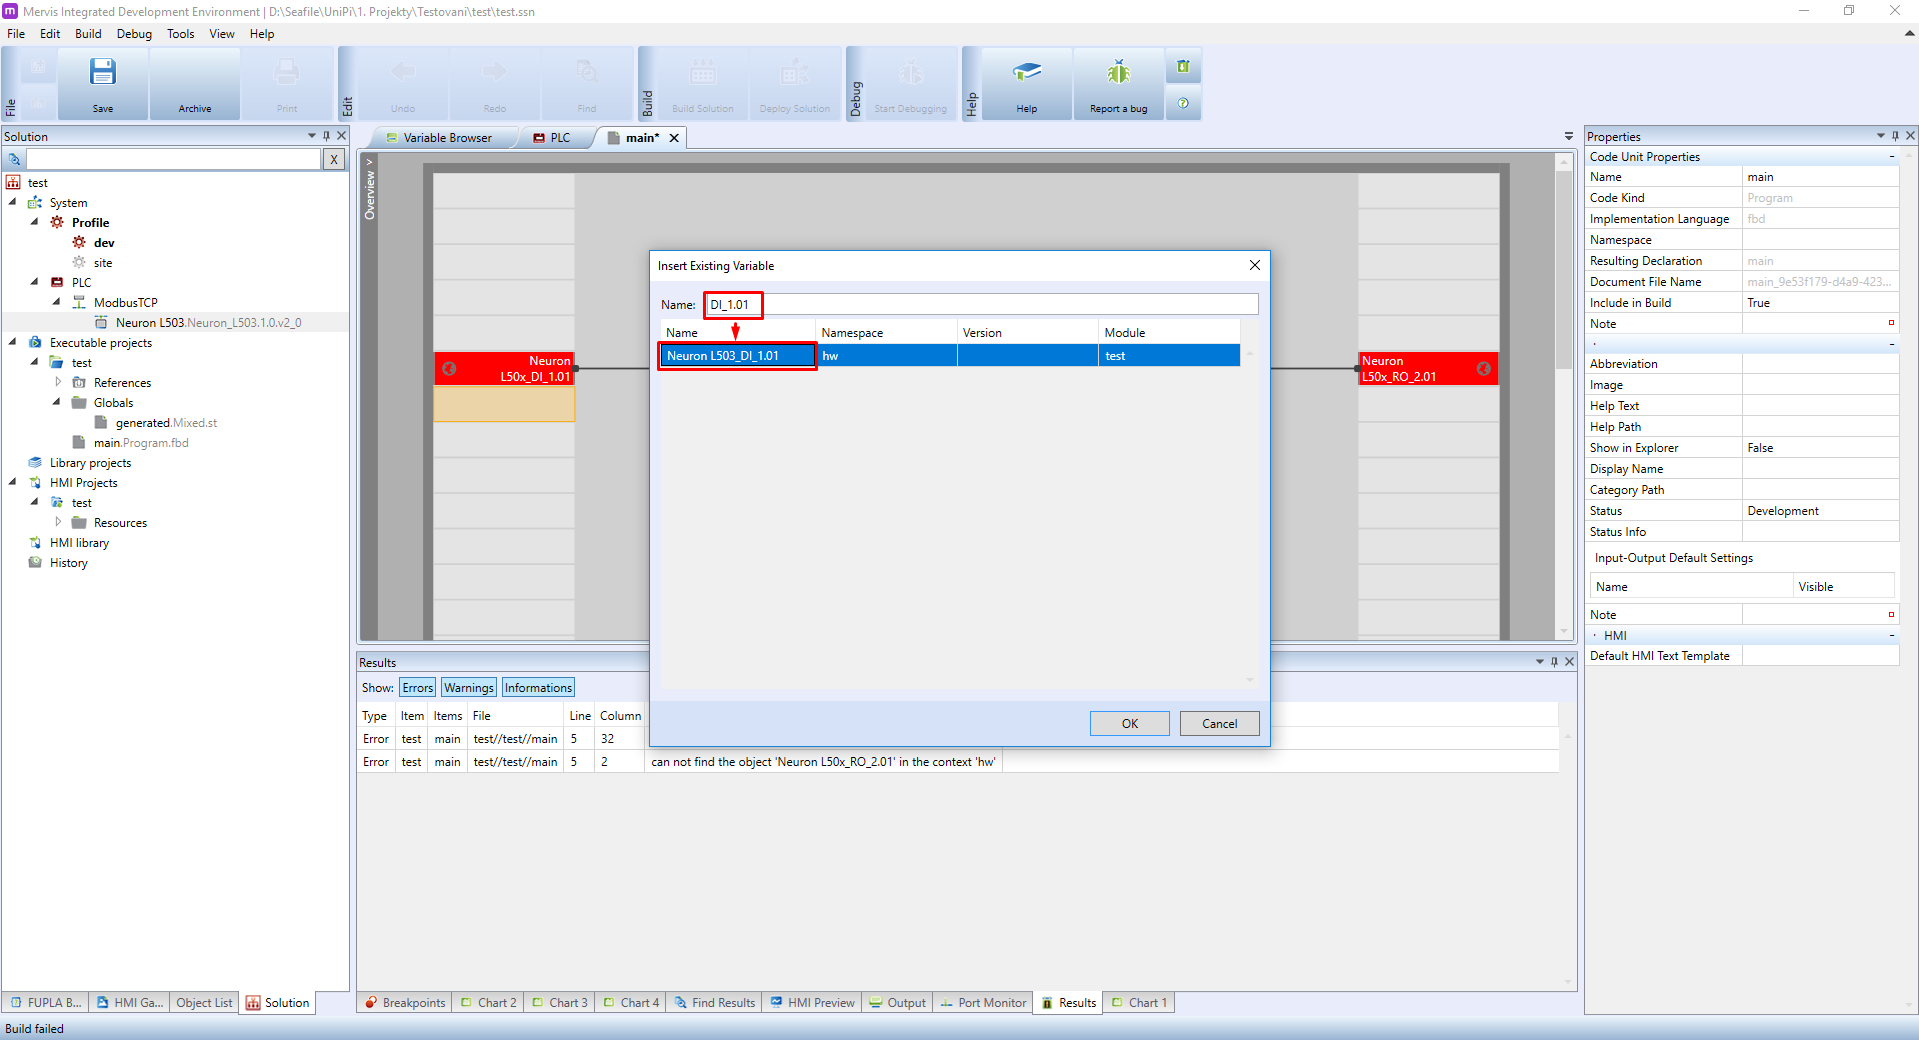
In the Insert Existing Variable dialog, search for the DI_1.01, which we want to replace. Select the found variable and confirm by clicking on OK.
As a result, a new datapoint will appear under the old one. Now select the wire leading from the old one by single clicking on it. Then click and grab the end of the wire and move it to the new datapoint.

The result should look like this:

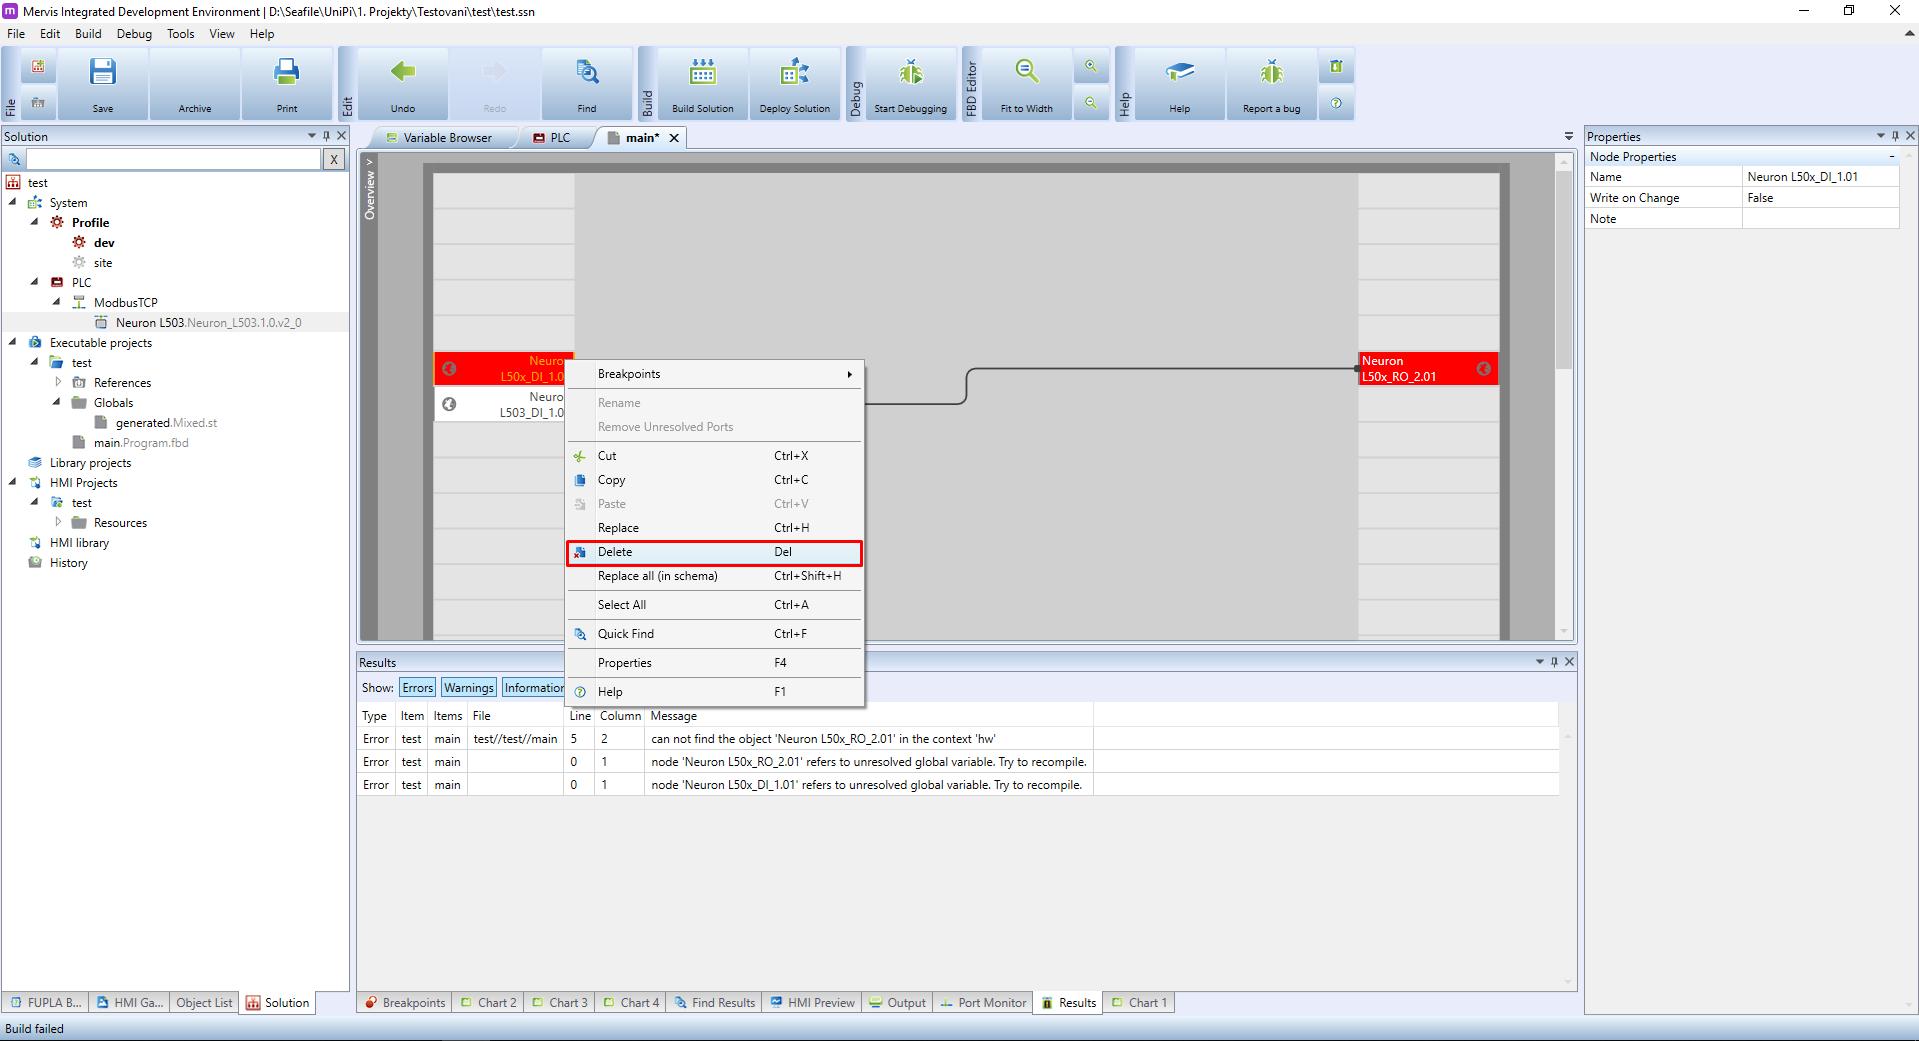
Now you can get rid of the old datapoint. Right-click on it and in the context menu select the Delete option.
And repeat the process for the remaining IOs until the build of the project succeeds. We only had to replace the “Neuron_L50x_RO_2.01”: