Storing data into Mervis DB
In this tutorial, we are going to demonstrate how to use history logs for long-term storing of data from Unipi controllers running Mervis OS.
Patron
Neuron
Gate
Unipi 1.1
Axon
Prerequisites
- Unipi controller running Mervis OS
- 24 V⎓ power supply
- Mervis IDE project created according to Storing data to history log
- Mervis DB credentials


Note:
The Mervis DB credentials are generated together with the Mervis SCADA project and are intended for all PLCs connected to this SCADA project.
PLC properties settings
The first step is to set up the storage.
If you wish to use the Mervis DB service to back up variables using our servers, you need to set its communication parameters first. In the left panel, select PLC.
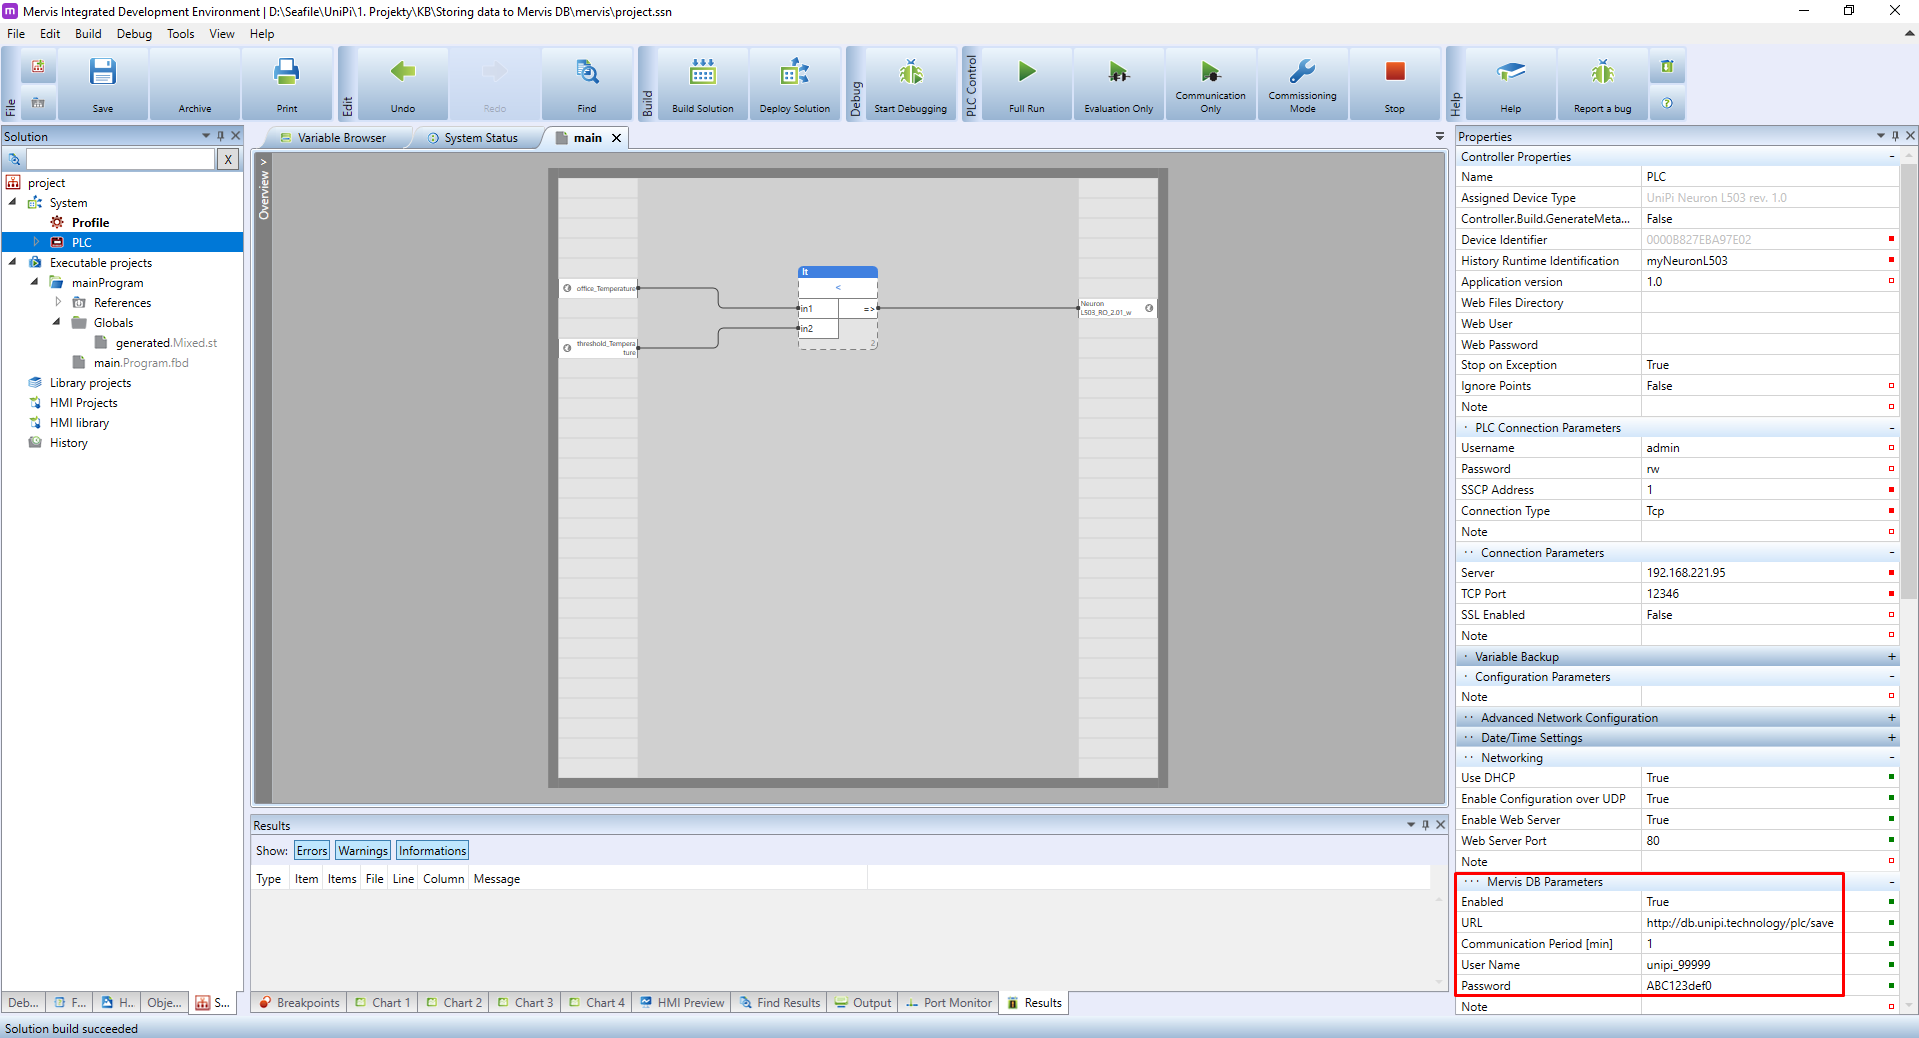
Approximately in the middle of the PLC's properties a section Mervis DB Parameters is located. Set its values to the following:
- Enable: set to true to enable the logging
- URL: the URL of the Mervis DB service. For controllers running Mervis OS v2.3.0 or newer, use
https://db.unipi.technology/plc/save. For the rest, usehttp://db.unipi.technology/plc/save - Communication period [min]: this is the period in which the PLC will send the gathered data
- Certificate validation: set to
FALSEby default, more info in the Certificate validation - Username: the Mervis DB username
- Password: the Mervis DB password
Note:
Observant users probably realized we just entered a second different time parameter, namely the Communication period.
What's the difference?
The Save Period defines how often the PLC will sample variable values. The Communication Period is how often the PLC will send those samples to the Mervis DB.
- Communication Period defines how often will PLC send data to Mervis DB. Can be set in PLC Properties
- Save Period determines how often will PLC parse variable values. Can be configured in the History log.
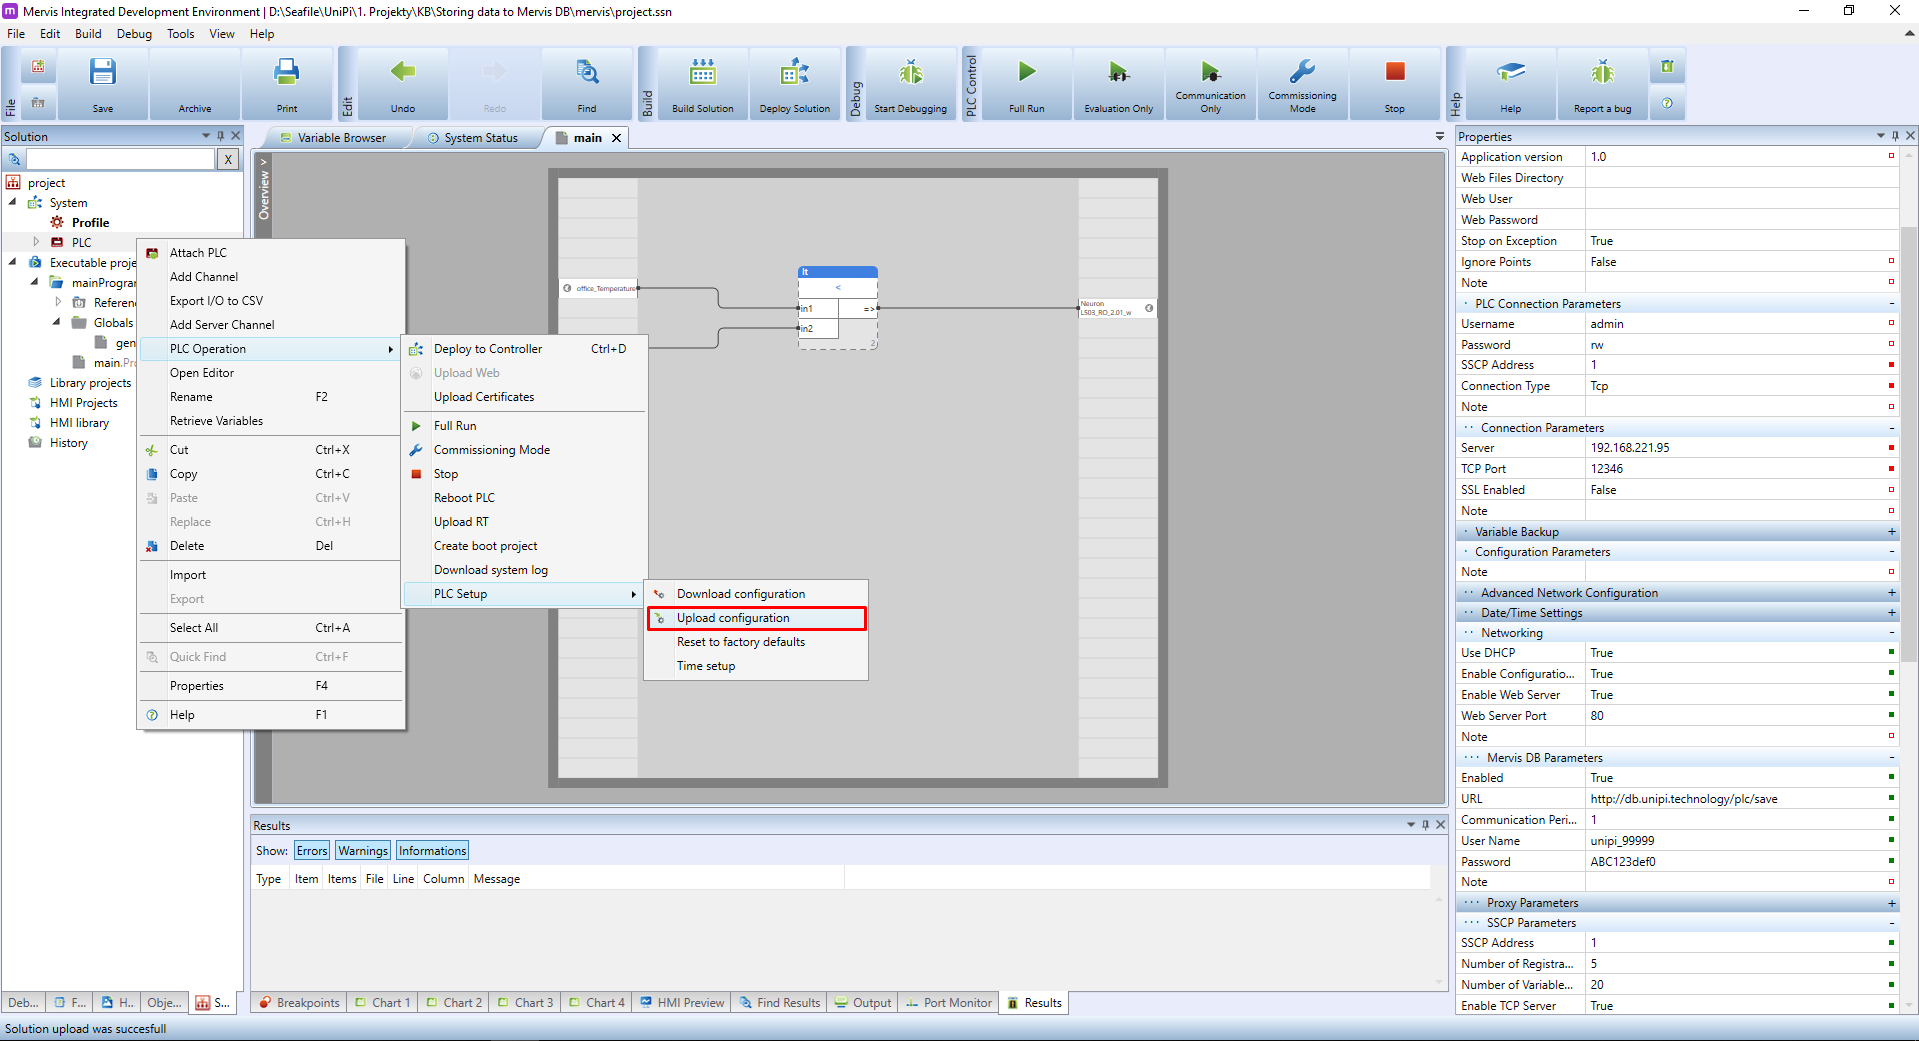
Since we changed the configuration of the PLC, we need to upload it. Right click on the PLC in the Left panel and select the PLC Operation → PLC Setup → Upload configuration. If you are not sure, check out the Uploading a RunTime configuration tutorial.
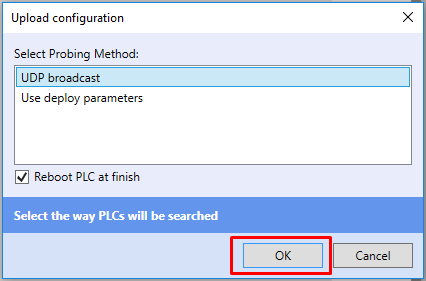
You will be asked how to connect to the PLC. If you are on the same network, you can select UDP Broadcast. If not (ie. you connect to the PLC via Mervis Proxyn), select Use deploy parameters and confirm by clicking on OK.
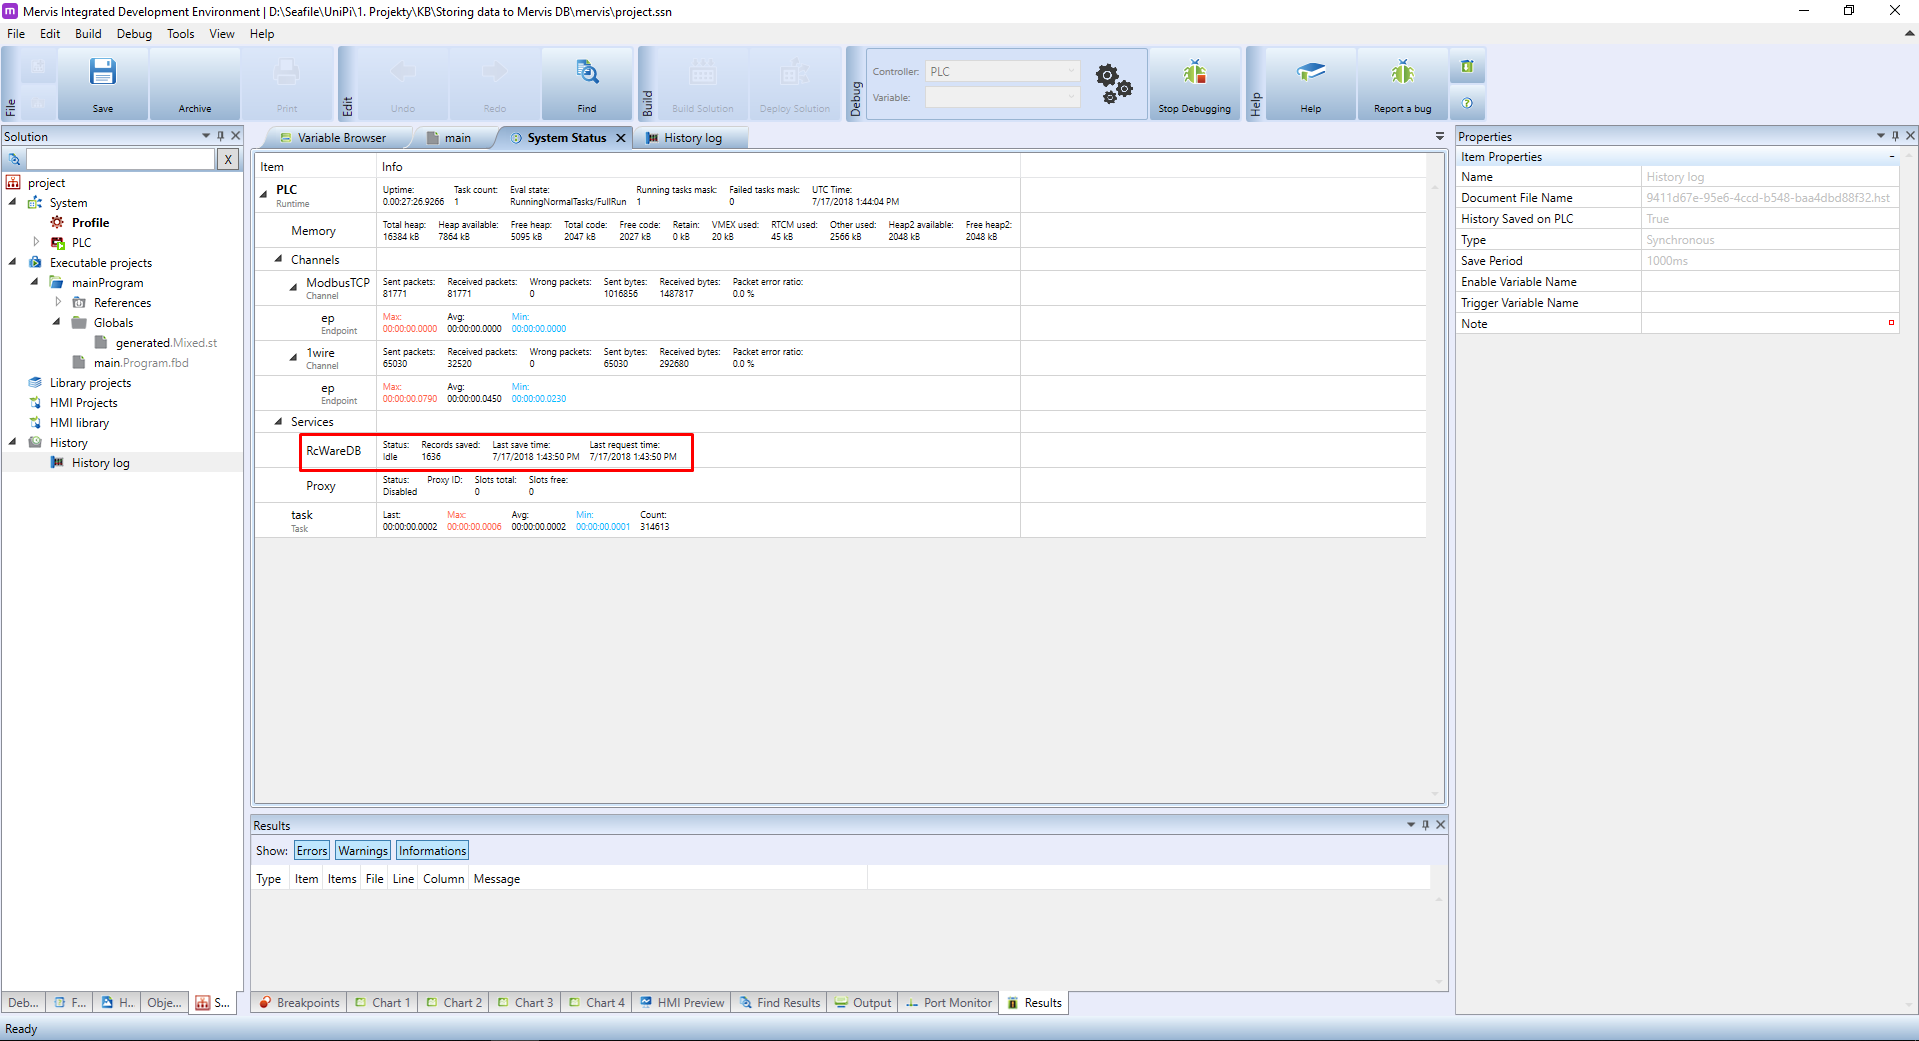
Deploy the solution, start the Debugging Mode and open the System status tab located on the main panel. In the MervisDB section (or RcWareDB in older versions of the IDE), you can check if the PLC communicates with Mervis DB. If the Communication interval [min] is set to 1 minute, the Records saved value will increase every 60 seconds.
Saved data can be found in graph view in Mervis SCADA.
If Mervis DB fails to display data even if you configured everything correctly, it is probably caused by the fact Mervis DB does not have any logged data yet. Wait until the first log is uploaded - the required time for this varies depending on communication intervals set for the PLC and DB, or on the history log interval. The interval can be synchronous (eg. with a fixed upload time) or asynchronous (the interval depends on how long it takes for data to be logged). If the issue persists even then, check Mervis DB login and password, make sure the address is set correctly and also make sure you uploaded the configuration into the PLC correctly.


