This is an old revision of the document!
Connecting the EMO-R8 to Unipi 1.1
This guide follows the First project with Unipi 1.1/Lite. It describes how to connect EMO-R8 expansion modules to Unipi 1.1 in Mervis and thus expand it by up to 56 relay outputs.
The addressing the module, further information, and a link to the e-shop can be found at this link.
Unipi 1.1
What you will need:
- MicroSD card for RPi

For the purposes of this manual, it is NECESSARY:
- Connect the EMO-R8 module to the Unipi 1.1 using an RJ11 cable
- Connect power supply - wait at least one minute before the OS in the PLC starts
Connection
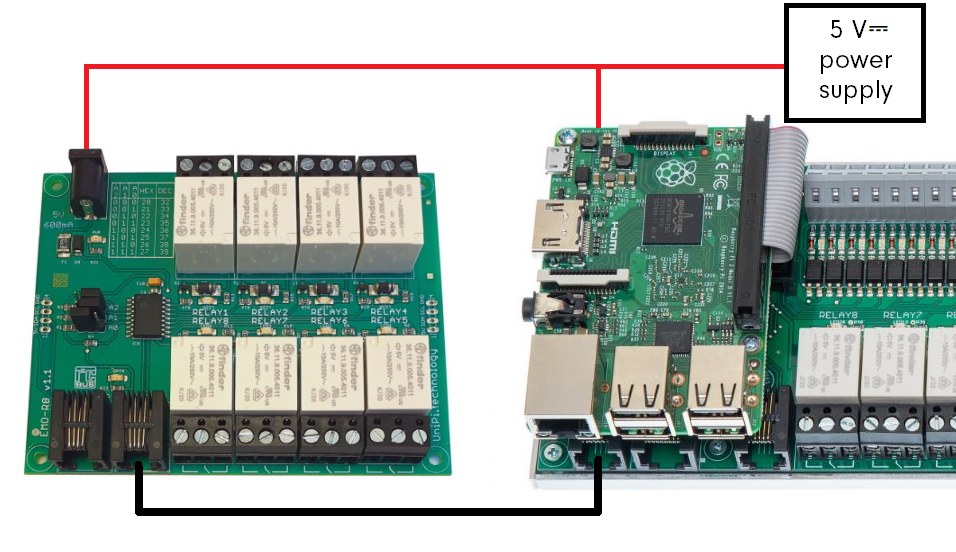
In the package of the EMO-R8 module, you will find an RJ11 connecting cable using which you can easily connect the module to Unipi 1.1. In addition to this connection, a 5 V⎓ / 0.6 A power supply must also be supplied to the module.
Procedure
To add an EMO-R8 device, first open your solution with the assigned Unipi 1.1, including inputs and outputs.
In the left panel of the solution, right-click on the I²C channel. In the context menu, select Add Library Device.

The Add Library Device dialog box opens, listing the various devices. In this dialog, expand the Unipi folder (v1.1) and continue with the I²C subfolder, select EMO-R8 here. Then click on the arrow icon to add the device definition to the list of selected devices. Then just confirm by clicking OK.
Otevře se dialogové okno Přidat zařízení z knihovny, kde naleznete seznam různých zařízení. V tomto dialogu rozbalte složku Unipi (v1.1) a pokračujte podsložkou I²C, zde označte EMO-R8. Následně klikněte na ikonu šipky ![]() , čímž přidáte do seznamu zvolených zařízení definici zařízení. Poté již stačí pouze potvrdit kliknutím na OK.
, čímž přidáte do seznamu zvolených zařízení definici zařízení. Poté již stačí pouze potvrdit kliknutím na OK.

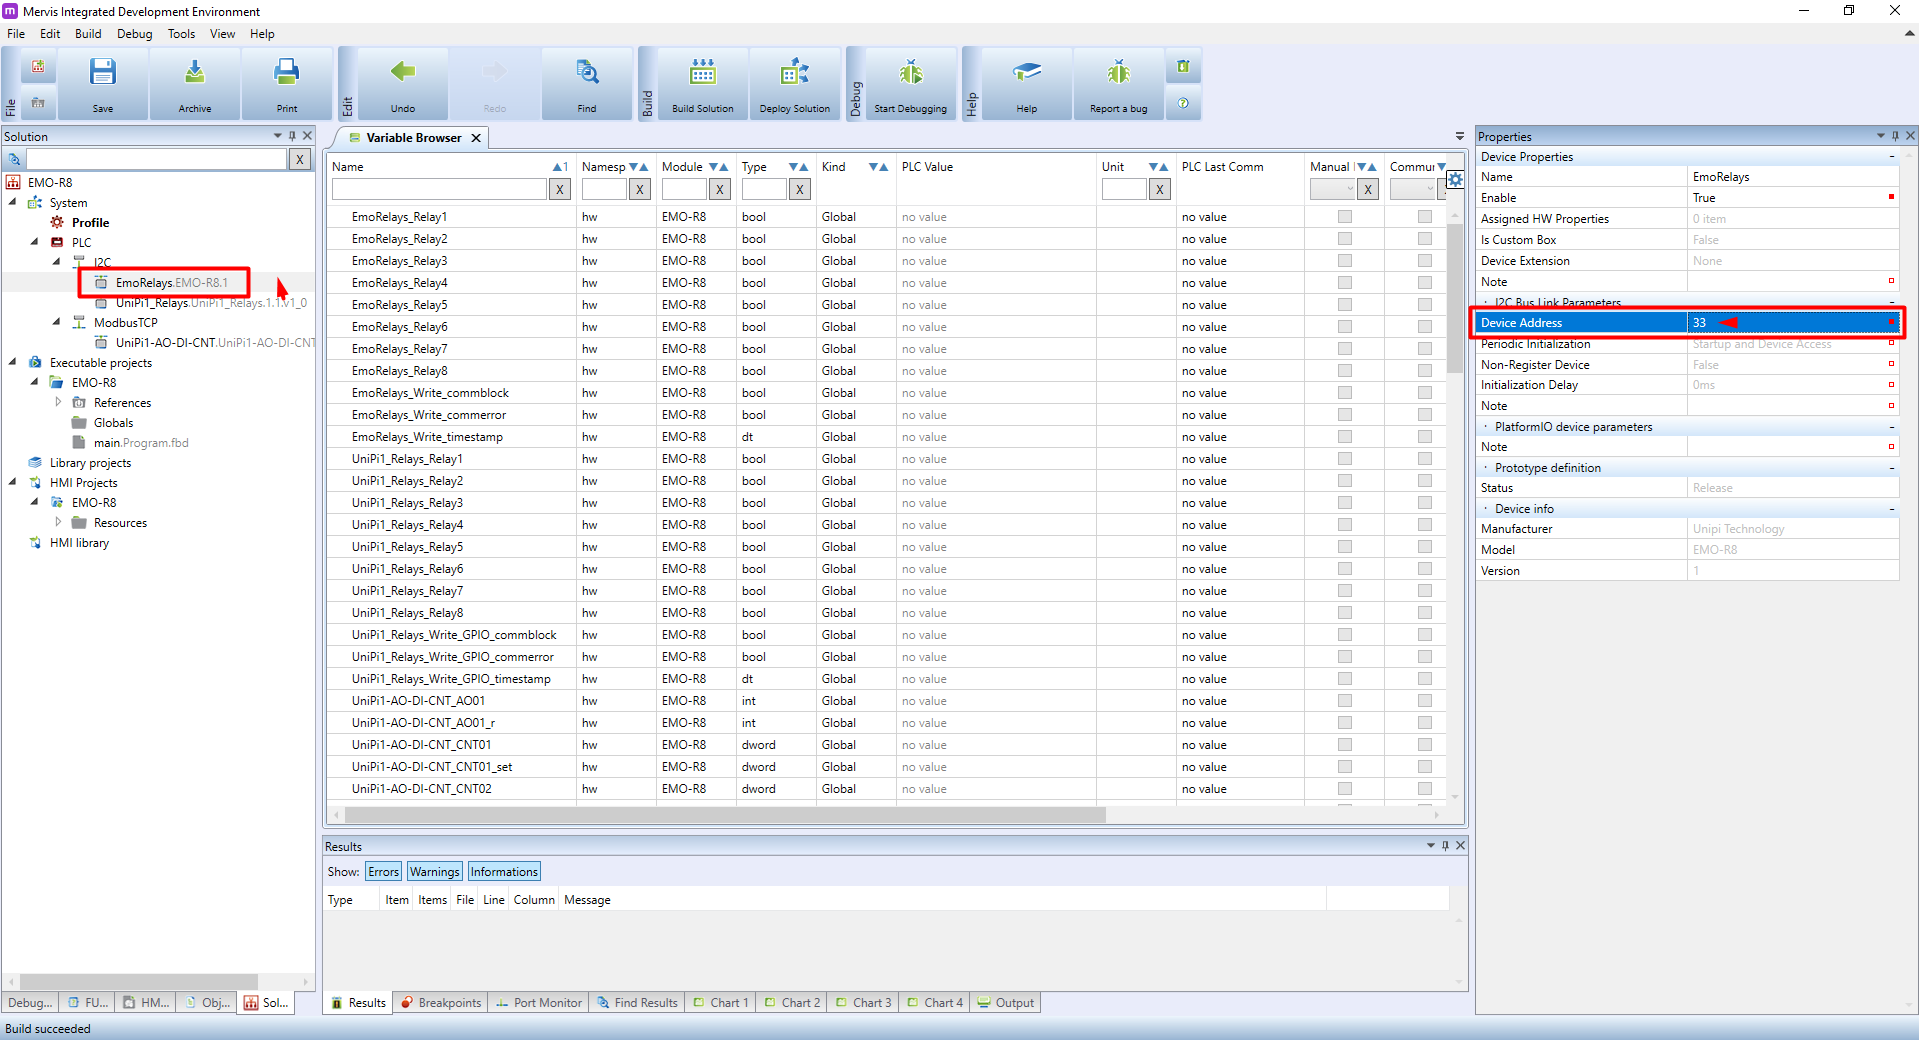
Definice zařízení tímto přidána, ale je ještě třeba nastavit adresu zařízení (modulu).
Označte definici zařízení a v pravém sloupci Vlastnosti nastavte adresu u parametru Adresa zařízení dle fyzického nastavení adresy na modulu.
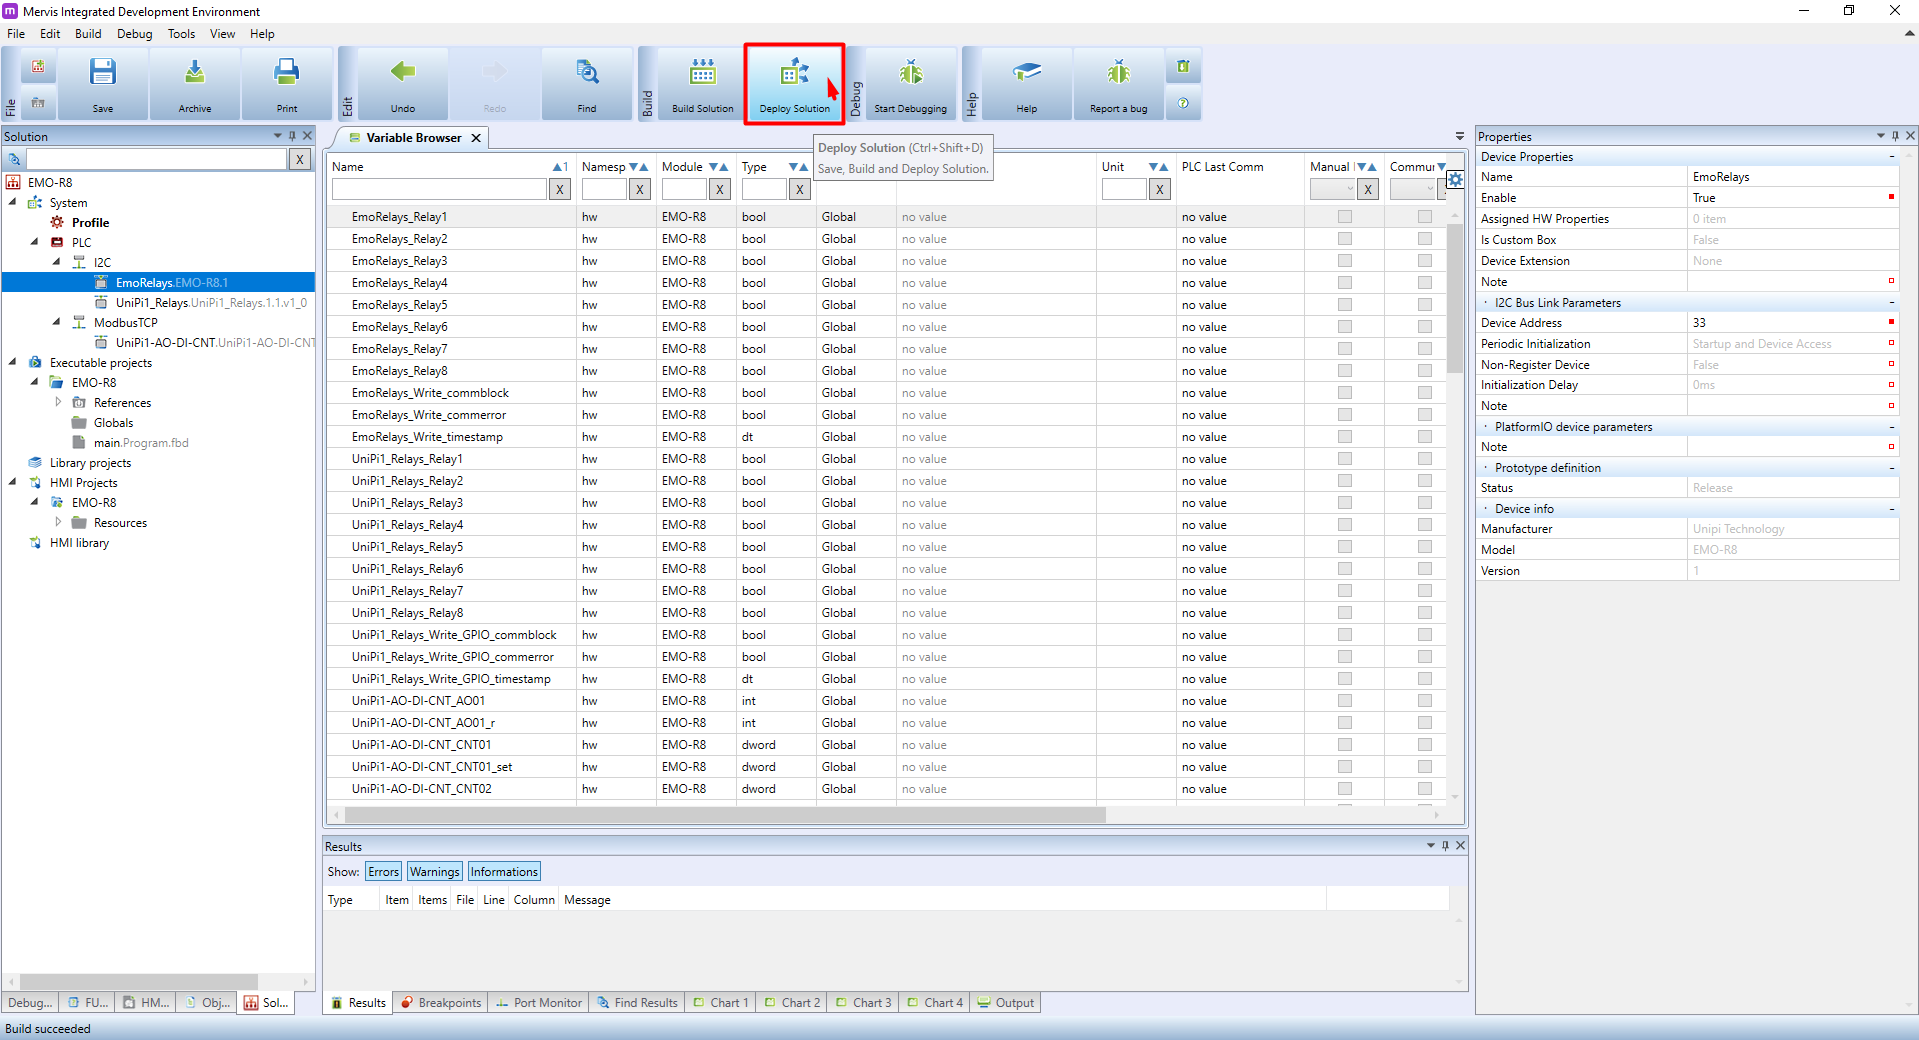
Nyní nastavte autogen pro vybrané relé výstupy, nebo celý modul a nahrajte sestavu.