This is an old revision of the document!
First steps
The Unipi Gate is delivered with Linux Debian OS that already includes the Node-RED open-source SW platform - a programming tool for interconnecting hardware devices, various APIs or online services. This article assumes Unipi Gate is in factory settings and uses the OS with Node-RED.
![]()
If you cannot tell the device's current state, check the description of all possible states available in LED indication category including visual demonstration.
Regular mode
The regular mode of the device's startup. Both the programming and user interfaces in Node-RED are available. The device enters this mode for several seconds after plugging in the power supply. The mode is physically indicated by PWR LED continuous emitting and ACT LED emitting with short flashes (demonstration here / startup simulator here).
First connection of the device
Unipi Gate device can be powered by 9-30 V⎓ power supply. To access the Node-RED interface you need to connect to the device via a web browser, using a computer or tablet.
Note:
Unipi Gate has an interface marked as eth0 (100Mbit) and eth1 (1Gbit). By default, these interfaces are connected to the br0 network bridge and act as a two-port switch. The MAC address for br0 is taken from the eth0 interface. As such, it does not matter which port is used to connect the device to a local network. In the regular mode, MAC address is assigned for each port individually.
Caution:
Device in default configuration should be connected to local network with only a single cable. In case both interfaces would be connected to a single network, a loop may occur disabling communication in the entire network.
Connection via a local network with DHCP server
Despite its rather complicated name, this approach is simple and the most frequent connection method. All you need to do is to connect Unipi Gate to a computer network via ethernet cable, and then connect a computer or tablet to the same network (using either Ethernet or Wi-Fi). The network's DHCP server (router or Wi-Fi router) will then automatically provided both devices with an IP address from the available address range.
Unipi Gate's IP address can be obtained either from the DHCP server, or by using a suitable network scan program (such as Advanced IP Scanner). In most cases, however, the mDNS record will suffice.
The used IP addresses are samples.

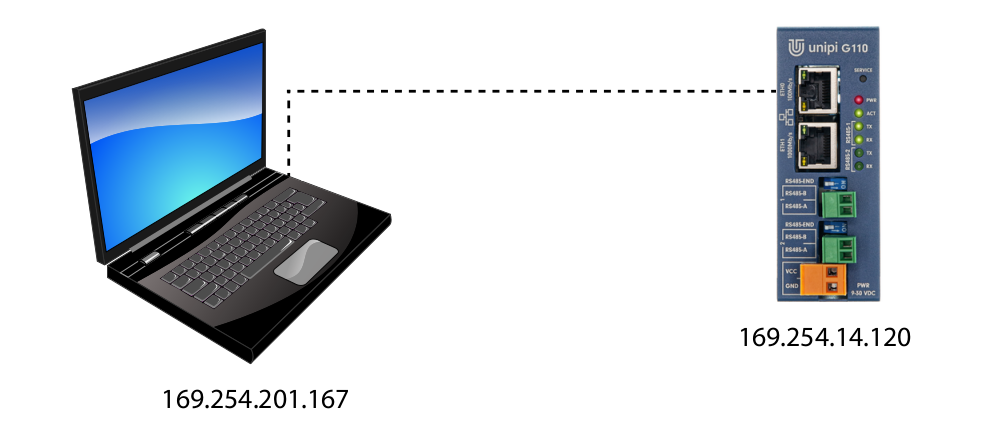
Direct connection
This method requires a physical link between the computer and the Unipi Gate device via Ethernet cable. As this solution does not include a DHCP server, both the computer and the Unipi Gate are assigned with a random IP address from the range of 169.254.XXX.XXX.
The Unipi Gate device's IP address can be obtained by using a suitable network scan program (such as Advanced IP Scanner). In most cases, however, the mDNS record will suffice.
The used IP addresses are samples.
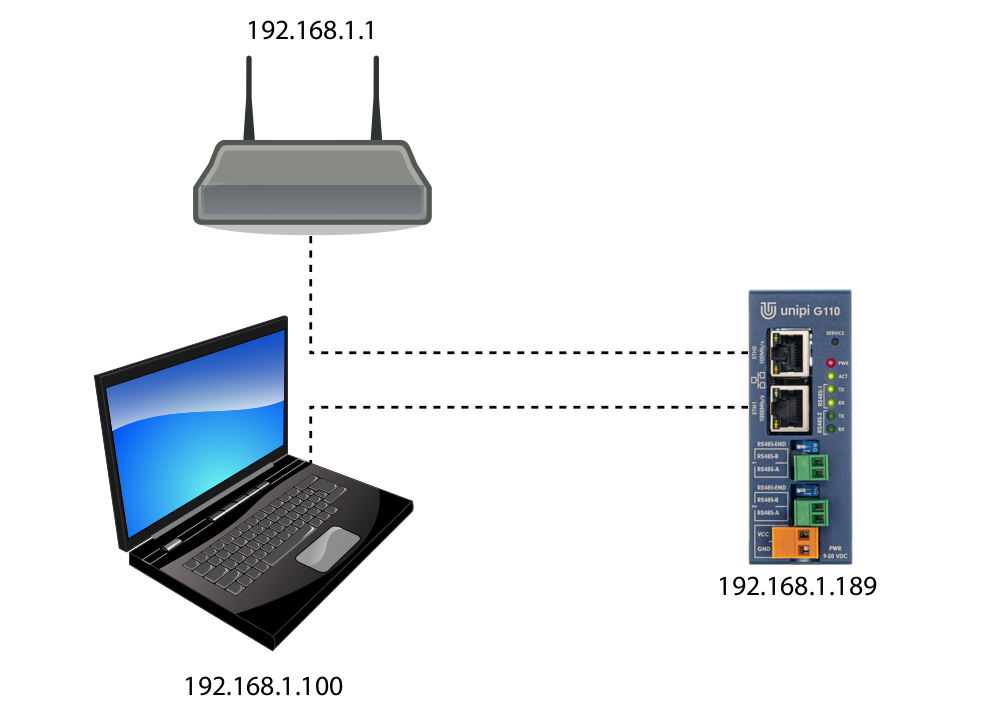
Connection to a local network with DHCP using Unipi Gate's network bridge
This method combines both above-mentioned variants and is useful in cases when your router does not have enough free Ethernet ports and Wi-Fi connection for your computer is not available.
Start by connecting the Unipi Gate device into the router's free port via Ethernet cable. Use a second Ethernet cable to connect your computer to the second port on Unipi Gate. As both Unipi Gate's ports act as a network switch (or a patch cord), both devices are connected to the same network and will be assigned IP addresses automatically by a DHCP server, using the available IP address range.
The Unipi Gate device's IP address can be obtained by using a suitable network scan program (such as Advanced IP Scanner). In most cases, however, the mDNS record will suffice.
The used IP addresses are samples.
Connecting to Node-RED interface
To access the Node-RED user interface (so-called dashboard), open a web browser and enter the IP address or mDNS address to the browser's address bar.
Such as:
http://g100-sn1
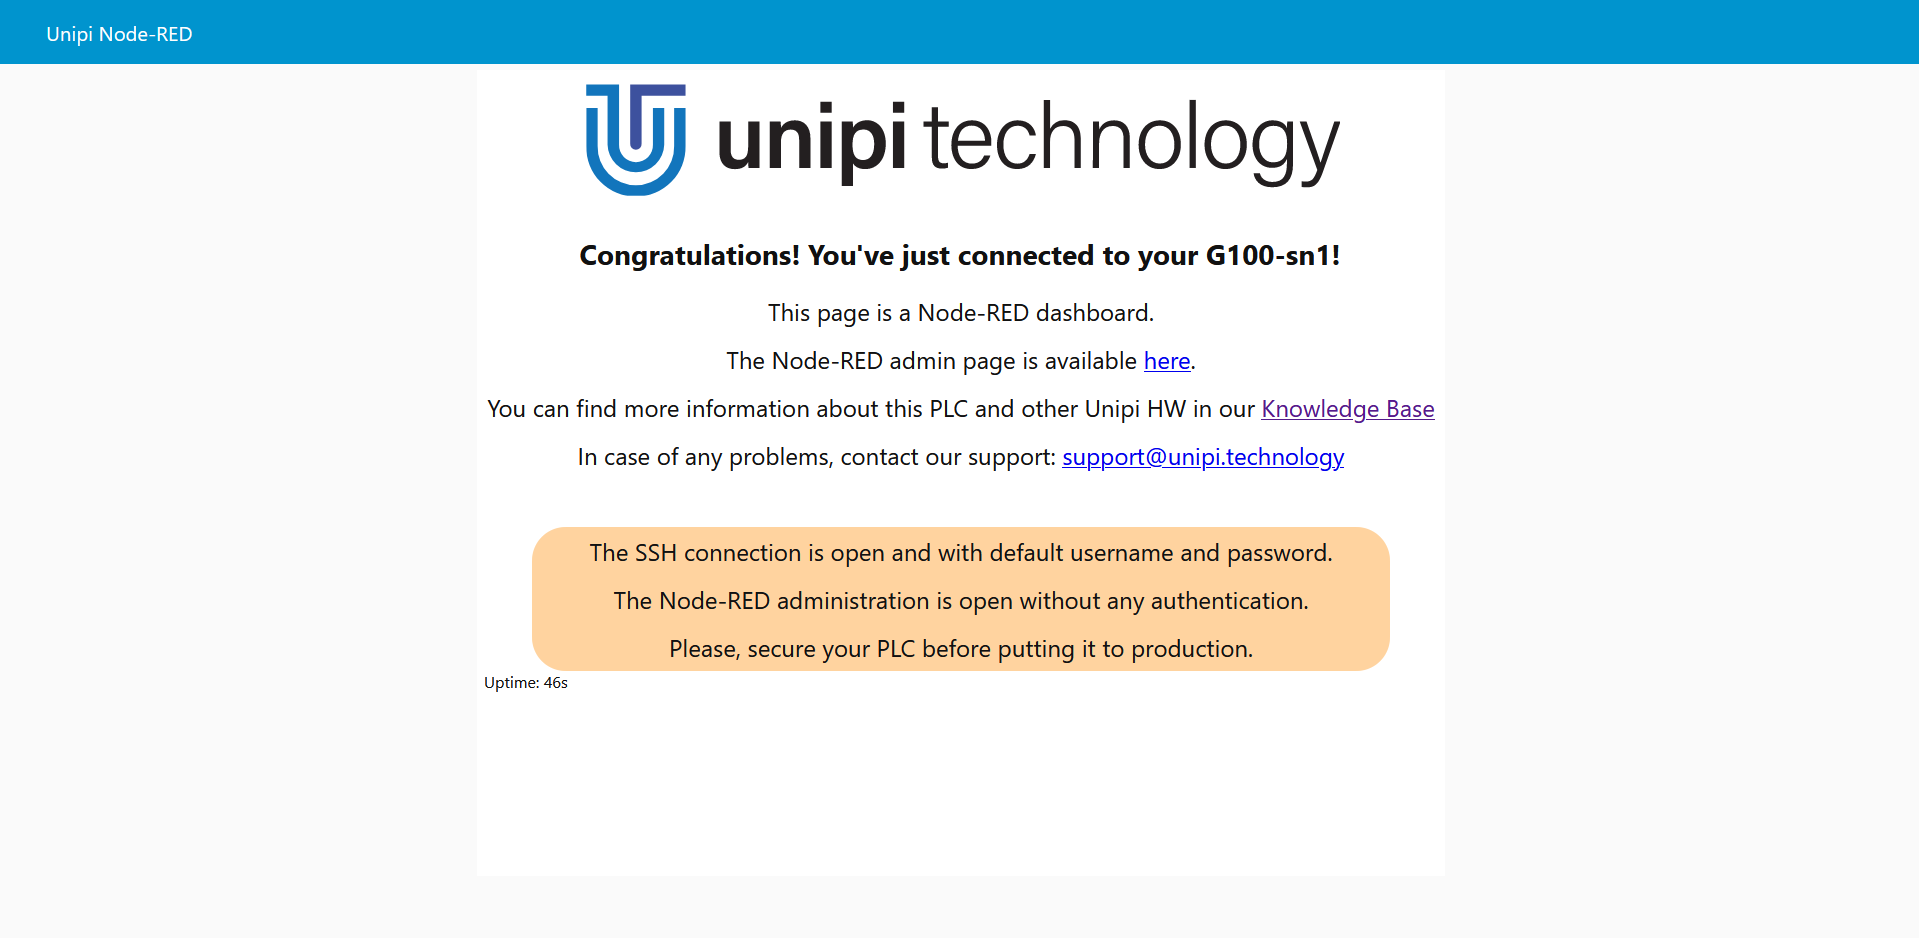
The following interface will appear:
To enter the Node-RED programming interface, add :1800 port to the IP or mDNS address.
An example:
http://g100-sn1:1880
The following interface will be displayed:
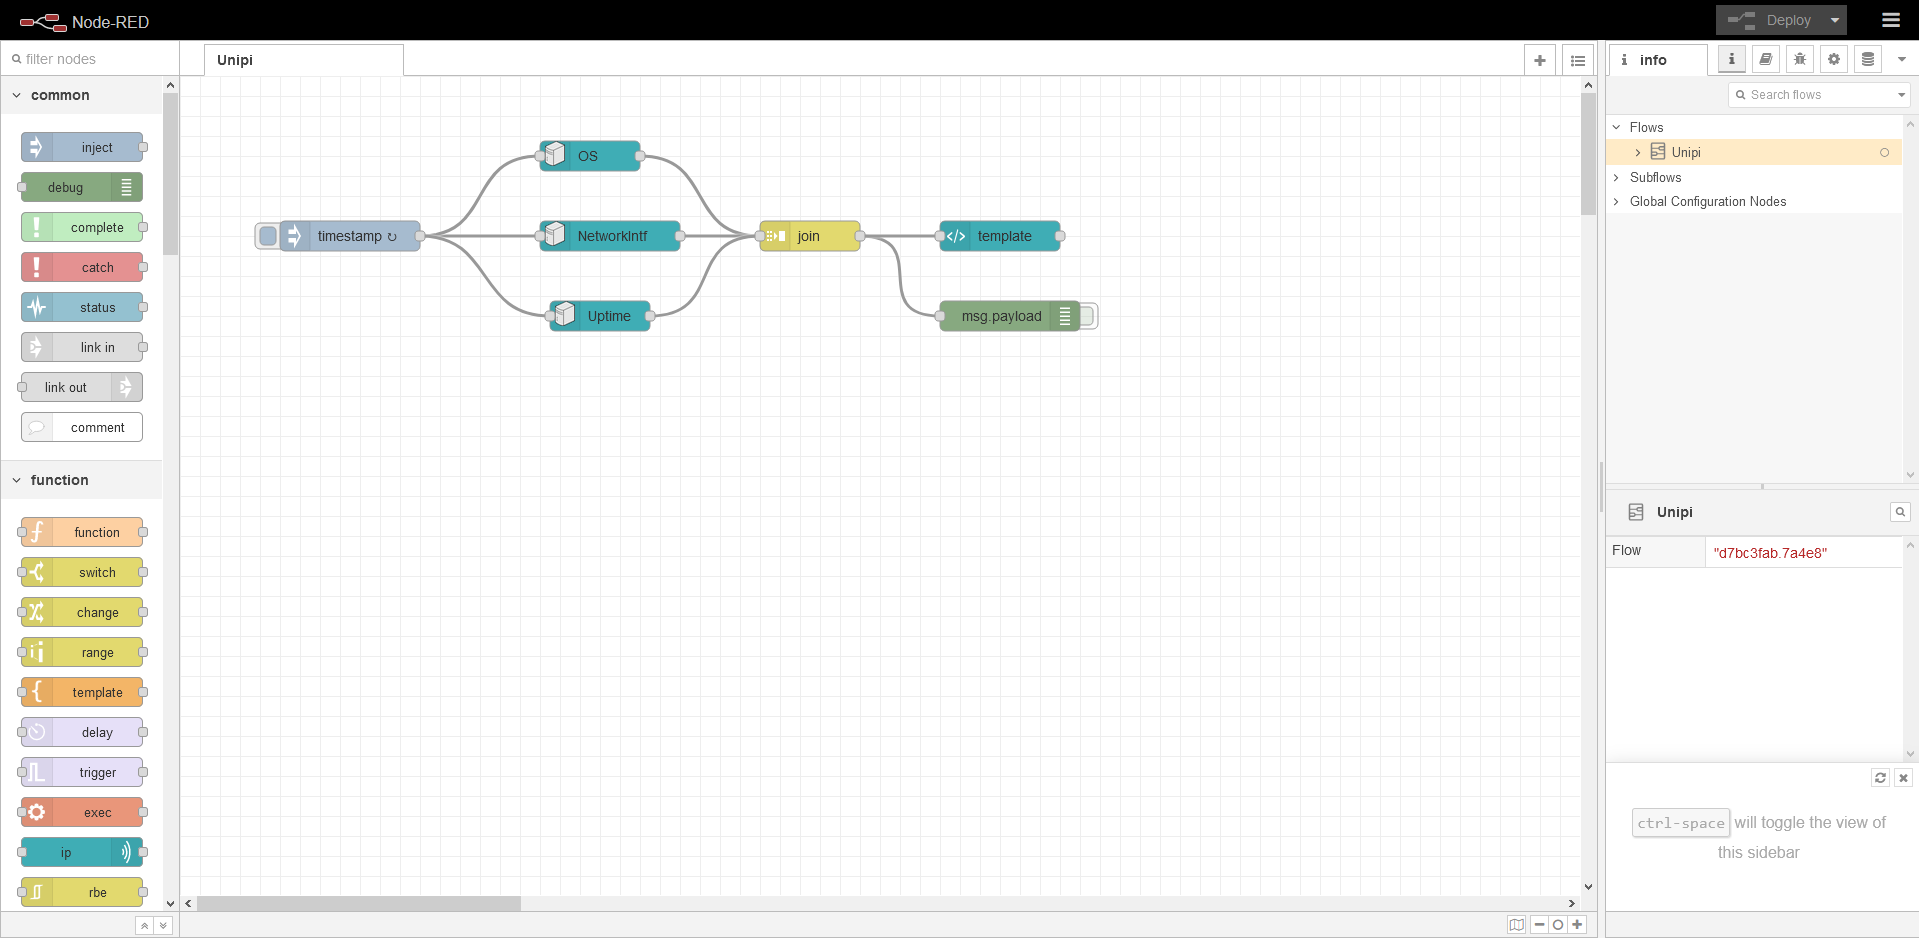
As seen in the picture, the programming interface already contains a demonstration project. This project serves only to create a user interface and is included in each Node-RED OS images provided for Unipi Gate.
Securing the OS (SSH)
Securing the operating system is always needed to prevent unauthorized access to the Unipi controllers. Using a non-secured OS may lead to unauthorized tampering that can stop or limit the system's operation. In the worst-case scenario, it may also cause damage to the connected technologies or endanger personnel on the installation site.
For these reasons, it is important to properly secure the system each time a new project is created. Alternatively, you can disable the SSH access completely.
As the connection is provided by the SSH protocol, it is necessary to know the IP address or the mDNS address of the device and have an SSH client installed on your PC or tablet. Among the most frequently used clients for Windows OS is the PuTTY application - user guide and default passwords are available here.
As a next step, enter the following command:
sudo passwd
A prompt to enter and confirm a new password will be displayed. If everything is set correctly, the following message will appear:
passwd: password updated successfully
The entire process is depicted below (the password is not visible during its entering):
unipi@S103-sn999:~$ sudo passwd
New password:
Retype new password:
passwd: password updated successfully
Was the password change unsuccessful?
If the password change fails, the following message will appear:
passwd: Authentication token manipulation error
passwd: password unchanged
To solve this issue, try to enter the command below and then repeat the password change process.
sudo mount -rw -o remount /
If the password cannot be changed even after entering the command, please contact our technical support.
Security in Node-RED
Securing access to the programming and user interface in Node-RED is as important as securing the OS. If the SW is not secured, unauthorized personnel may gain access to the Unipi controller - this can lead to the same consequences as using an OS that was not secured according to the description mentioned above.
It is thus crucial to have the Node-RED SW properly secured each time a new project is created.
As the connection to the device is provided by the SSH protocol, it is necessary to know an IP address or mDNS address of the device and to have SSH client installed on the user's PC or tablet. One of the most widely used clients for Windows OS is the PuTTY application - here, you can find a user guide and the default passwords.
Further steps are available in this guide on the Node-RED official webpage.
Node-RED guides
Bear in mind the Node-RED is just an alternative to Mervis - the officially supported software solution. The following guides were created just to complement this article and expect at least elementary knowledge of IT and programming - that said, readers should know basics of Linux shell command line and should be acquainted with flash memory, SSH and Modbus.
As the Node-RED is distributed as an open-source platform, many other guides describing its usage are available on the internet. After reading through the above-mentioned guides we recommend to continue with the Node-RED official homepage.