This is an old revision of the document!
Node-RED pro Unipi Axon
Tento manuál Vás provede celým procesem instalace Node-RED na Vaši jednotku Axon. Před začátkem instalace se prosím přesvědčte, že kontrolér během přepravy neutrpěl žádné poškození či jiné viditelné defekty.
Axon
Pro spuštění SW Node-RED je nezbytné přeflashovat stávající OS v PLC novým. Tento konkrétní OS s předinstalovaným SW Node-RED naleznete v sekci Obrazy OS v kapitole Axon Node-RED OS. Stáhněte jej a rozbalte do nové složky ve Vašem PC.
Flashing OS using the service web interface
Flashing OS via the service interface on Axon units can be performed in three ways:
1) In a local network (with DHCP):
- Connect the unit to your local network, plug in the power supply and wait at least for a minute before the unit boots and gets an IP address from DHCP. After that unplug the power supply
- Press and hold the Service button located (with exceptions) in the upper row of the connector labels to the left from USB port labels
- Plug in the power supply. After few moments the unit will switch to the service mode indicated by the slow flashing of all diodes in section 1 (except PWR and RUN)
- Now you can release the Service button.
- You now need to get the unit's IP address. You can obtain it either from the DHCP server or using a suitable application such as Advanced IP Scanner → user manual
2) Direct connection to the unit (without DHCP):
- Connect to the unit using a network cable (RJ45)
- Press and hold the Service button located (with exceptions) in the upper row of the connector labels to the left from USB port labels
- Plug in the power supply. After few moments the unit will switch to the service mode indicated by the slow flashing of all diodes in section 1 (except PWR and RUN)
- Now you can release the Service button.
- Set the PC's IP address to
192.168.200.100, mask255.255.255.0 - The Axon's IP is now set to
192.168.200.200
3) Via a Wi-Fi hotspot
- Press and hold the Service button located (with exceptions) in the upper row of the connector labels to the left from USB port labels
- Plug in the power supply. After few moments the unit will switch to the service mode indicated by the slow flashing of all diodes in section 1 (except PWR and RUN)
- Now you can release the Service button.
- Connect to Wi-Fi network with SSID:
UNIPICONFIG, usingunipi.technologyas password. Wait until your unit obtains an IP address from the DHCP server running in the unit - The Axon's IP is now set to
192.168.201.1
Next steps:
- Enter the unit's IP address into your web browser. After confirmation, the Axon service interface will display
- Drag the archive.swu file from the OS image archive and drop it into the Software dialogue window
- Wait until the unit finishes the entire process. You can monitor its progress in the Messages dialogue window
- The unit will automatically reboot
Flashing the OS using USB flash disk
- Prepare a USB flash disk with a capacity of at least 2 GB and a FAT32 partition
- Copy the whole content of the ZIP archive to the flash disk
- Insert the flash disk into the unit's USB2 port
- Press and hold the reset button located next to the upper row of connector labels
- The unit will automatically start the reflashing process, indicated by progressive blinking of LEDs. You can now release the reset button
- Once the LEDs stop blinking the reflash is completed. After that, the Axon will automatically reboot to its normal state
Only the USB2 port can be used for reflashing.
In case the used flash disk is not compatible, Axon will boot to the Service mode and the progressive blinking of LEDs is not indicated. In this case it necessary to use different flash disk or the above mentioned Service web interface.
Předinstalovaný SW
Na obrazu disku, který jste právě nahráli do jednotky již máte předinstalován náš Open-Source software EVOK. Jedná se o aplikační programovací rozhraní (API), které slouží pro komunikaci aplikací s hardwarem jednotky Unipi.
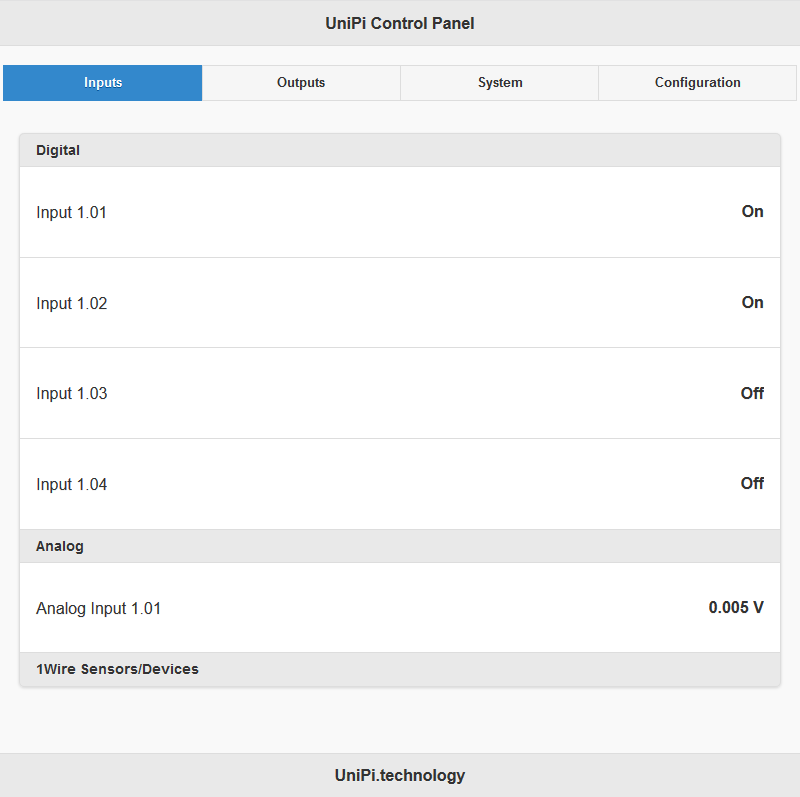
K dispozici máte i praktickou ukázku využití API v podobě jednoduché webové aplikace (Unipi Control Panel) sloužící jako uživatelské rozhraní pro všechny vstupy a výstupy jednotky. Pro připojení k tomuto rozhraní zadejte do webového prohlížeče IP adresu vaší jednotky s portem :80, ale nemusíte jej zadávat, jelikož se jedná o výchozí port pro webový server.
Například:
192.168.1.10
nebo
192.168.1.10:80
Tato webová aplikace vypadá následovně:
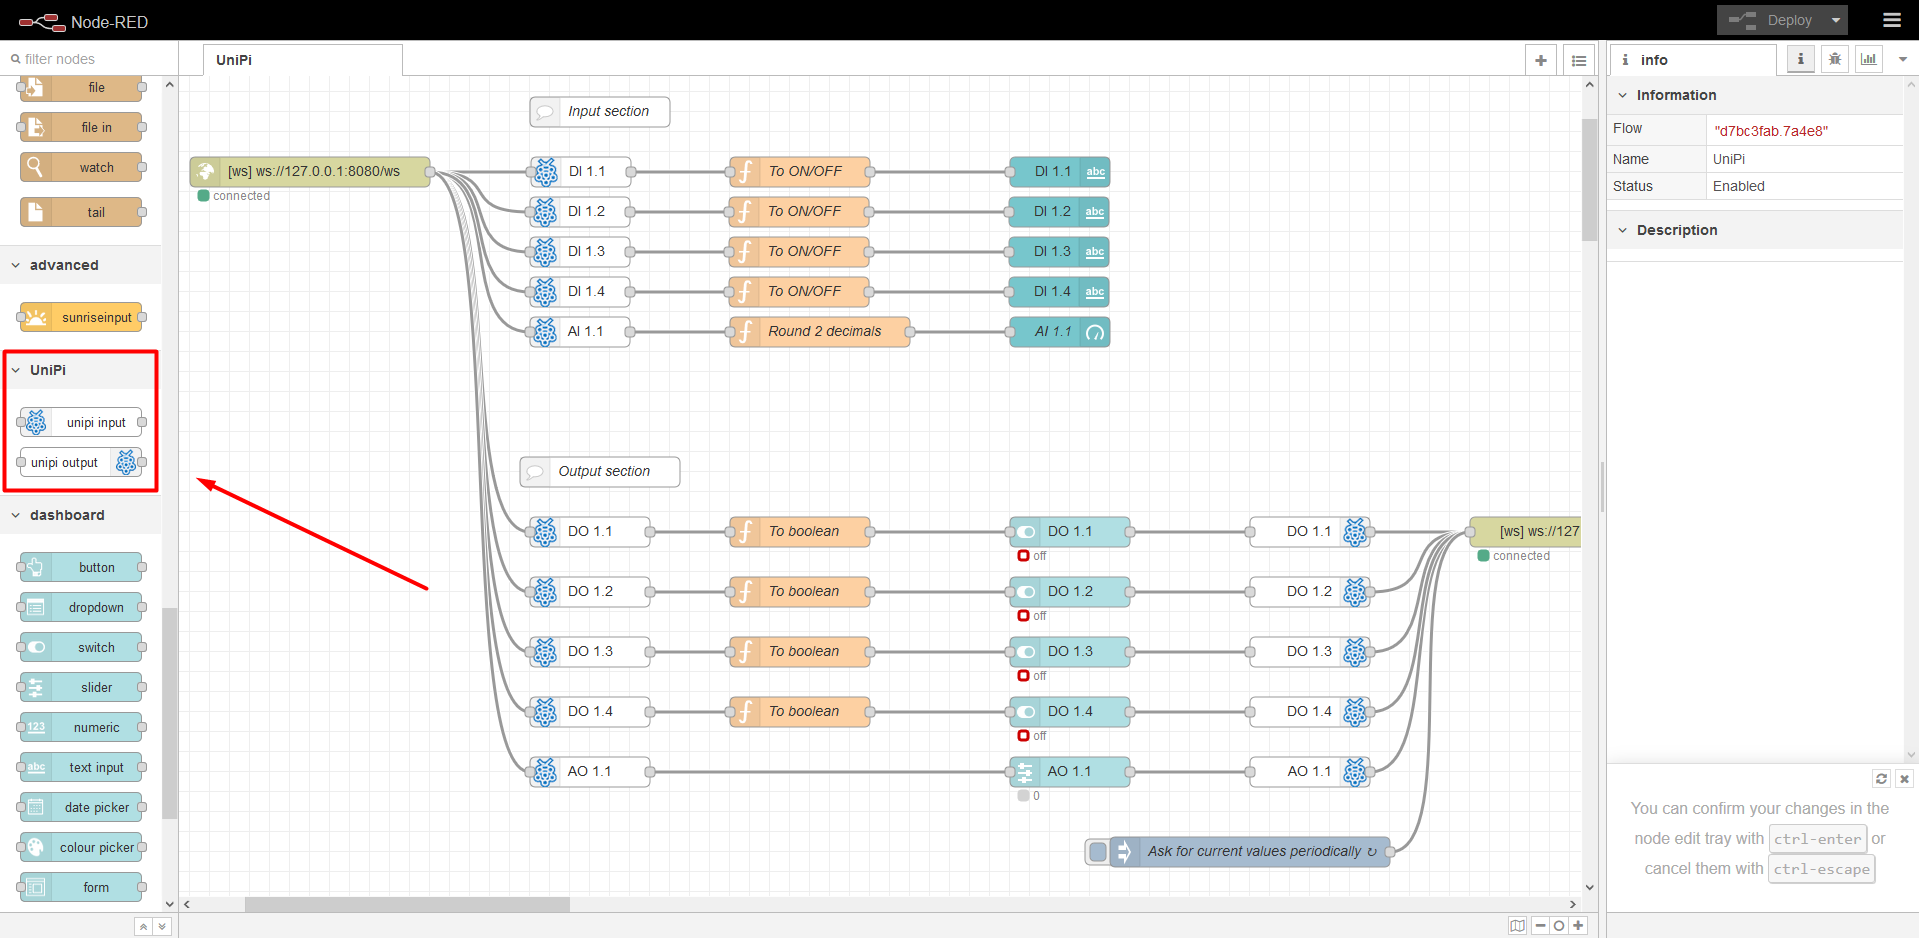
Dalším softwarem instalovaným na obrazu disku, nyní i ve vaší jednotce, je Node-RED. Jedná se o programovací nástroj k propojení hardwarových zařízení, různých API, či online služeb. V tomto případě již máte do SW Node-RED integrováno API EVOK. Toto API je v programovacím rozhraní reprezentováno dvěma uzly v levém panelu v odstavci Unipi. Konkrétně se jedná o uzly unipi input a unipi output, které slouží jak pro analogové, tak i digitální vstupy a výstupy.
Připojení k rozhraní Node-RED
Pro vstup do programovacího rozhraní Node-RED otevřete webový prohlížeč a do adresního řádku vložte IP adresu jednotky s portem :1880.
Například:
192.168.1.10:1880
Zobrazí se vám následující rozhraní:
Jistě jste si všimli, že programovací rozhraní již obsahuje projekt. Tento demonstrační projekt slouží pro čtení vstupů, zápis na výstupy a to vše propojené s uživatelským webovým rozhraním → tzv. Dashboard. Tento demonstrační projekt (flow) je k dispozici ke stažení na konci článku.
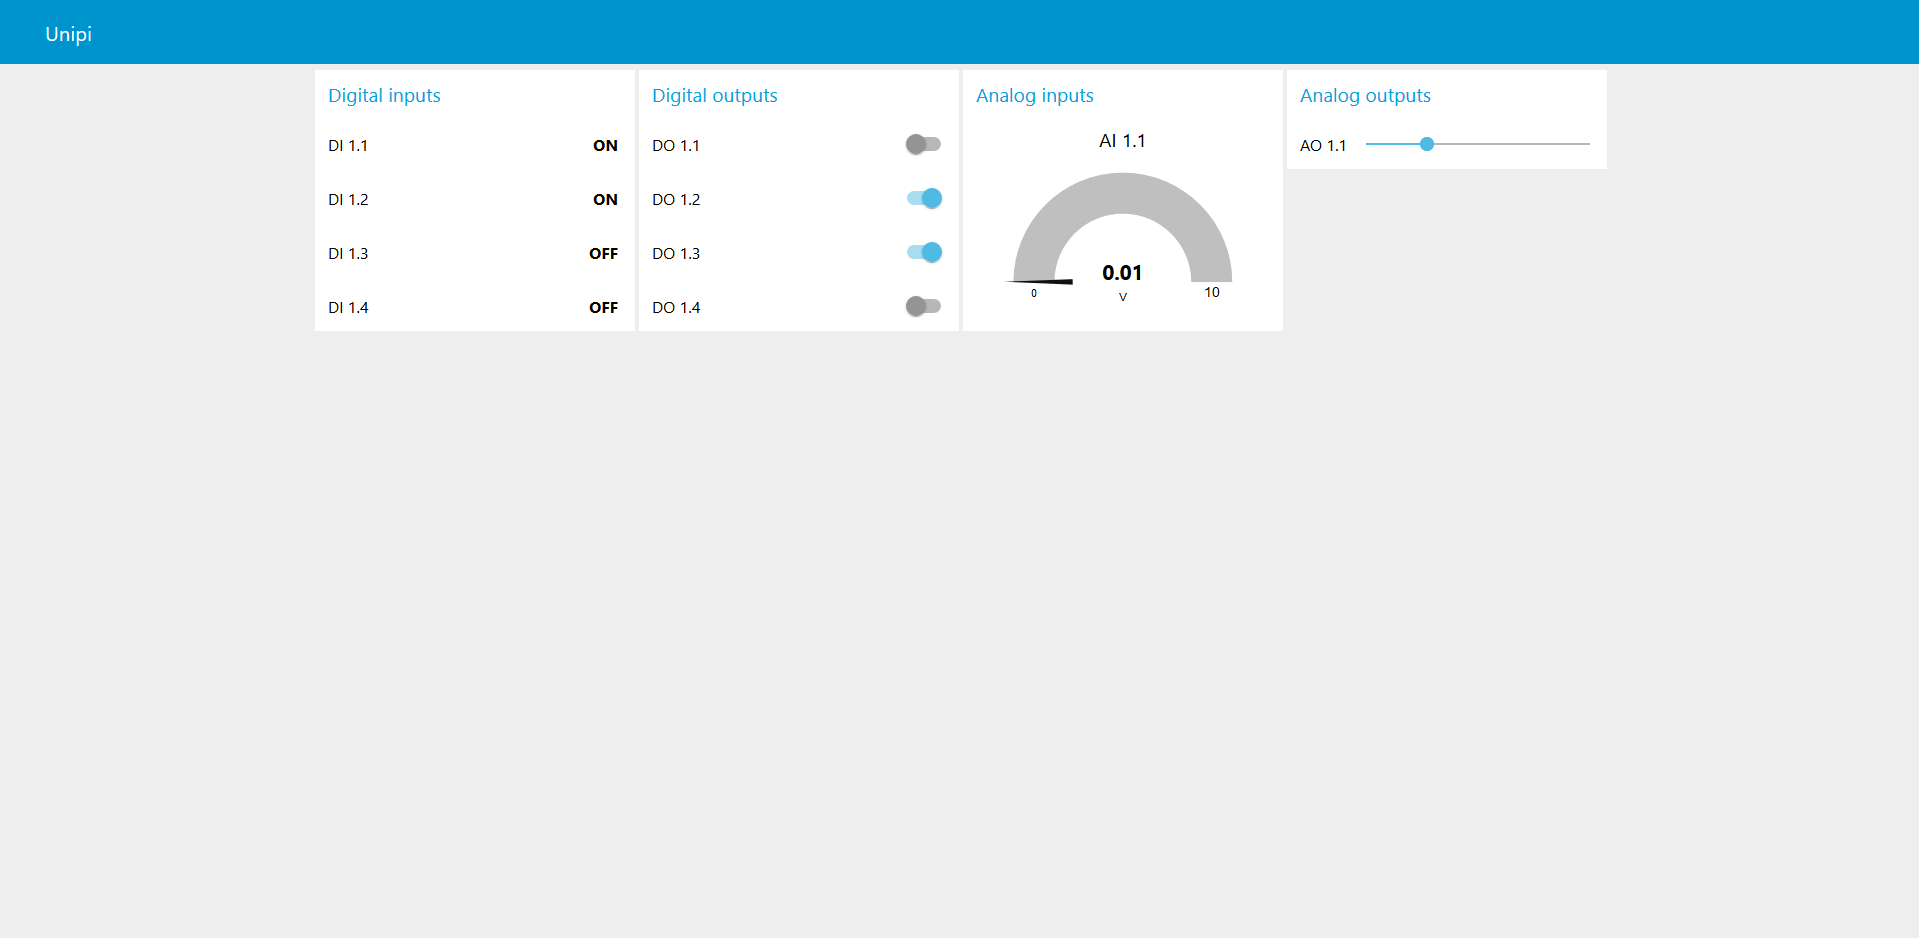
Pro vstup do rozhraní přidejte za adresu s portem ještě příponu /ui.
Například:
192.168.1.10:1880/ui
Nyní se vám zobrazí následující uživatelské rozhraní:
Vše potřebné máte již nainstalováno a můžete začít vytvářet své vlastní projekty.
Projekty ke stažení
Projekty v SW Node-RED se nazývají flow. Zde si můžete stáhnout soubor s touto flow pro jednotky Unipi Patron / Neuron / Axon.
build-scripts_061-install-default-project-neuron.neuron_node-red_default_flow.zip