Preparation and access to the unit
Before the first startup, it is necessary to insert an SD card with a flashed OS into the unit.
Instructions for flashing the OS can be found on this link.
After startup, the unit processes the uploaded program and the Mervis HMI website and other Mervis services communicating with the unit are also available. The device will startup fully a few seconds after the power supply is plugged in, it may take even longer for the first startup. The mode is physically indicated by PWR LED continuous emitting and RUN LED emitting with short flashes (demonstration here / startup simulator here).
First connection of the unit
Unipi Neuron unit size S must be powered by 24 V⎓ power supply; 0.63 A, sizes M and L must be powered by 24 V⎓ power supply; 1,5 A. To access the introductory HMI web page, it is necessary to connect to the unit from a computer or tablet, with any modern web browser.
For the programming option, it is necessary to connect to the unit from a computer with the MS Windows 10 operating system or higher with the Mervis IDE installed. The installation procedure is described below.
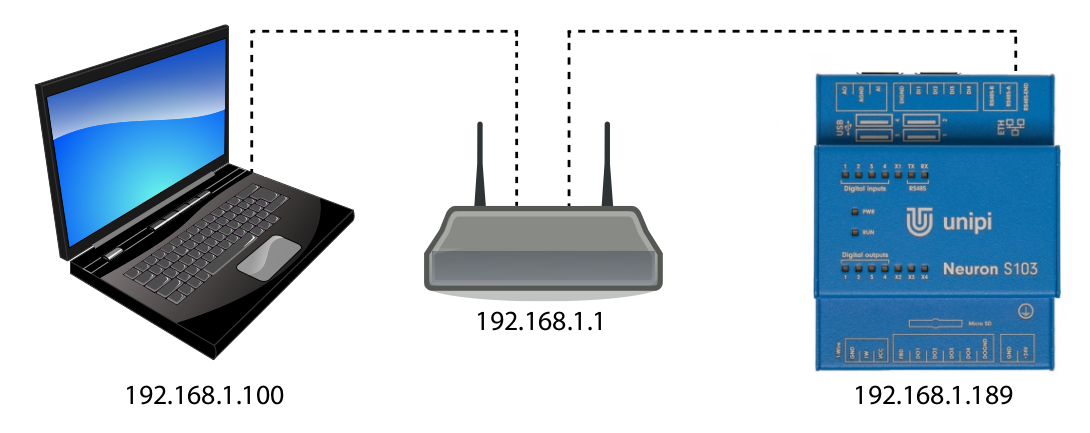
Connection via local network with DHCP server
Despite its somewhat complex name, this approach is a simple and most commonly used variant. All you have to do is connect the unit to a computer network using an Ethernet cable and connect a computer or tablet (either via an Ethernet cable or Wi-Fi) to the same network. Your DHCP server (router or Wi-Fi router) on this network will automatically assign an IP address to both of them from the available range.
The IP address of the unit can be found either from a DHCP server or by a suitable program to scan the network (such as Advanced IP Scanner). In most cases, however, an mDNS address variant will suffice.
The IP addresses used are only examples.
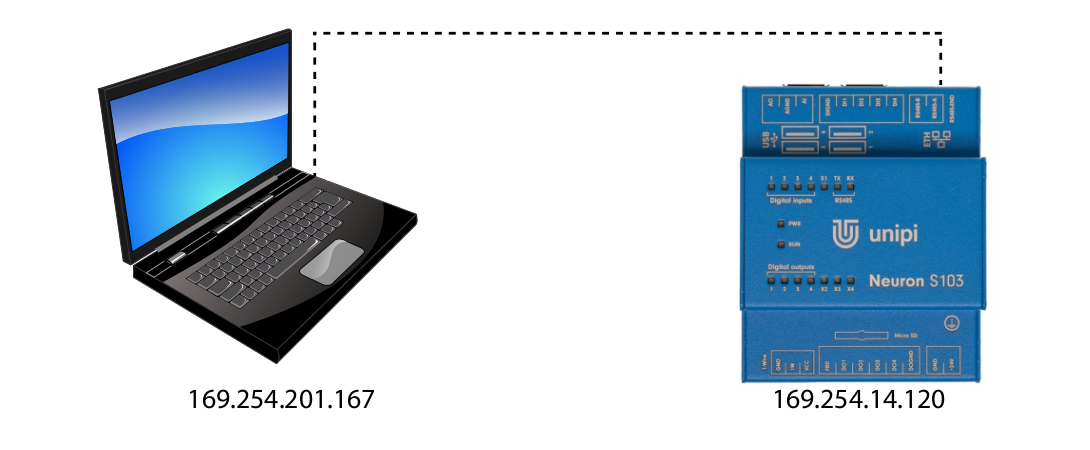
Direct connection
A direct connection requires the physical connection of the computer and unit with an Ethernet cable. Because this solution does not include a DHCP server, both the computer and the unit automatically assign itself a random IP address from the range 169.254.XXX.XXX.
You can find the IP address of the unit with a suitable program for scanning the network (such as Advanced IP Scanner). In most cases, however, an mDNS address variant will suffice.
The IP addresses used are only examples.