First steps

Neuron

The Unipi Neuron unit does not contain internal storage, so it is necessary to purchase a memory card for each unit. For more detailed information and recommendations on which card to choose, see the SD card article.


Available OS images for Unipi Neuron units are based on the Linux Debian system and may also contain pre-installed software (SW), such as Mervis.

(i)

Note:
This article assumes the choice of Base OS.

To use Mervis system the Mervis OS must be flashed onto the SD card. After connecting the power supply continue with First project with a Unipi unit.

Each Unipi Neuron unit is shipped with a request for a Mervis RT license.


(🕮)

Attention:
Always follow the Safety instructions when handling the device.

(i)

Note:
If it is not clear what state the device is in, all possible states are described in the category LED indication including a graphic example.

The OS image can be written to an SD card using the open-source BalenaEtcher tool (for Windows OS) and then run on Unipi Neuron.

You can download BalenaEtcher from official web pages.

(i)

Note:
Operating system images are available in the OS Images section.

More information about available software and OS images.

(!)

Attention:
Extreme caution is essential when choosing a disc. Selecting the wrong storage medium could result in data loss on a storage other than the desired one.

(i)

Note:
For trouble-free Mervis OS usage on Unipi Neuron, you will need storage with capacity of 2 GB. If you choose a different platform, we recommend using a storage with at least 4 GB capacity We always recommend using industrial pSLC SD cards.

Flashing OS image from a file

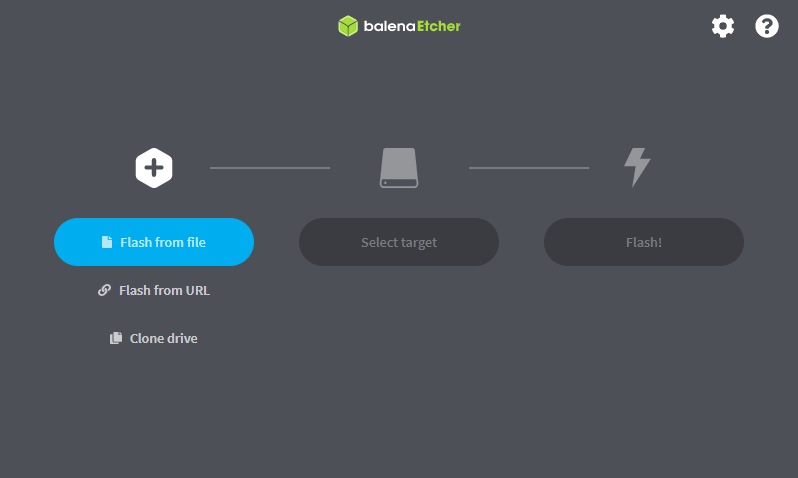
When running BalenaEtcher, there are three options in the main menu, selecting the first Flash from file will bring up a file explorer to select a disk image. This disk image can either be directly in *.img or *.raw format, or it can be packaged in a ZIP archive.

BalenaEtcher dialog window - insert image

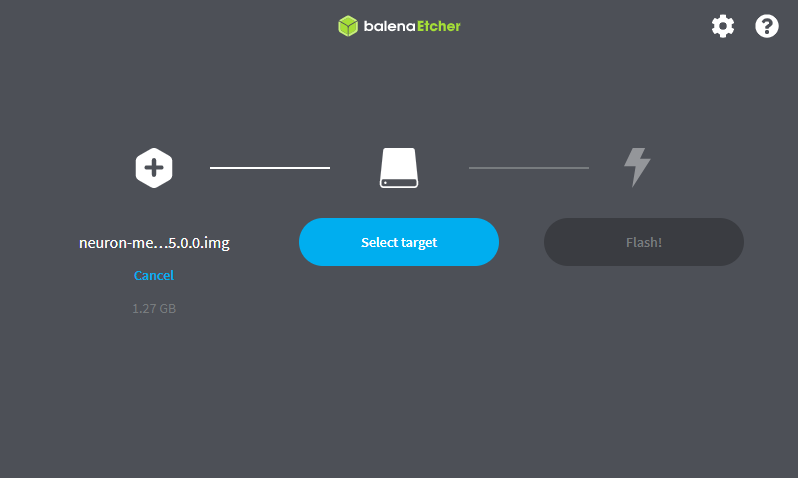
After successful selection of the OS image, the next option Select target is possible to select a suitable storage. When selecting, please note the caution in the introduction of the article.

BalenaEtcher dialog window - select target

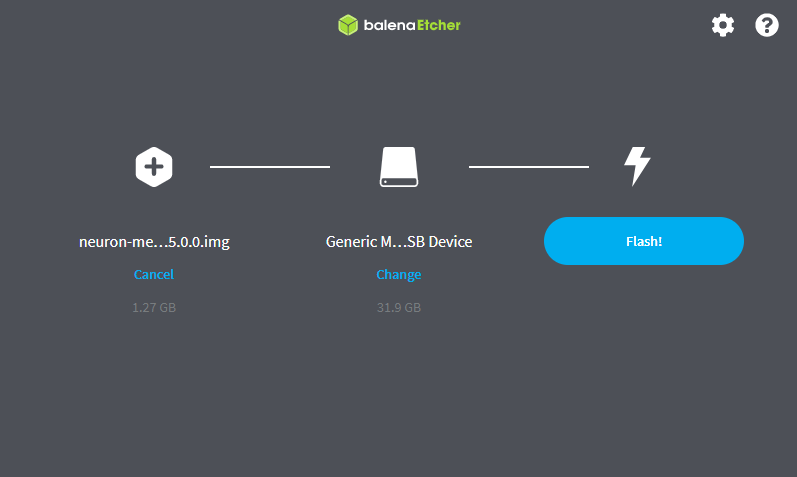
Flashing the OS image to storage will start after clicking on Flash!

BalenaEtcher dialog window - flash

Before running the OS on a Unipi device

(i)

Note:

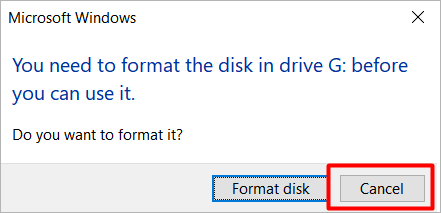
After finishing the flash, or after the storage drive is reinserted into the PC, Windows OS may detect it as a new storage device that it cannot recognize and may request formatting. Close the formatting prompt by clicking on Cancel.

Inserting password for SSH

It is necessary for the first login to insert user password onto the SD card. For further information see Passwords.

Here are the instructions for setting the user password:

  1. Open the SD card in file explorer
    1. Create a new file named PWD_HASH_USER in the root directory of the boot FAT32 partition. It is important the file has no file extension, do not add .txt at the end. Open the newly created file in a text editor and paste the generated hash
    2. Download and save the file with hash to the root directory into the boot FAT32 partition of the SD card
  2. Eject the SD card and insert it into the device
  3. After the device starts, the new password will be set. It will now be possible to log in over SSH with the password entered in step 1.

(!)

Note:
This process can only be done once, if the device is in factory settings (newly flashed SD card). If the user password was previously set on the SD card this process will not work.

Hash generator


*
*
*

(!)

Note:
If you are offline, this tool can also be found in the FAT32 partition of the Neuron and Unipi 1.1 image.

(i)

Note for Debian 12 and older:
If the OS image has been successfully flashed, the storage will be identified with the name boot when re-inserted into the PC.

If the Mervis OS has been flashed on the storage, there is one last step possible: enabling SSH. The easiest way to do this is to create a file called ssh.txt, or just ssh without the suffix, in the main boot directory of the storage. Alternatively, SSH can be activated directly in the Mervis IDE by changing the RunTime configuration, see section Uploading a RunTime configuration (RT) - unipi specific. For non-Mervis OS, the SSH connection is enabled by default and does not need to be enabled in this way.

After SSH is enabled, you can connect with, for example, Putty.

Running the OS on a Unipi device

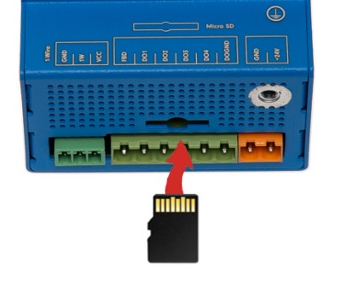
At this moment, the OS is ready on a storage (with SSH enabled). After removing it from the computer, the storage can be inserted into the Unipi device.

(!)

Attention:
Disk storage can ONLY be inserted when the device power supply is unplugged!

(i)

Note:
Insert the SD card back side up into the slot (i.e. the gold connectors towards the technician). Plug the power supply in.

(!)

Attention:
Booting the device with the newly flashed OS will take a little longer - about 3 minutes. This is due to the necessary configuration of the OS.

/!\

Warning:
Prior to mounting, make sure that the environment is disconnected from all power sources.

If the holder for DIN rail is not installed, it must be mounted first with the supplied screws (M3x5, DIN 965, PH 1) so that the spring is towards the top of the device.

DIN holder installation

To install unit on the DIN rail, slide the unit onto the rail from above (in the direction of arrow 1 in the picture below), against the spring resistance downwards and then clicking the lower part (in the direction of arrow 2 in the picture below).

Mounting on DIN rail

(!)

Attention:
Avoid pressure on the terminals as they could be mechanically damaged.

/!\

Caution:
Make sure that the upper edge of the DIN rail runs between the spring and the rear of the DIN holder (see figure above). Improper mounting of the DIN bracket can cause injury when mounted on the DIN rail.

Before the first startup, it is necessary to insert an SD card with a flashed OS into the unit.
Instructions for flashing the OS can be found on this link.

Connecting peripherals, sensors, control elements and communication cables

Before connecting the power supply it is necessary to connect all other terminals and interfaces. The purpose of each terminal contact is described on the top side of the unit case.


For now, only connecting an ethernet cable to the eth0 interface is needed.
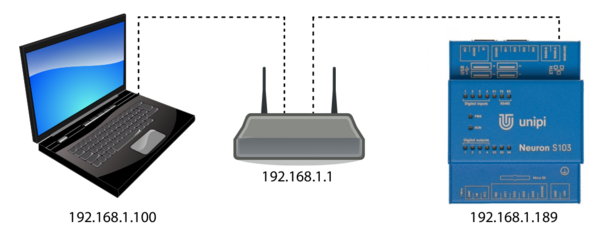
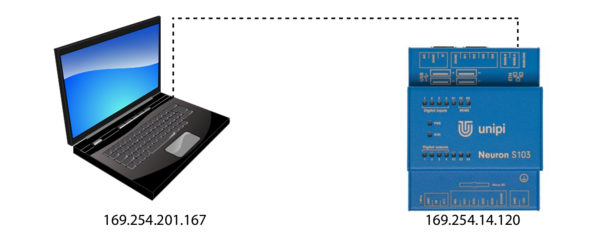
Unipi Neuron can be connected as follows:

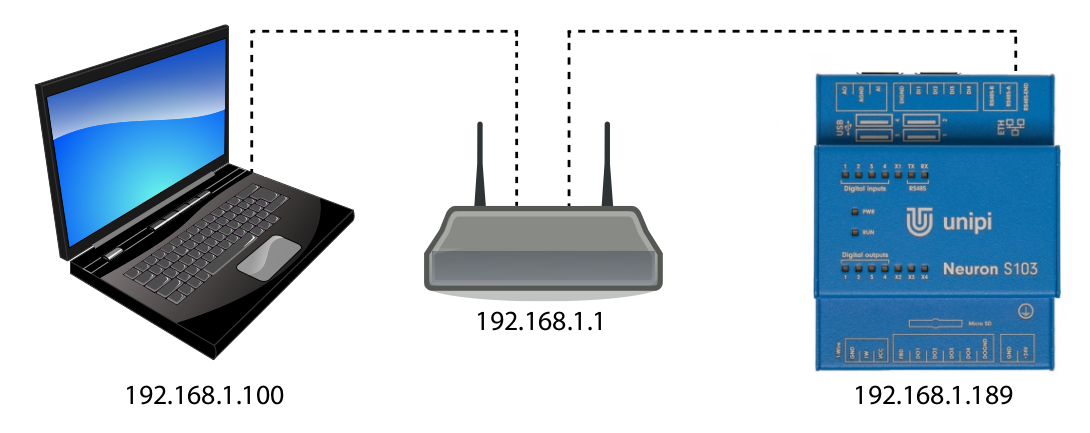
  1. To the network with DHCP server Connecting to a network with DHCP server
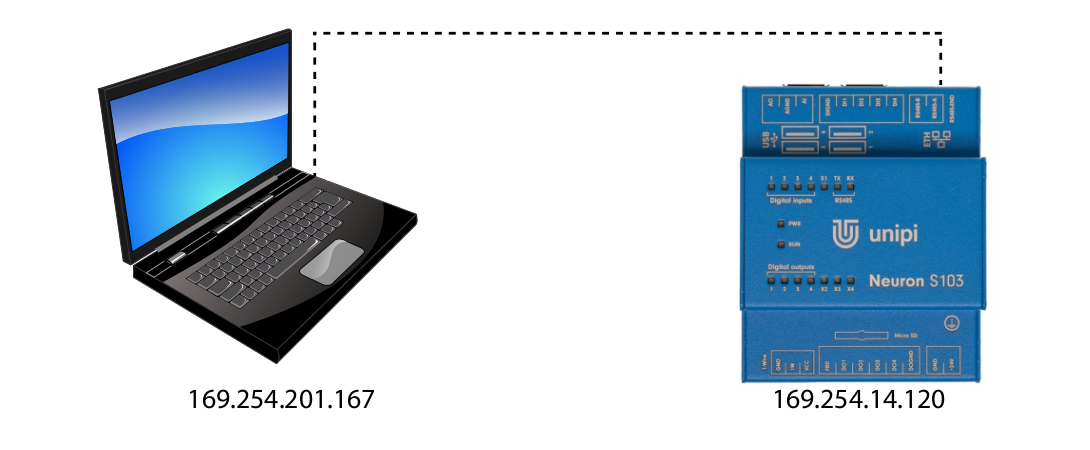
  2. Directly to the PC/Notebook Connecting directly to PC/Laptop

Connecting the power supply

/↯\

Warning:
Take extra care when plugging in, there is a risk of electric shock! Always ensure and check that the environment and device are disconnected from all voltage sources before starting work.

/!\

Attention:
Make sure to connect the power supply last. Connection and disconnection of other interfaces should be done with power supply disconnected; otherwise, the device can be damaged.

To ensure correct operation, first connect the 24 V power supply wires to the contacts as described on the device: +24 V to the positive contact and GND to the negative contact of the detachable screw terminal block. Use the appropriate flathead screwdriver to install the power wires into the terminals. Do not exceed the maximum tightening torque specified in technical parameters. For information on recommended supply voltage tolerance and power consumption, refer to operating conditions and the product label.

Power supply connection

(i)

Tip:
Unipi Neuron unit size S must be powered by 24 V⎓ power supply; 0.63 A, sizes M and L must be powered by 24 V⎓ power supply; 1.5 A.

/↯\

Warning:
The device has appliance class I. To protect against electric shock and to comply with electromagnetic compatibility (EMC), it is necessary to connect a ground conductor to the ground connector of the device marked on the case with symbol (⏚). For ground conductor connection use ring tongue and provided M4 screw with serrated lock washer.

The DIN rail on which the device is installed must be connected to the main protective earth point of the cabinet/box as well.

The device will startup fully a few seconds after the power supply is plugged in, it may take even longer for the first startup. The mode is physically indicated by PWR LED continuous emitting and RUN LED emitting with short flashes (demonstration here / startup simulator here).

Device address

Unipi Neuron can be addressed with mDNS record. mDNS adress format is as follows:

  • [model]-sn[serial number].local

Example:

S103-sn1262901235.local

Model and serial number can be found on the product label.

(i)

Note:
Alternatively the Unipi Neuron can be addressed via its IP address. The IP address can usually be found on the DHCP server or by using a network scanner (such as Advanced IP Scanner).

When the Unipi Neuron is connected to a network without DHCP server (for example directly to a PC or laptop), the Unipi Neuron assigns itself a random IP address from the range 169.254.XXX.XXX.

Connecting via SSH

The unit is now ready to house the implementation of any project done in Base OS. To install additional SW and to create control logic, it is necessary to connect via SSH using the address from previous step.

Username for the SSH connection is unipi. The user password is the one that was inserted on the SD before. For further information see Passwords.

This website uses cookies. By using the website, you agree with storing cookies on your computer. Also you acknowledge that you have read and understand our Privacy Policy. If you do not agree leave the website.More information about cookies